understanding one-size diapers
If you’re anything like me, you got your first pocket diaper in the mail and the first thing you noticed was 500 snaps along the front. And maybe it was because I was pregnant, but that alone overwhelmed me and made me want to give up right there!
But really, one-size diapers aren’t complicated once you understand how the snaps work. And I love being able to use the same diapers, and not having to buy more as she grew. She has been wearing the same diapers from the time I started cloth (8 weeks old) to now – at 19 months old. I’m hoping the pictures below will help you understand how one-size diapers work a bit better.
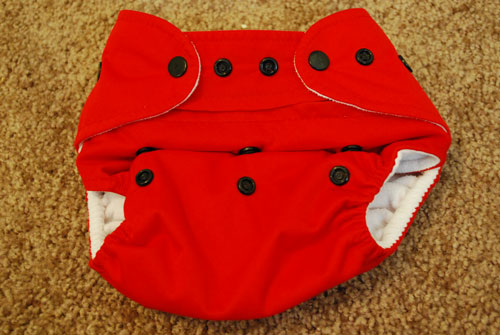
When you spread out your diaper, it probably looks similar to this. Your diaper might vary slightly depending on the brand (these are Baby Kangas – I chose the red one with black snaps so you could see it easier!), but the overall idea should be the same.
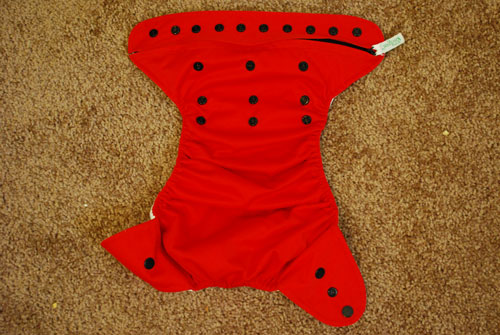
What do all the snaps mean??? Well hopefully this will help:
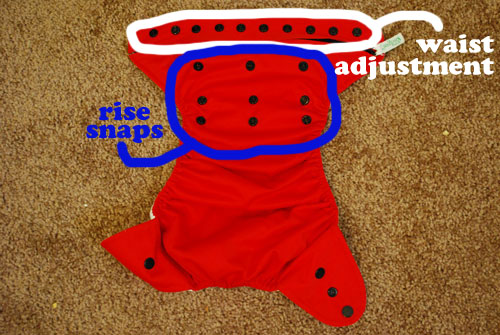
The snaps that run horizontally along the top of the diaper are for waist adjustment. You’ll bring the tabs over the front and attach them here to secure the diaper snugly around your baby’s waist. There are so many snaps to allow for the baby to grow. (Some diapers, like bumGenius and Flips, have two horizontal rows here, so don’t get confused!) The other set of snaps are to adjust the rise. This makes the diaper bigger or smaller depending on the age/size of your baby. The top row should be one side of the snap, and the next two rows should be the other side – the part that is snapped INTO. (This might not be true on all diapers, but it’s been that way on all the one-size diapers that I have.)
Here is a picture of the diaper snapped down to the smallest rise, which is the setting you’ll want if your baby is still very small.

And here is the diaper snapped down to the middle rise. I can’t remember when Savannah moved into this middle setting, but of course every baby will be different. (If your baby is skinny or just small, chunky or just big.)
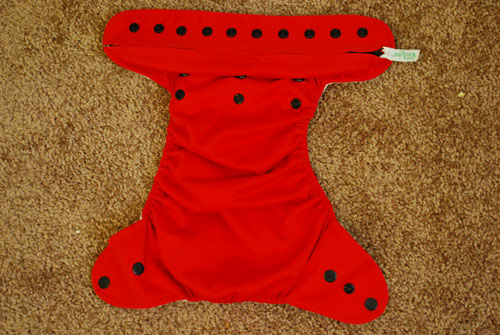
Of course, the largest rise setting is not snapping down anything at all.
As for adjusting the snaps around the waist, let’s say this is what your diaper looks like:
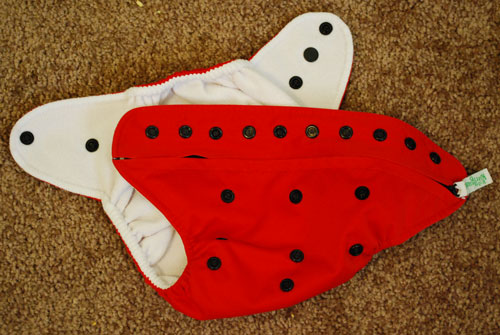
Once the diaper is on the baby, you’ll pull the tabs around and snap into a snug yet breathable, fit (just like you would with a disposable and the sticky tabs).
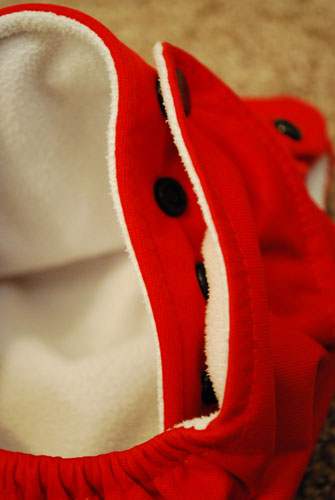
It might take a few tries to get the fit you want. If the diaper has two sets of snaps, you’ll snap both of them to give a more secure fit. I tried to take a picture of both of the snaps snapped here:
Some diapers have the option for an even tighter fit for little babies. One side of the diaper has some inverted snaps. These are so you can overlap the tabs. First you’ll snap the side with the extra snaps:
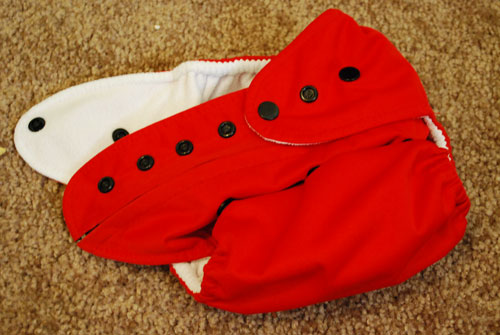
Then you’ll take the other side and overlap it. Here’s a picture of it fully snapped. See how small it can get for those little itty bitty babies?

I hope that makes sense! Please leave a comment if you have any questions, and I hope you enjoy your one-size diapers for many years!
One thought on “understanding one-size diapers”
Nice post! I bet this shows up in Google. :)
Comments are closed.