From Pie Pumpkin to Pumpkin Pie
Editor’s note: This guest post is brought to you by Paul who has been delighting friends and family with pumpkin pies for the past 3 years.
Just looking for the pumpkin pie recipe? You can find it here.
One of my favorite times of the year is fall. There is just something about the change in the air that is refreshing and beautiful. From the changing of the leaves to all the holiday traditions that bring people together. One such tradition for our family is making pumpkin pie from scratch. This started several years ago when I created my first pie; ever since pumpkin pie has embodied the beginning of fall for me. Today I will share the process for anyone interested in trying their hand at it.
The Pumpkin
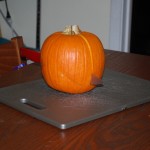
It begins with finding the perfect pumpkin. This can be a fun outing especially if you live near a pumpkin patch that sells pie pumpkins. Although, it is possible to make pumpkin pies from regular pumpkins the down side is that you need to add more sugar to the recipe and generally regular pumpkins are a bit more stringier then pie pumpkins. Even if you don’t live near a pumpkin patch most grocery stores will sell pie pumpkins in October. This is usually how I procure my pie pumpkins. When choosing a pumpkin I like finding one that is somewhere around 2 1/2 to 3 pounds and has a medium dull orange color. Feel the pumpkin, you will want the pumpkin to be firm all around with little to none blemishes. I also find that the denser the pumpkin is the more you will get out of it. Generally, I count on one pumpkin making one pie with a little left over. With the larger pie pumpkins two pies can easily be made.
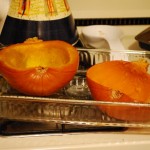
Next you will need to prepare your pumpkin. Turn on your oven to 375° F to warm it up while you prep the pumpkin. Remove the stem either by hand or with a knife. Next you will want to cut the pumpkin in half either the long way or through the middle. I like cutting it the long way because the lines on the pumpkin help guide my slicing. Once in half, take a big metal spoon and cull out the seeds and stringy mess. If you intend to make pumpkin seeds as well then save what you cull out in a bowl of water. Put the two halves in a 9×13 glass baking dish. The pumpkin halves should be facing down so that the water drains on the glass instead of in the pumpkin. Cover with foil and bake in the oven for 1 hour.
Bonus: Remember the pumpkin seeds and stringy mess in the water. Now remove the seeds from the mess by squeezing it in your hands. As the seeds are separated they will float to the top making it easy to skim off. Let the pumpkin seeds dry over night and then mix seasoning, olive oil and the seeds in a plastic bag tossing to coat. Place on a baking sheet in the oven at 250° F for 1 hour.
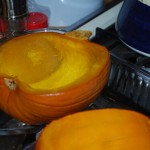
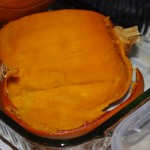
Now back to the pumpkin. After an hour take the pumpkin out and remove the foil. Set the foil aside as we will use it later. Sometimes the skin of the pumpkin will just fall right off when first removed from the oven leaving just the pumpkin. If that does not happen then let it cool a little and remove the soft pumpkin from the skin with your trusty spoon. It still might be a little string so I like taking the pumpkin mush and run it through with a food processor for about 30 seconds to a 1 minute. This will make it nice and smooth. However, if it is not stringy at all you can also mush it by hand with the spoon. Now we are ready to make the pie!
The Pie
For the pie you will want to have the following ingredients:
- 1 1/2 cup pumpkin
- 1 cup sugar
- 1/2 tsp. salt
- 1 1/2 tsp. cinnamon
- 1/2 tsp. nutmeg
- 1/2 tsp. ginger
- 1/2 tsp allspice
- 1/2 tsp cloves
- 1 can (12 oz.) evaporated milk
- 2 eggs
It is a fairly straight forward process. Preheat your oven for 450° F and mix all the ingredients together in a bowl so that it is smooth. I find that mixing your spices in with the pumpkin first makes it easier to get an even blend. Pour your mixture in your pie crust. I like getting the deep dish crusts because the regular size pie crusts will have a lot of the mix left over but not enough to make another pie.
Place the pie in the oven for 15 minutes at 450° F. Then turn down the temperature to 325° F for 45 minutes. Test the center of the pie with a toothpick, if it comes out clean—nothing clinging to it—then its done. Cool and then cover with the foil you set aside before. Chill in the refrigerator and then enjoy!
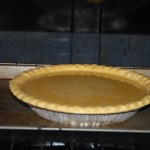
Now you can enjoy a very tasty fresh pumpkin pie. Thanks for taking the time to read this post. Please leave comments on how well this recipe worked for you. Below are some pictures of the last pie I made.






7 thoughts on “From Pie Pumpkin to Pumpkin Pie”
Looks delicious! I’ve never tried pumpkin pie from scratch scratch, I’ve heard it’s less consistent in moisture levels and texture – have you had any problems with that? One thought – would it work to mix up the rest of the ingredients in the food processor with the pumpkin and save a bowl?
I haven’t found any issues with consistency or texture especially after the pie has chilled in the refrigerator for a few hours.
Yes you are very right about saving on a bowl. I generally process a pumpkin one day and then make the pie another which is what my instructions are reflecting. And since I don’t use all of the pumpkin at once I will save the leftovers in a container for another pie.
Thanks! I wish I was there to eat your pie! It will be awhile before I make pumpkin pie again (Elijah is allergic to eggs) but I will do it this way; I made pumpkin pie from scratch once but it didn’t tell me how to use the pumpkin and it came out a horrible, stringy mess!
I will definitely do that with the seeds, too. I never heard of that trick with the water and end up pulling the seeds out with my fingers.
Nichole, if you are feeling adventurous then you could try some of the suggestions from these links for egg substitutions. I have never tried them so I can’t vouch for them but the daring kitchen is fairly informative:
http://thedaringkitchen.com/food-talk/baking-without-eggs
http://answers.yahoo.com/question/index?qid=20081220080506AAeNoXT
Pumpkin Pie is fairly close to a custard so the eggs act as a type of thickening/binding agent as the pie cools. Some of my early pies were pretty stringy too. When I learned about the trick with the seeds and water I thought the solution was very elegant of a solution.
I like this! At first, I was confused about the post because it was so not Ashley’s style. I guess I missed the editor’s note at the top.
Anyway, we made our first pumpkin pie from a fresh pumpkin over the weekend. It was a bit of work dealing with the pumpkin but I think the result was really good!
I am glad you liked the post! I’m glad your pie went well; dealing with a real pumpkin is definitely worth the effort.
Kacie: When Paul first posted it, he didn’t have the editor’s note at the top. I asked him to add it because I was afraid people would be confused. :-)
Comments are closed.