06/26/11

our new pantry!

I’ve talked before about our pantry (or rather, lack thereof). We have been using a baker’s rack as a pantry, which would have worked great if we didn’t have a toddler. I would find pantry items scattered throughout the house, and once I discovered several cans missing labels (sounds like she’s living up to her middle name!).

We looked for another pantry for a while. Our biggest problem was that the only space to put a pantry also had the HVAC vent for the kitchen, so whatever we got had to be at least 6-8 inches off the ground. We also needed something that was able to be baby proofed. Last Saturday, we finally bit the bullet and bought the one we’d found at Ikea.

We spent 6 1/2 hours that night putting it together. It was so complicated! We only stopped because it was 2am and we really needed to get to bed. We didn’t have time all last week until today, when we finally finished it. It looks great! I have most of the pantry stuff put back. I just don’t know what to do with my cookbooks; I’ll have to find somewhere else to put them. (I’m thinking the secretary in the den?)

One thing I love about this cabinet is it’s so versatile; when we redo the kitchen we’ll be able to easily find another use for it in another part of our house.

Here’s how it looked before:
Our kitchen (after)

And here is our new pantry:
New pantry

New pantry

Sorry the pictures are dark. One of the bulbs is burned out in the ceiling light. You can see this thing is almost as big as the fridge! I’m not used to seeing it yet… I keep catching it out of the corner of my eye and thinking the fridge door is open. It is good to get everything behind doors though. I think ideally I would have preferred something that wasn’t quite so deep, but really it’s perfect. (Technically, it’s made to hold a microwave. So we could move our microwave in the kitchen if we wanted and have a vent-free pantry in the dining room where the microwave currently is, though really we should just save our money for a kitchen reno.)

Anyways I’m still getting used to it, but overall it’s a good thing.

03/3/11

dining room

I never did take “after” pictures of our dining room. Since we had guests for dinner last night, I cleaned it up and this morning I decided to snap some pictures before it got messy again. :-) It hasn’t changed that much, which is another reason I never bothered with “after” pictures.

First, the “before”:
Dining room

And now for the “after” pictures, taken yesterday while Savannah was eating breakfast:

Dining room

It didn’t change all that much, so here is a list of the things we did:
* We removed the curtains (we still need to patch up the holes from there!). The curtains were dirty, but were actually really thick, so we used them as drop cloths for painting. They were excellent drop cloths!
* Removed the borderprint, and then painted all the walls a light yellow. We also painted the ceiling white.
* Refinished the hardwood floor.
* Last summer we removed the add-on sunporch from the back. That made a tremendous difference in the light! The room (and the whole main level of the house) is SO much brighter.
* Put up vertical blinds for privacy once the sunporch was gone.
* Replaced the side door that headed to the carport. This was a hollow wooden interior door that locked with a variety of little locks that any determined person could pop open. Actually, those locks were a little crooked so in order to lock them we couldn’t shut the door completely. We put in a steel door with a deadbolt.

Here’s a better picture of the side door:
Side door to carport

Other side of the dining room

Vertical blinds

This picture isn’t great, but here’s a closeup of the ugly chandelier, which we hope to replace someday:
Ugly chandelier

As I said, this room hasn’t changed that much since we bought the house.

01/1/11

goals for 2011

Well, it’s the new year, and it’s time to think about resolutions and whatnot! I’m not making resolutions, per se, but I wanted to take some time to talk a little about our house goals for this year. Not sure what we’ll actually be able to accomplish before 2012, but here is a try.

1) Fix the backyard – February/March. This is important for water drainage issues, as well as bug problems. Also, I want to put up a clothesline to dry our clothes outside this summer.

2) Save up for the foundation repairs. The quotes we got ranged from $10,000 to $18,000. We have about $5k saved right now. The cheapest price is from a company that I hesitate to trust, as it was their botched estimate that convinced us to get this house to begin with – we wouldn’t have bought had we known the full extent of the damage. The most expensive price is unfortunately the price we think would actually fix everything, and fix it right. So, we need to look over the quotes again and decide which price we want to save up for. Our decision about that will affect how long it takes to save up the money, and whether we’re able to do it in 2011 or not.

3) Fix the kitchen. My reward for saving up for the foundation is to tackle the kitchen! Even though it might not make the most sense compared to all the other problems, it does make sense to have a nice kitchen for resale value, and it also affects my daily life probably the greatest. And it’s the most exciting for me. :-) As I work hard at saving money this year, I hope to brainstorm some wonderful plans to make the best use of the space. I’ll also need to come up with a realistic budget!

In between, we hope to tackle some little things in 2011. We want to replace all the light switches and electrical outlets so that they will all match. Also, I want to replace the blinds in the bedrooms. And if I can, I’d like to get new baseboards for the main level of our house. And last but not least, we need to either clean or replace the carpet in the den because the cats have pretty much destroyed it. Not sure what exactly to do about that, but I’d love to get that room back!

Right now I’m feeling positive about everything; we’ll see how long this lasts!

09/26/10

foyer beautification

We have a little “foyer” of sorts right by the front door, created by a half wall and our couch. We currently have our bookcase there, and it has also become a catch-all for miscellaneous junk we aren’t sure what to do with. I keep telling myself I need to make places for the junk, clean up the foyer, so it is a nice “first impression” for guests.

Since our only closets are in the bedrooms, we need somewhere on the main level to put our coats. We had a coat rack, but some of the pegs had broken off and it was hard to find coats and jackets on it. So, we went to Ikea and bought some hooks to put in the wall. We haven’t started using them yet since it’s still warm out, but I am excited. Already I think it looks cleaner.

Now to get the rest of the foyer cleaned up…

New hooks in the foyer

07/11/10

kitchen pantry

Our kitchen needs a definite facelift! I naively thought, way back a year ago, that we would use our $8,000 for that project. Ha, that’s funny to think about now! I think it will be at least 5 years before we’re able to put money into aesthetic things, but that doesn’t stop me from thinking and dreaming. I will have to detail my thoughts about the kitchen in a future post.

However, there is an issue that we’re going to have to address before 5 years. And that is the lack of a pantry. Currently, this is what our pantry looks like:

Our kitchen (after)

That’s the only open space we have in our kitchen. The previous owners had a table there, but we decided to use our baker’s rack as a pantry. We keep cookbooks on the top shelf, pantry items on the middle shelves, and pots on the bottom shelf. It works pretty well, but there are two problems.

The biggest problem is that it is sitting over the only HVAC vent in our kitchen. We have one of those plastic deflector shields to try and encourage the air to go out instead of up, but I don’t know how much it helps. I like that the baker’s rack is pretty open; hopefully that helps.

The baker’s rack would be fine except for the other problem. It is impossible to baby-proof an open shelving unit like that! So far we haven’t had to worry about that, but I know that won’t always be the case, and I’m in the process of trying to figure out what to do. I don’t want to be constantly cleaning up everything Savannah takes off the shelves while I’m trying to cook or wash dishes. So I’m in the process of finding something that can be closed, doesn’t block the air vent, and isn’t too expensive. I don’t want to put a lot of money (or effort) into something when we’re going to just redo the kitchen in 5 years.

Tonight we were walking through Ikea and I saw this cabinet. I thought it really met our needs. It is the same width as the baker’s rack, and just a few inches less than the depth of the fridge. It can totally be babyproofed, and I think would hold our pantry stuff really well. It also has legs and is raised off the ground, for the air vent. Paul doesn’t think it is raised high enough – he liked a different unit that I’ll talk about in a minute. The other negative is that it’s a little on the expensive side. I’m not saying it’s not worth the price, but it was more than I was hoping to spend. However, this is something that we’ll be using heavily for the next five or more years, and once we redo the kitchen and solve the pantry problem (which might incorporate this unit, who knows?), it can totally be repurposed to another area of the house.

There was another possible solution at Ikea that Paul liked better. Unfortunately, I don’t have a picture of it, but it’s basically a tall wall cabinet that is much less deep than the other one. This one would attach to the wall, and can be hung as high or low as we wanted. I didn’t like the look and feel as much, and it wouldn’t fit in as well with our current kitchen (not that that matters a ton). When I got home and measured the space, I think it might be too wide. So all this might be a moot point.

Anyways, I think we’ll see if Home Depot or Lowe’s have anything similar. Maybe we can find something that fits our needs that is less expensive. Besides, the one I want is sold out right now at our Ikea, so I have to wait anyways.

06/16/10

our den – finished!

Originally posted at twentysixcats.com

The den was a HUGE project in our house. It was on our list to finish when we moved into the house last fall, but it seemed silly to spend the money on that when there were lots more immediate things. My plan for the room was to make an area that was 100% kid safe and child proofed. I hope to see it become the playroom (with the toys contained downstairs!). We don’t really have furniture for it right now, but in the future I envision getting something like a sectional with a hide-a-bed for slumber parties and overnight guests (after we have more kids and the guest room becomes just a bedroom). One thing I love is that it is only a few steps down from the kitchen, so I can keep an eye on the kids while cooking dinner. We still need to get baby gates; hopefully soon.

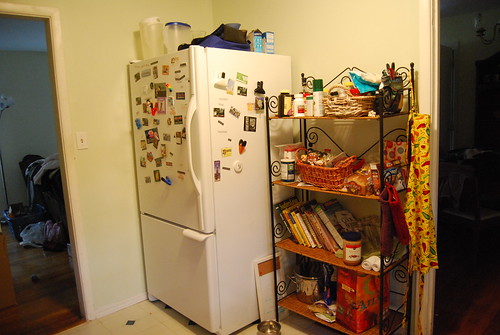
After trying to make an office area work upstairs, I gave up and decided to move it down to one corner of the den. It’s not exactly kid-proof, so I hope to get some of those playyard baby gates or something to section off the area. I’ve been scouring Craigslist for them, so whenever I find some at a good price I’ll snatch them up. :-)

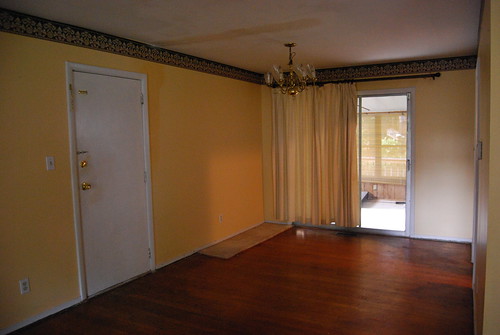
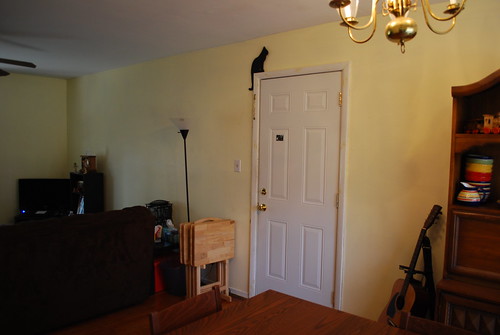
Here is a picture of one side of the den from when we bought the house:
Family room

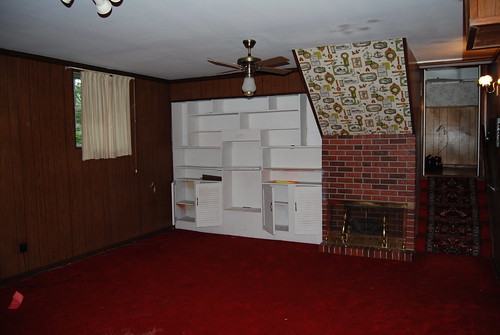
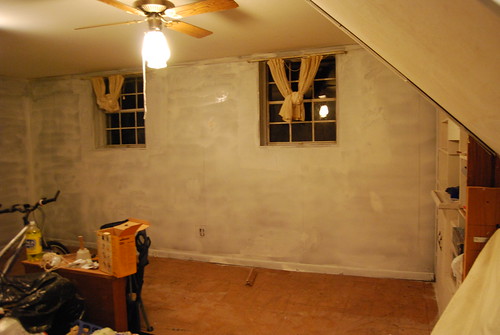
The carpet was the first to go – it was damp and smelled horrible. It became a sort of junk room for about 6 months when, in March, my sister came down for a week and helped us paint. It took 4 coats of paint to cover the dark paneling! We put 2 coats of Kilz on it to help with the mustiness and possible mildew in the room. The room definitely had a basement feel to it. We then put on a few coats of the same yellow we used throughout the house.

Painting our den - first coat

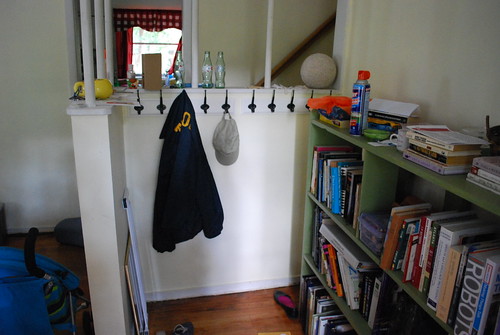
We also ripped out the fake fireplace, and hope to put a pantry in there. That’s Paul’s project, and will be nice for storing stuff since we don’t have a pantry in the kitchen. I had originally thought I wouldn’t worry too much about the built-in shelves, but when I pulled out the white paint I thought I’d just go ahead and give them a nice coat. I’m glad I did! I didn’t realize how disgusting those shelves were! I washed them, too (before painting), and they look so much better. I wish I’d gotten a picture of a shelf half painted so you could see how gross they were!

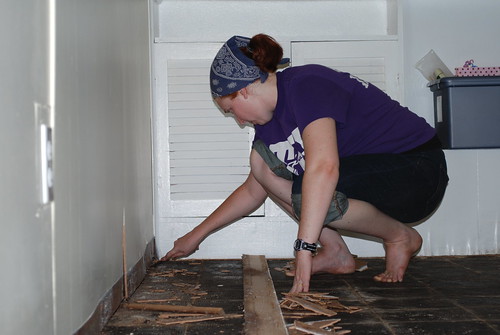
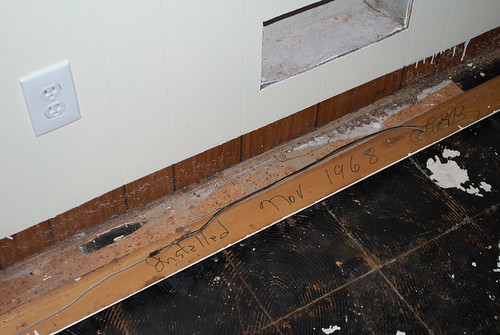
After painting, we waited another few months until we had the money to put in carpet. That became an adventure in of itself! We finally got the carpet in, and so far we have been loving it! We also replaced all the baseboards (in an attempt to remove everything with cat pee).

Pulling up asbestos tiles

Hard at work

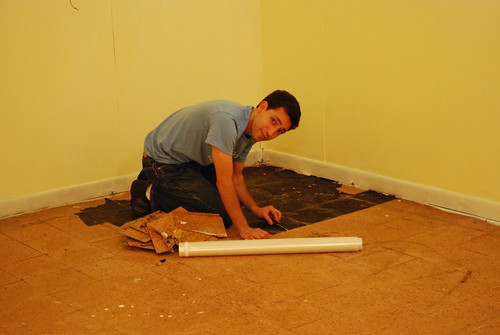
We also did a few other smaller things: we replaced all the plugs in the room, because the old ones were brown (to match the paneling). There was an A/C vent and an air return that we got covers for – the return was a different size than I guess they make now, because getting a cover for it was really hard! I ended up having to buy one a few inches too big but it works. Little things like that really help finish a room!

Installed Nov. 1968

I took out the accordion door that went from the den to the laundry room. Once the room was painted, the brown door looked a little weird. Also it made it impossible to put a baby gate in the door way, and the door itself wouldn’t latch. I looked into other types of doors and decided our best bet was to just leave it open, even though now you can see the laundry area.

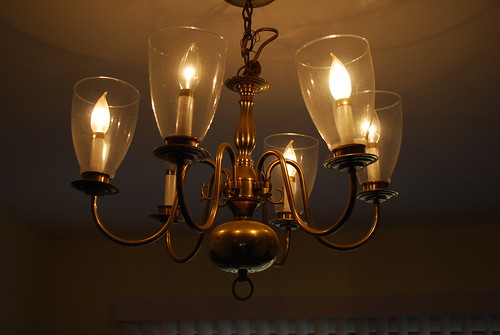
We replaced the ceiling light and ceiling fan. The old lights were mismatched and outdated, and the fan was too small for the room. So, I picked up something that looked nicer and have been pretty happy. However, I will say, I think it might be worth paying more for a nicer ceiling fan. We bought the cheapest we could find and I definitely notice a difference between this fan and the ones upstairs in our bedrooms (that came with the house). Fans are just so expensive, though!

As you can see we have learned a lot about houses from this room alone! A year ago, we did not know anything about carpet, tiles, sealing cement floors, tree roots, replacing electrical outlets, replacing lights and fans, and baseboards.

And now for some pictures!
Our den/playroom

Our den/playroom

Our den/playroom

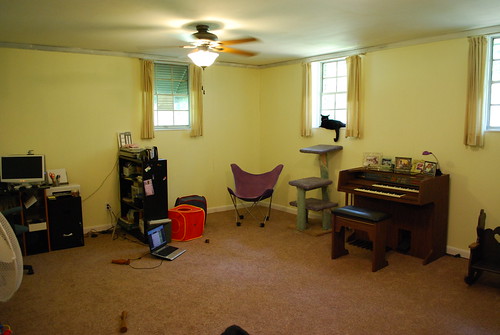
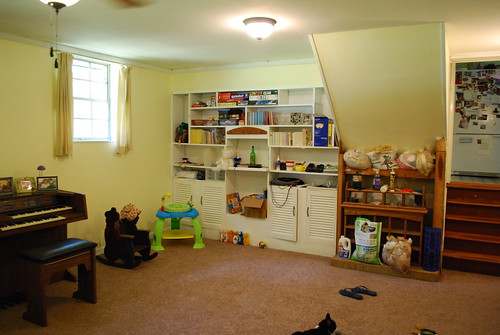
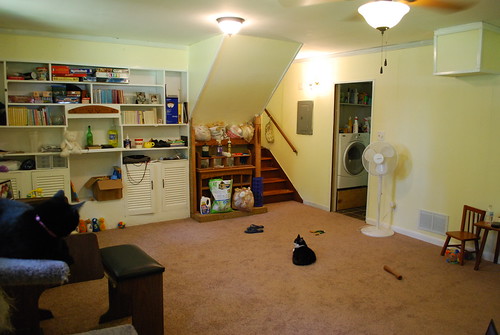
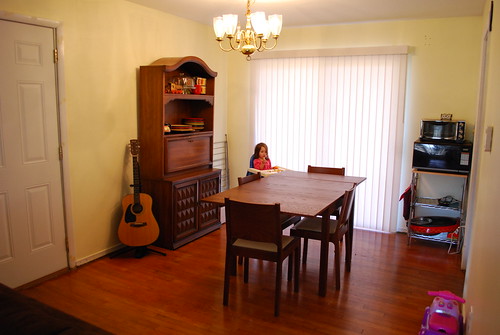
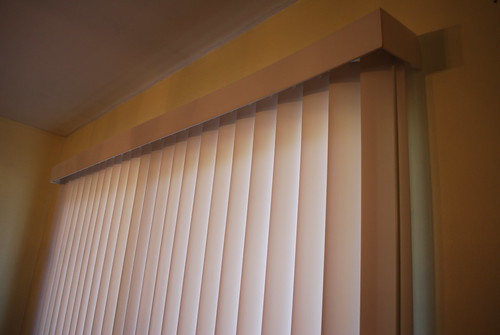
As you can see, we’re still figuring out the arrangement but I like all the space to play on the floor. The only other thing I want to do is do something with the curtains. These are kind of ugly, but I’m not really sure what to replace them with. The windows are very close to the top of the room because of this part of the house being partially underground, so I think the normal panel curtains look a little silly. I don’t want curtains that go to the floor because of it being a playroom. Perhaps blinds? I’m still thinking about it. In the meantime, I’m really happy with how this room has turned out! And the living room looks much better now that we moved some of the furniture downstairs.

Next up: finalize room layouts and hang pictures throughout the house!

06/1/10

new carpet!

Originally posted at twentysixcats.com

So the carpet guys just left and I’m so excited!!

Our den looks great. Man, it makes SUCH a difference getting carpet down there. It really feels like a room now. I totally ran and jumped around like a little girl.

Up next: Getting new baseboards and putting them up. That won’t be a pain, right, nailing up 60 feet of baseboard, right?

Also I need to replace the light fixtures and the fan. The fan that’s there has a lot to be desired in terms of usefulness and sound. I’ve been scouting fans at Lowe’s and Home Depot, and think I’m about ready to make my selection. We actually replaced the fan in our living room yesterday (the one that was there broke), so now we can add “basic electrical work” to our list of experiences.

As soon as the baseboards are up, I’ll put up pictures. You’re going to be amazed! :-)

05/24/10

asbestos not to touch to the tiles

Originally posted at twentysixcats.com

I’ll start my story when we left off in the last paragraph of a previous post. We were supposed to get our carpet installed in our den today. So on Thursday, we mopped the whole room with a heavy-duty cleaner and degreaser. There was carpet down when we bought the house, but it smelled bad so we ripped it up last September. Underneath we found floor tiles on top of cement. Not only were the tiles all dirty, but my cats had peed down there multiple times and so the whole place really stank. (More about them later. Grrr!)

We were hoping the cleaner that we used on Thursday would get rid of the cat smell. On Friday, after everything was dry, I walked down there and realized that you could still smell it. I didn’t know what to do, and didn’t have any way to do it before we left Friday afternoon for my sister’s college graduation in North Carolina. (I will write a post about that trip later, too.) While we were up there, we asked my relatives what they would suggest to fix the smell before the carpet guys came Monday afternoon. Molly suggested we install a sort of vapor barrier – like they put underneath hardwood or laminate flooring. We thought that was a pretty good idea, and stopped at Lowe’s before we left Asheville to pick up the necessary ingredients.

We got back to Atlanta around 5 on Sunday (yesterday). We didn’t even unload the car – we immediately set to work. Paul pulled up one of the tiles and brought it up to me. It was absolutely soaked in cat pee. He started pulling up the tiles to find it pooled underneath. We ended up pulling up all the tiles in the 270+ square foot room. That took several hours. In the meantime, I went to Subway to get dinner. We took a short break for dinner, and then I went downstairs to finish the tiles. The ones in the middle of the room were not too hard, but the ones along the edge were impossible to get up without breaking them up into small pieces. We realized that the worst of the smell was around the perimeter of the room. So, we decided to get rid of all the baseboards and hope that the smell hadn’t gotten into the walls. (Though I would LOVE to gut the room and replace all the paneling with drywall… BUT… that’s not exactly a project you tackle by yourself on Sunday night…)

One of the baseboards had a date written behind it: “Installed Nov. 1968”. We had wondered when they finished the downstairs – we could tell that it was finished later, and this confirms that it was 8 years after the house was built.

As I was hacking away at the tiles, I had a sudden thought. Then a sinking feeling. Um, aren’t floor tiles one of the things that are often full of asbestos? I did a quick Google search and then called my dad. He said he guessed there was a 50 percent chance that the floor tiles were asbestos. Since we were almost done, we decided to just finish. I found a face mask and tried to be more careful about smashing the tiles to smithereens. After I got them all off the floor, I carefully swept the entire room, and then we mopped everywhere to make sure all the dust was gone.

So hopefully this brief exposure doesn’t spell an early death for either of us! According to some helpful internet forums, we’re probably okay.

While we were working on the tiles, we realized that one part of the floor is just slightly raised. I don’t think we would have noticed it if we hadn’t been on the floor, but once we could see it, it seemed obvious. We brainstormed the possible causes. There is a HUGE magnolia tree right next to the house, and when we glanced out the window we realized that it was in the perfect position to have a root that is affecting the floor of our den. (This is the opposite side of the house with the foundation issues.) We’re actually a little sad – we like that tree, but it will need to come down sooner than later so that the problem doesn’t get worse.

We went over the cement with the same cleaner that we’d used on Thursday. Then we both took showers and went to bed around 3am. That means we worked 10 hours straight on that den!

It was sooo hard to drag myself out of bed when Savannah woke me up at 9 this morning. I got dressed and went downstairs to check out the den. The cat smell is almost completely gone. Yay! However, I noticed a trail of water near where the floor is slightly raised. (I sniffed it – it was definitely water!) I thought we had just missed a part when we were cleaning the floor last night, but Paul was more concerned.

After careful inspection, Paul noticed a small crack in the cement. He could tell that the water was coming in there. I knew this would take some time to fix so I called and cancelled the carpet installation – I hope we’ll be able to get it installed soon! We called my dad again this morning and the current plan is to get some crack sealer, and then put a cement sealer over the entire room. Then we’ll lay the plastic down, THEN we can get the carpet installed.

Also we need to find room in our budget to remove a tree.

Anyways, so that’s our adventure for today. We’re both exhausted. Stayed tuned for whatever happens next!

(I am glad to find the source of the dampness that I’ve always felt was present down in the den. Also, I’m glad all the asbestos tile is gone. If we hadn’t removed it, we would never noticed the crack. So I guess it’s a good thing.)

03/15/10

one down, two to go! (or maybe three…)

Originally posted at twentysixcats.com

My wonderful sister Amy is visiting this week. It’s spring break for her, and so she decided a trip to Atlanta to see her favorite niece sounded like fun. I, of course, welcome her visit and her company. (Free babysitter!) Also, my sister is very handy and loves to be helpful, and asked to be put to work. So I made a list.

Number one on that list was to get the den painted. Second is getting the half-bath downstairs finished.

Here is what we’re tackling with the den (picture taken before we moved in):
Family room

And the half-bath that’s off the den:
Half bathroom

Today, we started on the painting. I handled the part by the steps that had to be done with the brush, while Amy figured out the paint sprayer that my parents gave us. Paul tackled the bathroom. (And Savannah took a nap!) Amy got the paint sprayer working, but it was super loud. So, she painted with the roller until Savannah woke up from her nap. Then Amy and Paul put in some ear plugs, and I took Savannah and went to Home Depot to kill time until they were done. It took them about an hour and a half to do the entire den. The paint sprayer had mixed results – it was much faster than just using the roller, but the result was an uneven coat of paint.

On my part, it was really fun to wander around Home Depot for an hour and a half! Especially because I actually could buy some stuff. :-) I got a new faucet for the half-bath, plus a toilet paper holder and a towel rod. I also picked up white outlet and lightswitch covers for the den – the current ones are brown to match the dark paneling, but we’re painting the walls a light color. I also priced new overhead lights for the den, and curtains/blinds for the windows. I’m really excited about the possibilities! It reminded me how much fun a fixer-upper can be.

Tomorrow will be coat #2 of the den. I really hope we only need one more coat of the Kilz paint to cover the dark before we put a third coat of the light yellow that’s in the rest of the house. (Reference the title of this post.) I am so excited about how this is going to look when we’re done!! I will definitely upload pictures. :-)