08/20/16

One year ago today…

The renovations started on our house! Some pictures of Demo Day from last year, which is always the most exciting part of the process. :-)

The dumpster arrives!

The dumpster arrives! We had this dumpster in our driveway for 3 months last fall. It was completely full by the time they were done!

Upper cabinets down

Starting to take down the cabinets.

Multiple layers of wallpaper and ceiling tiles

Showing the multiple layers of wallpaper and ceiling tiles our kitchen had.

Walls coming down!

Caroline shows off the kitchen at midday – the walls are down and the cabinets are gone, but the studs are still there. They called in an electrician at this point to take care of all the wires.

Everything gone but the stove

The wall of the kitchen with the stove, after the cabinets and backsplash are gone. It looks so ugly once everything is gone!

Where the sink used to be

The floor where the sink was. When I saw this, I was really worried about water damage on the floor underneath, bit thankfully once they removed that layer the subfloor underneath was fine. Phew!

Where the fridge used to be!

Where the fridge used to be! It was crazy to me to be able to see all the way to the bay window from the kitchen window. I remember how much brighter the downstairs felt once the walls were down.

Walls coming down...

They thought one of the walls was load bearing and would need a beam and a column, so they put up temporary walls on either side before they took down the studs. We had these temp walls here for a few weeks before a structural engineer inspected and said the wall was not actually load bearing, and we were fine. That was very happy news!

Getting ready to fix the foundation

After demolition, the first task was to fix the foundation. They had to remove the stoop outside the back door to get access to our crawlspace.

The kitchen is opened up!

The walls in the kitchen are completely down! (You can see the temporary walls on the right) Hooray for an exciting day!

I am hoping to chronicle the whole renovation process, but not sure how fast those posts will come. :-) Just as a heads up! You can jump ahead to the official before and after pictures here.

01/18/16

Our kitchen’s major transformation

I was going to wait until the end of my posts to share pictures of my favorite part of the renovation, but I finally took after pictures today and am so excited to post them that I decided not to wait. :-) I have a bunch of in-progress pictures that I’ll share at a later date – I’m still sorting through them and trying to decide how much to post.

First, I will share pictures of our main level when we bought our house 6.5 years ago.

DSC_1136 DSC_1153 DSC_1157 DSC_1159

As you can see, it needed a bit of work. We did a bunch of painting when we first moved in, and then basically didn’t touch it for the next 6 years. I found it a very frustrating kitchen to work in – there was very little prep space, the cabinets were inefficient, and the portable dishwasher – while better than nothing! – was very annoying after a while. I did love the butcher block look of the laminate counter, but it was starting to come up in places and was not looking so great anymore.

10405340_837502128653_5479027832417978633_n 10990012_837502143623_5830833177615132226_n

So basically, we gutted the whole kitchen. And the result is fabulous! I’m just going to inundate you with pictures now.

Kitchen Renovation: After!

Kitchen Renovation: After!

Kitchen Renovation: After!

Kitchen Renovation: After!

Kitchen Renovation: After!

Kitchen Renovation: After!

Kitchen Renovation: After!

Kitchen Renovation: After!

Kitchen Renovation: After!

As I said, the kitchen was gutted and basically everything is new. But, here is a list:
– removed 2 walls to open up the kitchen to the rest of the house
– replaced laminate peel & stick tile with porcelain tile on the floor
– window replaced with double-pane window
– sliding glass door replaced with French doors
– single light in the center of the kitchen replaced with 4 canned lights, 2 pendants over the island, and under cabinet lighting
– electrical updated (in the kitchen only) and proper GFI outlets installed
– HVAC vent moved to a toe-kick under the window
– appliances rearranged: fridge went where the stove was, stove moved to where the dishwasher was, and sink moved to the island and built-in dishwasher moved next to sink
– all new cabinets: white upper and espresso lower
– island installed in the area where the walls and fridge had been
– granite counters installed
– kitchen, dining room, living room, and foyer painted
– white glass subway tile installed as a backsplash
– new stainless steel appliances: refrigerator, gas stove, microwave, and dishwasher
– new sink and faucet
– hardwood floors refinished (sanded and sealed)

Whew! And that’s not even an exhaustive list of all the work that was done, period. I would like to go into more detail about the process and what I’ve learned about everything (ha!), but for now I will say I am so, so happy with how it turned out. I have really been enjoying cooking dinner every night, which is good because after eating out for 3.5 months straight I am ready for homecooked meals again! ;-)

04/9/12

having fun with the kitchen!

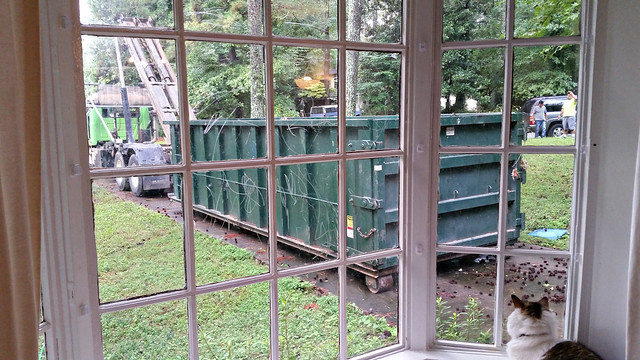
Yesterday, I was ready to wash my hands of this house and walk away and not look back. But today, I went to Home Depot and let myself dream and now I’m excited again.

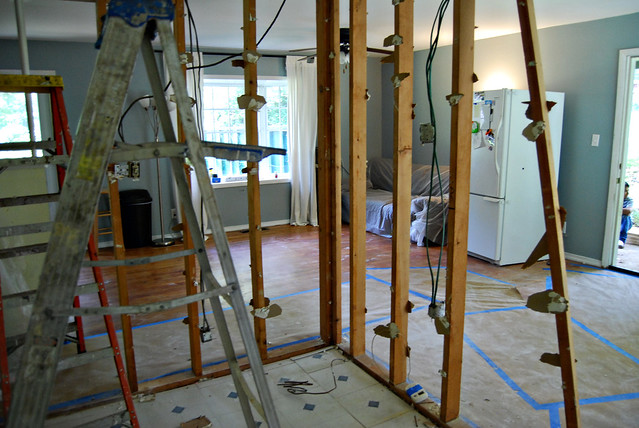
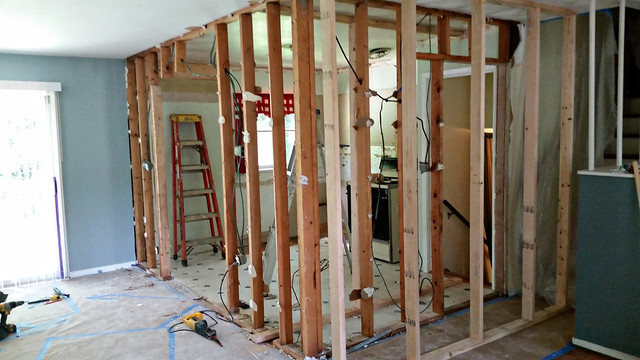
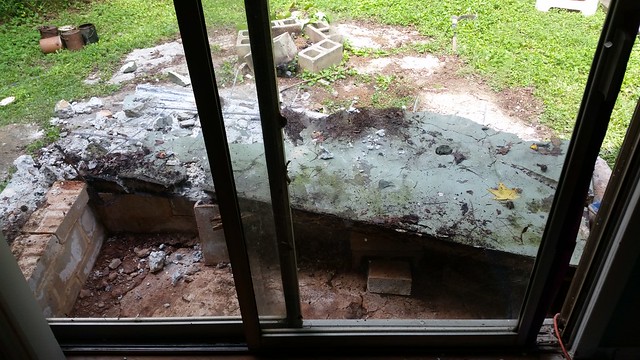
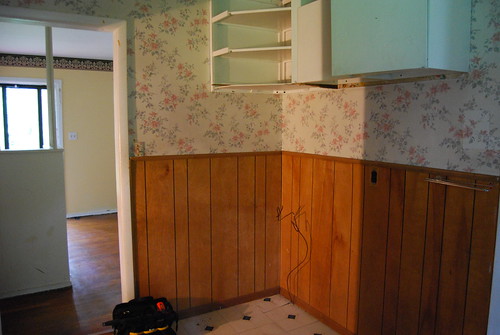
We’ve decided that we’re going to take care of the foundation, then focus on the bathroom and kitchen. Honestly, with the amount of “extra” money we get, it will probably be years before we’re able to get to the foundation unless we make some serious lifestyle changes (which I’m not mentally willing to do right now, whether I should be or not). Sigh. But I will let myself dream of what this house could be if we could work on some of the little issues! Part of the problem is until we fix the foundation, we really shouldn’t touch anything else on the main level because that repair will surely shift things. (Example, some things on my “wish list”: replace all the baseboards, put up crown molding, get a new patio door with screen.)

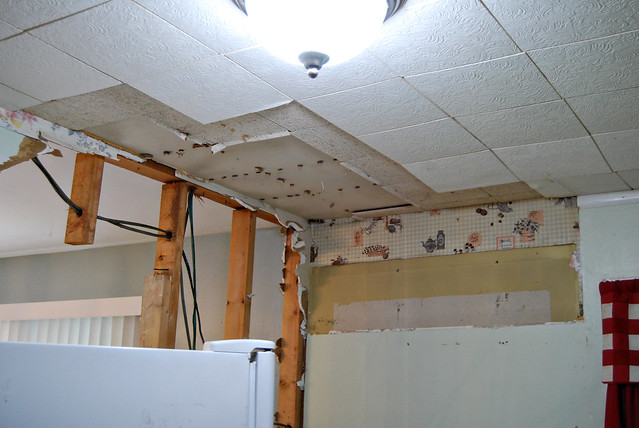
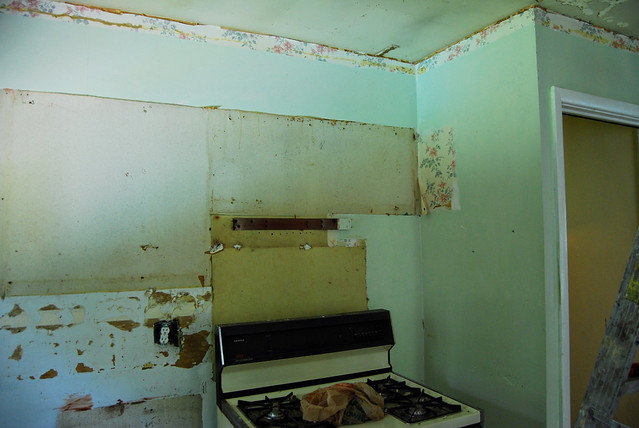
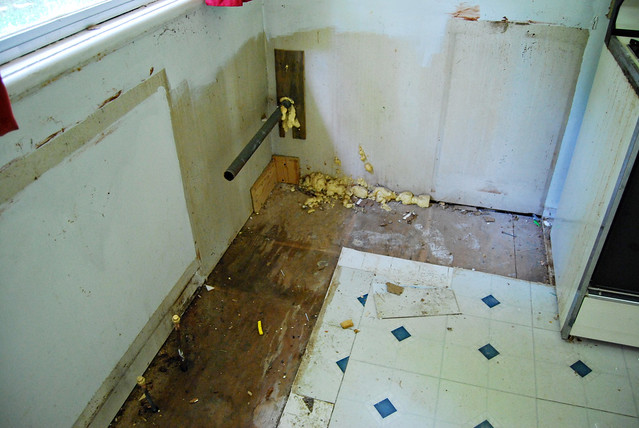
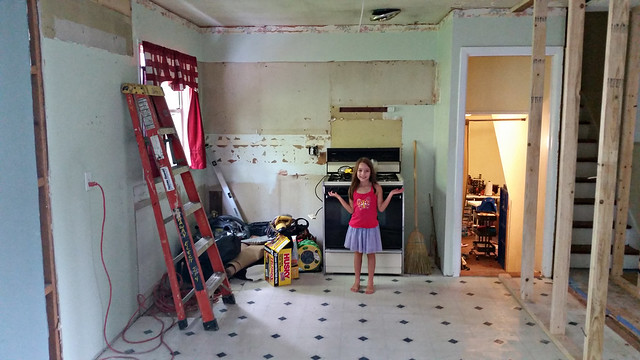
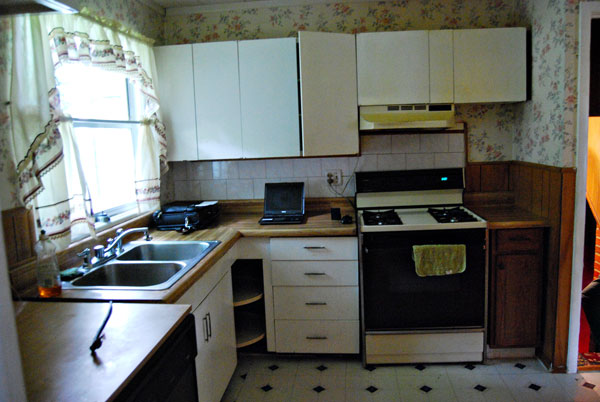
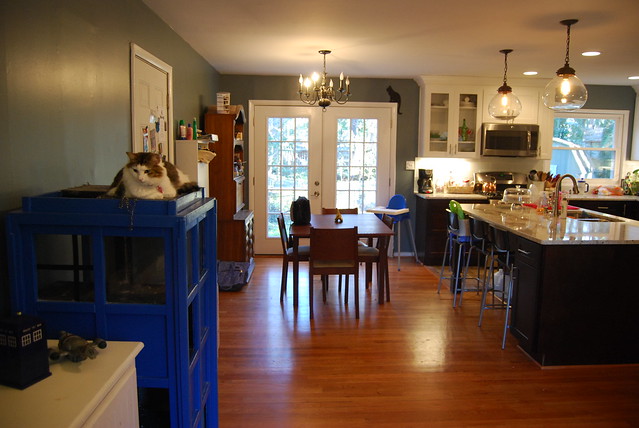
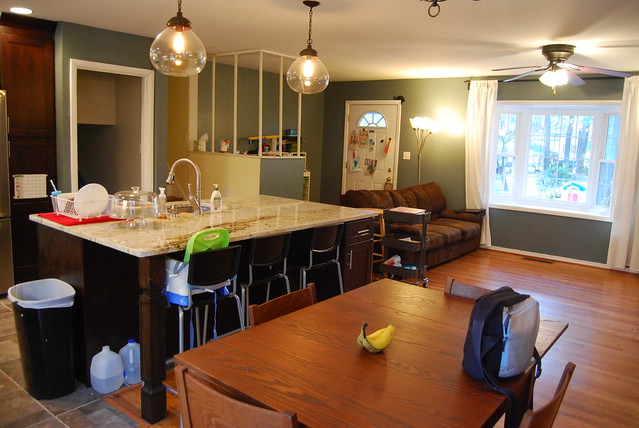
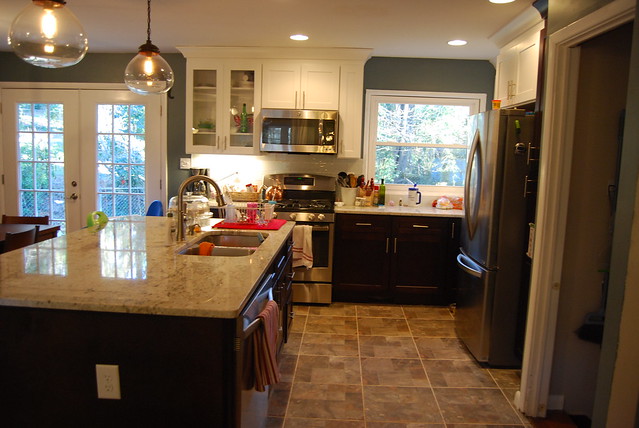
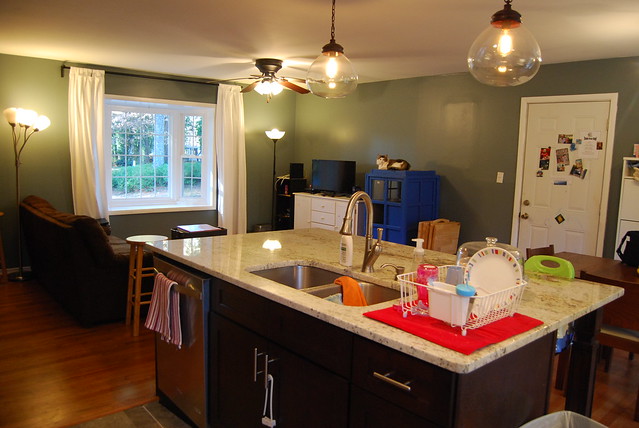
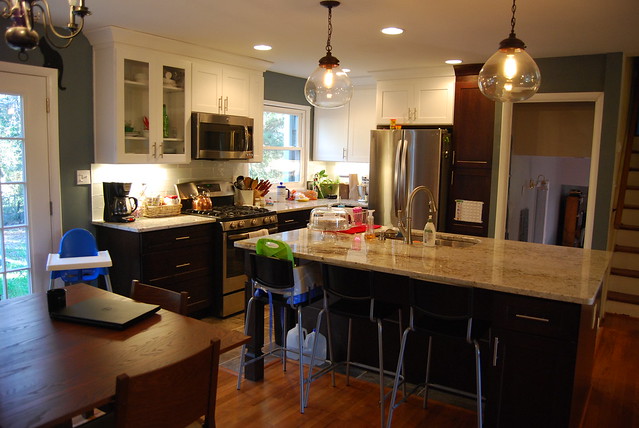
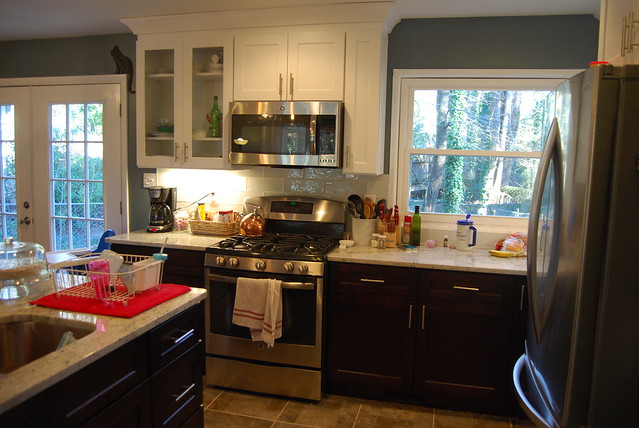
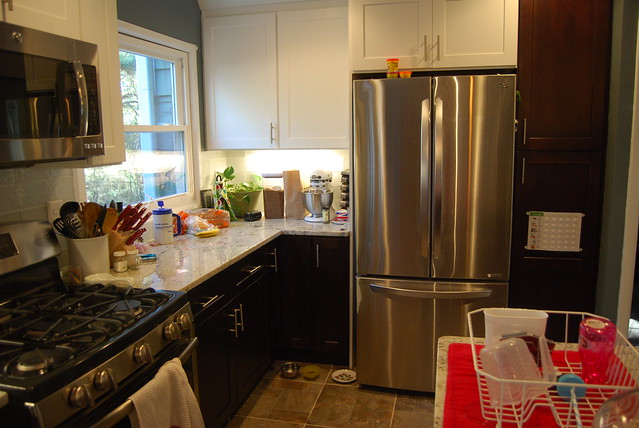
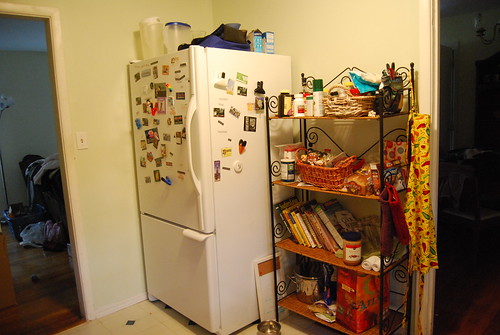
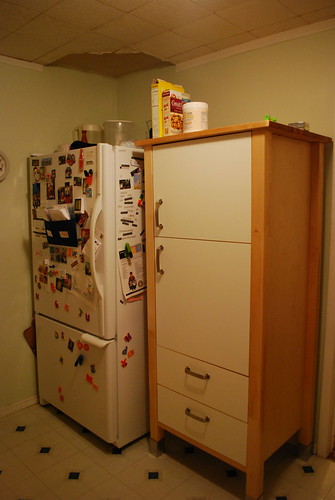
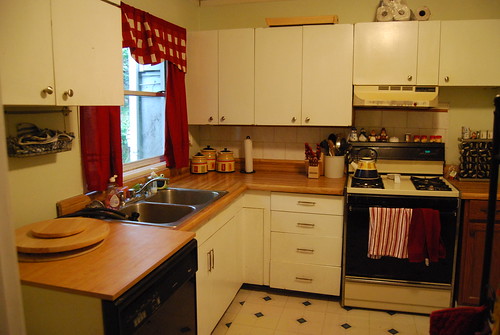
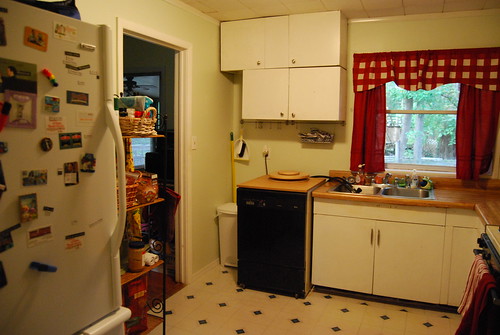
Anyway, back to the kitchen. If you need a refresher about what our kitchen looks like, click on this post. (Oh and we also added a pantry.)

Some of the things I want to do:
– Replace all the cabinets. They don’t work with the current space, and we have trouble fitting our dishes in, in ways we never had trouble with any of the 4 apartments in which we lived.
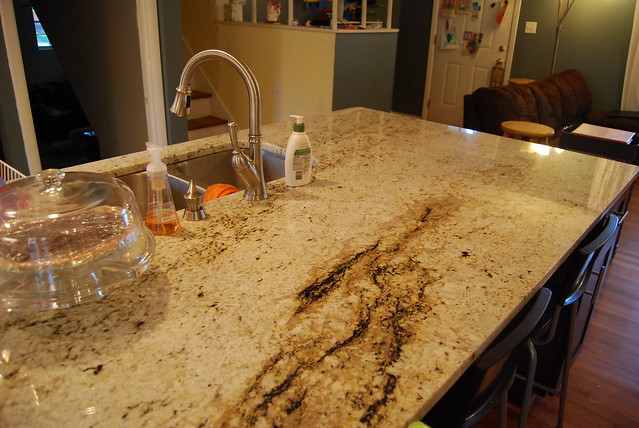
– Replace the countertop. It does a really good job at hiding the imperfections, but it does need replaced.
– Put in a built-in dishwasher. I’m grateful to have a dishwasher, but I’m totally over the whole having to hook up hoses and losing the use of my sink every time I run a load. I also want a seamless counter over the dishwasher to the sink.
– Get a pantry. I do like the one we have, but I would also love a built-in one that would fit with the kitchen as a whole.
– Maximize cabinet and counter space. We only have one spot in our kitchen for meal prep – right next to the stove. I actually do a lot of prep on the dining room table. Overall, I really want to make sure our kitchen is most efficiently using all the space allotted!
– Replace the floor. That’s kinda an afterthought in my mind, but it makes the most sense to do it all at the same time. No idea what I want for the floor.

Some of the considerations:
– That darn HVAC vent just really messes up with our kitchen arrangement!! We’ll probably have to get a professional in here and get his opinion and a quote about moving it. In the doorway is probably the only spot. I do NOT want to lose all that valuable space where it is now!
– We have no plans to replace our fridge or stove, because the former we bought when we moved here and the latter still works great. We do want to think long-term about appliances when we buy the dishwasher, so we’ll probably decide on a color and we’ll need to make sure our fridge and stove are standard measurements.
– NO IDEA what to do about venting the stove. There is a really ugly fan thing on our ceiling that is original to the house and hasn’t been cleaned in that long, either – it’s really gross. I am not sure what’s recommended, or what works with our particular setup, or what.
– We’re totally willing to start from scratch and reconsider placement of appliances, but right now the pipes are already there for the sink and the gas line is there for the stove. Moving those would involve a professional and add to our total cost. Something to consider.
– Everyone wants us to tear down walls and open up the kitchen. It sounds great, but until I win the lottery I doubt it’s going to happen.
– Our neighborhood is lower middle class, and we’re going to keep that in mind as we redo the kitchen. We don’t want it to be “cheap” persay but we don’t want to get super nice things and not be able to recoup the money.

Today I took a look at Home Depot and the stock cabinetry they have. I am really drawn to the white cabinets, but am not settled on that. I took home the sheet of paper with the cabinet measurements, and proceeded to spend my afternoon measuring the entire kitchen. It was fun. :-) I very frustratingly realized that their pantry was about an inch too wide for me to fit everything I wanted to along the wall with the sink. So, I decided to check out Ikea.

I used Ikea’s kitchen planner and had a lot of fun. I am wary about my kitchen looking too “Ikea” so I am not sure we’ll do this, but it’s fun to daydream right now. They have a great pantry – not only is it more narrow, but it pulls out which I like. I’ve noticed it in the store before and I was impressed by the design. I think it would work great in our space.

Here are some screen captures from the Ikea kitchen planner. Here is the look when you first walk in. To the left there is the pantry, and then the dishwasher then the sink. In the corner would be a lazy Susan corner cabinet. On the wall is another cabinet with a space for a microwave. I wasn’t originally planning to put the microwave in the kitchen (it’s currently in the dining room), but the thought of it is nice! We will have to take the plug situation into consideration if we put the microwave there.

This would be the view from the other door. On the bottom left, there’s the corner cabinet, then a four-drawer cabinet, the stove, and a narrow cabinet on the right. Don’t mind the big green wall on the right – it’s actually another doorway; I just didn’t put it in. Along the top you have a one-door cabinet, a glass-door cabinet, and on the right another upper cabinet. Above the stove… that’s where I am not sure. We’ll have to ask the question.

And this is the other side of the kitchen. Fridge to the left, with cabinets above. (Which I added because I thought it looked better, but to be honest we never used the cabinets over the fridge in any of our apartments. So… I dunno.) Then this part is new: a lower and upper cabinet, adding another surface in our kitchen! Of course, this is assuming we move the #%$* HVAC vent. There is currently an outlet right there, so I think that would be a lovely place for my KitchenAid stand mixer, or any other small appliance. Don’t you think?

Ikea doesn’t have the greatest selection of countertops, so I just picked black. We’ll probably pick that once we for sure decide on the color of the cabinets. According to their planner, all of this would cost about $3200 (including a new dishwasher, and a new sink and faucet – two things we aren’t planning to replace but I put into the planner for visual purposes). So, that’s not too bad. We’ll have to revisit our budget in the future – once we’re at a point where we’re actually saving for this project!

06/26/11

our new pantry!

I’ve talked before about our pantry (or rather, lack thereof). We have been using a baker’s rack as a pantry, which would have worked great if we didn’t have a toddler. I would find pantry items scattered throughout the house, and once I discovered several cans missing labels (sounds like she’s living up to her middle name!).

We looked for another pantry for a while. Our biggest problem was that the only space to put a pantry also had the HVAC vent for the kitchen, so whatever we got had to be at least 6-8 inches off the ground. We also needed something that was able to be baby proofed. Last Saturday, we finally bit the bullet and bought the one we’d found at Ikea.

We spent 6 1/2 hours that night putting it together. It was so complicated! We only stopped because it was 2am and we really needed to get to bed. We didn’t have time all last week until today, when we finally finished it. It looks great! I have most of the pantry stuff put back. I just don’t know what to do with my cookbooks; I’ll have to find somewhere else to put them. (I’m thinking the secretary in the den?)

One thing I love about this cabinet is it’s so versatile; when we redo the kitchen we’ll be able to easily find another use for it in another part of our house.

Here’s how it looked before:
Our kitchen (after)

And here is our new pantry:
New pantry

New pantry

Sorry the pictures are dark. One of the bulbs is burned out in the ceiling light. You can see this thing is almost as big as the fridge! I’m not used to seeing it yet… I keep catching it out of the corner of my eye and thinking the fridge door is open. It is good to get everything behind doors though. I think ideally I would have preferred something that wasn’t quite so deep, but really it’s perfect. (Technically, it’s made to hold a microwave. So we could move our microwave in the kitchen if we wanted and have a vent-free pantry in the dining room where the microwave currently is, though really we should just save our money for a kitchen reno.)

Anyways I’m still getting used to it, but overall it’s a good thing.

01/1/11

goals for 2011

Well, it’s the new year, and it’s time to think about resolutions and whatnot! I’m not making resolutions, per se, but I wanted to take some time to talk a little about our house goals for this year. Not sure what we’ll actually be able to accomplish before 2012, but here is a try.

1) Fix the backyard – February/March. This is important for water drainage issues, as well as bug problems. Also, I want to put up a clothesline to dry our clothes outside this summer.

2) Save up for the foundation repairs. The quotes we got ranged from $10,000 to $18,000. We have about $5k saved right now. The cheapest price is from a company that I hesitate to trust, as it was their botched estimate that convinced us to get this house to begin with – we wouldn’t have bought had we known the full extent of the damage. The most expensive price is unfortunately the price we think would actually fix everything, and fix it right. So, we need to look over the quotes again and decide which price we want to save up for. Our decision about that will affect how long it takes to save up the money, and whether we’re able to do it in 2011 or not.

3) Fix the kitchen. My reward for saving up for the foundation is to tackle the kitchen! Even though it might not make the most sense compared to all the other problems, it does make sense to have a nice kitchen for resale value, and it also affects my daily life probably the greatest. And it’s the most exciting for me. :-) As I work hard at saving money this year, I hope to brainstorm some wonderful plans to make the best use of the space. I’ll also need to come up with a realistic budget!

In between, we hope to tackle some little things in 2011. We want to replace all the light switches and electrical outlets so that they will all match. Also, I want to replace the blinds in the bedrooms. And if I can, I’d like to get new baseboards for the main level of our house. And last but not least, we need to either clean or replace the carpet in the den because the cats have pretty much destroyed it. Not sure what exactly to do about that, but I’d love to get that room back!

Right now I’m feeling positive about everything; we’ll see how long this lasts!

07/11/10

kitchen pantry

Our kitchen needs a definite facelift! I naively thought, way back a year ago, that we would use our $8,000 for that project. Ha, that’s funny to think about now! I think it will be at least 5 years before we’re able to put money into aesthetic things, but that doesn’t stop me from thinking and dreaming. I will have to detail my thoughts about the kitchen in a future post.

However, there is an issue that we’re going to have to address before 5 years. And that is the lack of a pantry. Currently, this is what our pantry looks like:

Our kitchen (after)

That’s the only open space we have in our kitchen. The previous owners had a table there, but we decided to use our baker’s rack as a pantry. We keep cookbooks on the top shelf, pantry items on the middle shelves, and pots on the bottom shelf. It works pretty well, but there are two problems.

The biggest problem is that it is sitting over the only HVAC vent in our kitchen. We have one of those plastic deflector shields to try and encourage the air to go out instead of up, but I don’t know how much it helps. I like that the baker’s rack is pretty open; hopefully that helps.

The baker’s rack would be fine except for the other problem. It is impossible to baby-proof an open shelving unit like that! So far we haven’t had to worry about that, but I know that won’t always be the case, and I’m in the process of trying to figure out what to do. I don’t want to be constantly cleaning up everything Savannah takes off the shelves while I’m trying to cook or wash dishes. So I’m in the process of finding something that can be closed, doesn’t block the air vent, and isn’t too expensive. I don’t want to put a lot of money (or effort) into something when we’re going to just redo the kitchen in 5 years.

Tonight we were walking through Ikea and I saw this cabinet. I thought it really met our needs. It is the same width as the baker’s rack, and just a few inches less than the depth of the fridge. It can totally be babyproofed, and I think would hold our pantry stuff really well. It also has legs and is raised off the ground, for the air vent. Paul doesn’t think it is raised high enough – he liked a different unit that I’ll talk about in a minute. The other negative is that it’s a little on the expensive side. I’m not saying it’s not worth the price, but it was more than I was hoping to spend. However, this is something that we’ll be using heavily for the next five or more years, and once we redo the kitchen and solve the pantry problem (which might incorporate this unit, who knows?), it can totally be repurposed to another area of the house.

There was another possible solution at Ikea that Paul liked better. Unfortunately, I don’t have a picture of it, but it’s basically a tall wall cabinet that is much less deep than the other one. This one would attach to the wall, and can be hung as high or low as we wanted. I didn’t like the look and feel as much, and it wouldn’t fit in as well with our current kitchen (not that that matters a ton). When I got home and measured the space, I think it might be too wide. So all this might be a moot point.

Anyways, I think we’ll see if Home Depot or Lowe’s have anything similar. Maybe we can find something that fits our needs that is less expensive. Besides, the one I want is sold out right now at our Ikea, so I have to wait anyways.

10/21/09

our kitchen: before and after

Originally posted at twentysixcats.com

I finally took pictures of the kitchen! Here are the before pictures, what it looked like when we closed on the house:

Small kitchen

Other half of the kitchen

After spending a lot of time scraping wallpaper (two layers!) and painting, here is what it looks like today:

Our kitchen (after)

Our kitchen (after)

Our kitchen (after)

Our intention is to redo the kitchen when we get the money – new cabinets, new appliances, etc. Something that will make better use of the space without pricing ourselves out of our neighborhood. In the meantime, we wanted to make the kitchen a little pleasanter and less smelling like curry. What we did:

– Ripped down all the paneling and wallpaper which took FOREVER. They have special wallpaper removal stuff but we found that hot water worked better. There were two layers of wallpaper! We didn’t bother with the paper over the cabinets; we’ll get that whenever we redo the kitchen.
– Painted all the walls a sage green color.
– Replaced the curtains with new ones. The curtains that were there were stiff, stained, and greasy. They were probably pretty at one point, but not anymore. New curtains mad such a difference!
– The house didn’t come with a fridge so we hopped over to the Sears scratch & dent store in Tucker to buy a new one. I spent a long time debating about what color fridge to get, and I finally decided on white. (I wanted black, but I was afraid it would be too dark for the room.)
– Because of the height of the fridge, we had to take down the shelves and cabinet that were on that wall. We were going to reuse the shelves, but they fell apart in the process of taking them down. We moved the cabinet over near the sink. It looks a little funny, but it’s usable and that’s the important part.
– Added knobs to all the cabinets. Even after a heavy-duty cleaning, they were still sticky and made me want to wash my hands after touching them. So, we added knobs which not only make them look nicer but enable me to open them without getting my hands sticky. :-) I was going to replace all the drawer knobs too, but I decided against it because of our intentions to redo the kitchen.

So the kitchen is really functional now, and I think will be fine for the next few years. When we redo it, we’ll go ahead and get a new oven/stove and exhaust fan to match the fridge. We’ll also get a built-in dishwasher and extend the counter from the sink all the way to the wall. I’d also like to replace all the cabinets – my biggest complaint with these is that the shelves are rather low and so a lot of space is wasted due to not being able to stack things (like, for example, cups).

I put all the dishes out in the dining room so that we could use the cabinets for our small appliances. I think I’m happy with how it turned out, and until we have the money to redo it, I’m going to be brainstorming ideas for how to make better use of the space.