10/21/13

outside updates

The weather has been beautiful the past two months or so, and we have been taking advantage by being outside more. I don’t really enjoy being outside when it’s not pleasant, and that probably shows in the overall cleanup of our house during the summer and winter months. So, it’s good for me to spend the time and energy to make up for it.

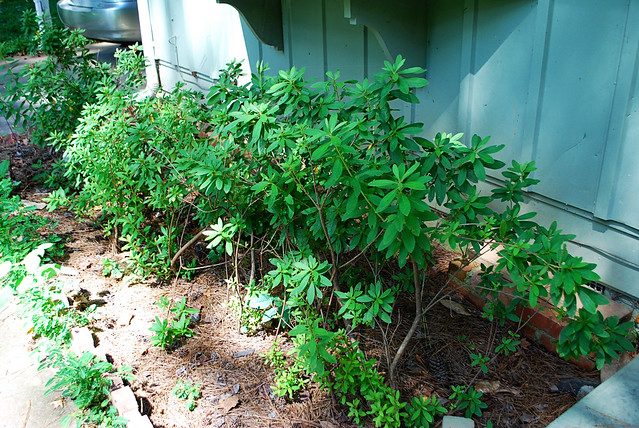
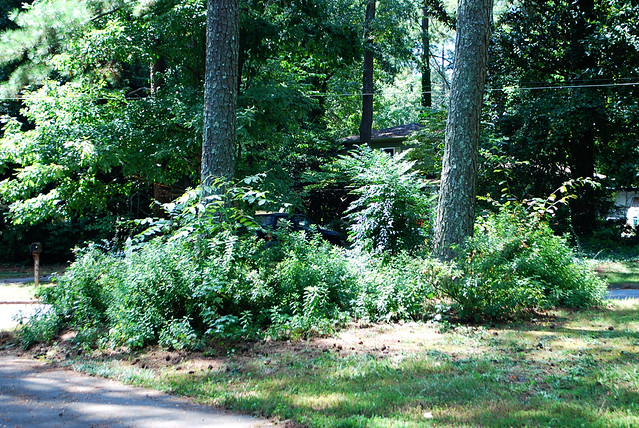
One of the things I spent a long time on was in cleaning up the bushes by the road. I talked a little bit about the azaleas here, and left with this picture:

Cut back azalea bushes

It’s not very obvious in the picture, but there are a lot of non-azalea bushes in that island that have somewhat taken over now that the azaleas have been cut back. So I spent a few hours outside one afternoon/evening with our pruning shears and lopped off as much as I could. I had to be really careful because there are vines with thorns starting to grow. I cut them back whenever I encountered them, but then I had to be careful because I wasn’t wearing gloves. Here is the after:
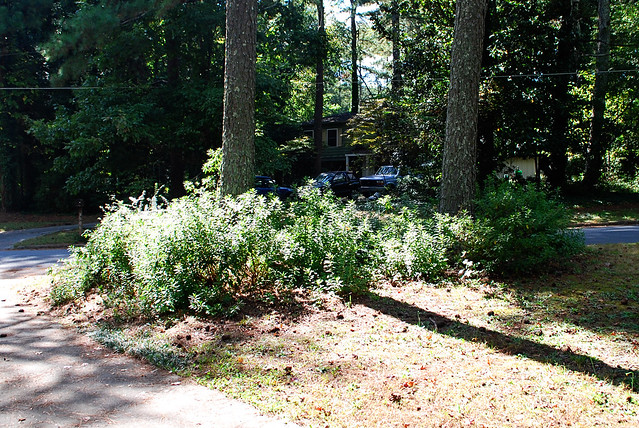
Azaleas, after trimming back
(Apologies for not taking these pictures in the best of light – I just know I need to take them when I think of it and not wait.)

I cut a lot back from the other pine island, but you can’t really tell. The thorny vines were worse on that side, so it was tedious, but I think it’s a good start.

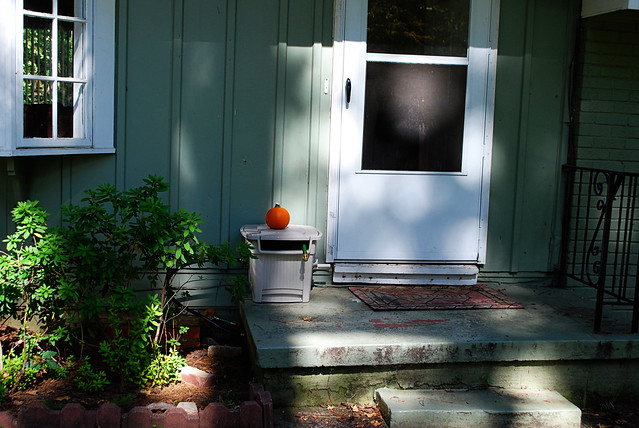
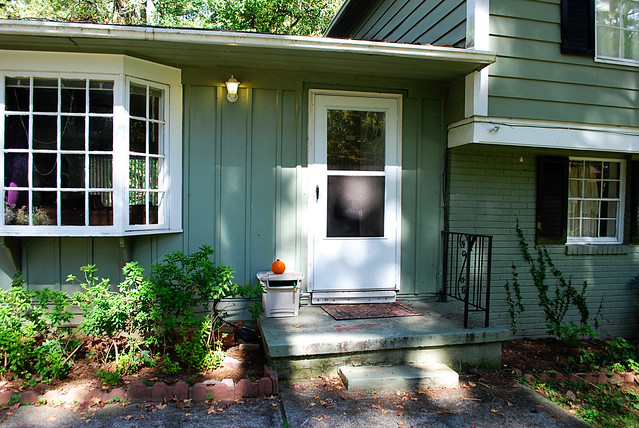
Another thing I started doing was quickly pulling out the hose and spraying down the front of our house where the spider webs are going crazy (around our front door). It has really helped and doesn’t take too long. However, our house was at an awkward place just sprawling around the front stoop, so I decided to get one of those hose hiders from Home Depot. Because of the azaleas, I couldn’t put it on the ground, but I think it actually looks nice to have something on the front stoop.

Fall flavor

Fall flavor

We didn’t paint the front door – it was just open. I try to leave the door open whenever the weather is nice, to help air out the house. I just wish we had screens elsewhere in the house so I could get some cross-ventilation going! (One of our cats makes a beeline for open doors and windows.)

I stuck the little pumpkin there for now, but we hope to get a big pumpkin soon. I think it looks very nice!

09/25/13

Cutting down the azaleas!

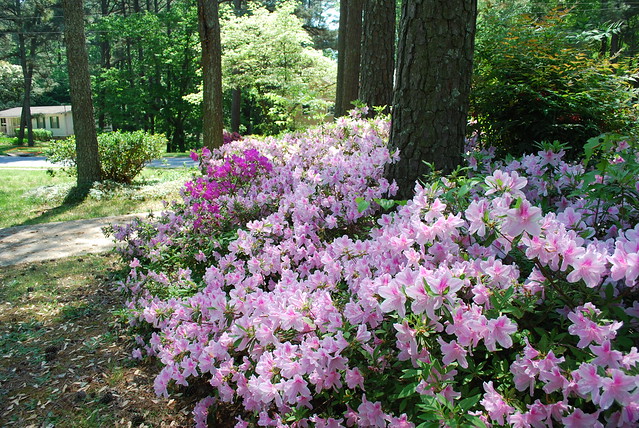
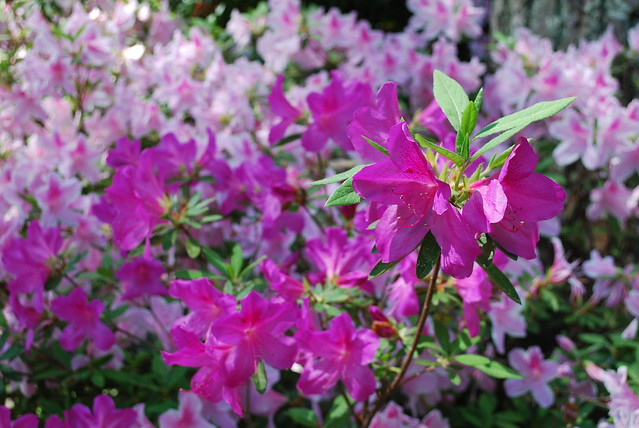
At the end of our driveway, we have several clumps of bushes that were at one point intentionally landscaped by a previous owner. We know nothing about plants, so we have mostly let them go, occasionally pruning them in a completely uneducated way. One of the clumps of bushes are azaleas, which are some of my favorite flowers. Here they are in full bloom:

Azaleas

Azaleas

The pretty flowers were keeping me from cutting them back, but they were really too high and tall. Cars could park on the street on the other side of the bush, and would be completely obstructed from view from the house. It also made backing out the driveway a little dangerous. I couldn’t really find a “before” picture, but hopefully you can get the idea from this picture:

Loves her balloon!

My sister was visiting, and while she was here did a lot of work to cut back the azaleas – she couldn’t find the original bushes. It seemed to her that a layer of mulch/dirt/pine straw was placed over the original bush, or something like that. She didn’t have enough time to finish, but she did get it cut down and thinned out a lot. I took this picture today.

Cut back azalea bushes

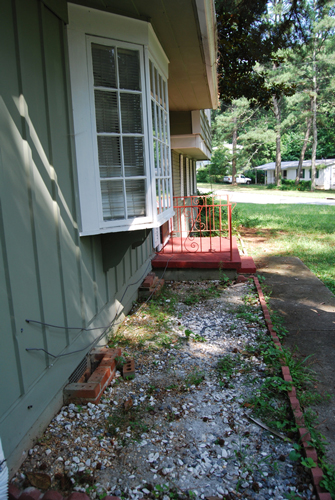
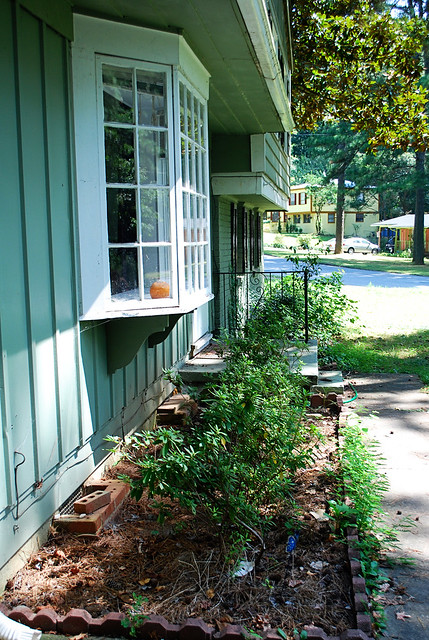
We still need to do more, especially with removing all the non-azalea plants. But for now, this is good. As far as the parts that my sister cut off – she transplanted them to the front flower bed under our bay window. We weren’t sure if they would take, but this past spring they bloomed! And I noticed today that there are new leaves, which should hopefully fill out the whole area. I’m excited for how it looks!

Front flower beds

So as a reminder, here is what it looked like when we moved in:
DSC_1123

And here is what it looks like now:
Front porch

05/28/12

Coming home from vacation

We went on a little jog down to Orlando this weekend for my nephew’s 1st birthday! We had a wonderful trip. My brother and sister-in-law just moved into their new (old) house and I look forward to seeing what they do with it! Perhaps it will inspire me to work at decor in our house.

Coming home we were greeted with a slew of issues, which is frustrating.

Shortly before we left, we noticed our bathtub is leaking. We didn’t have time to deal with it before, so we need to figure out the problem and best solution now. The downside of having only one bath/shower! Fortunately our local Y (where we are members) has showers available.

Speaking of plumbing, we also came back to a dripping kitchen sink faucet. It wasn’t dripping before we left, and it isn’t bad, but it’s still something that needs to be dealt with.

We came home to find our mailbox on its side – apparently someone decided to take it out with their car, and drive off. Sigh. So today I went and bought a new mailbox, and now that Paul is home from work for the evening we’ll figure out how easy it will be to put up. (I’m 7 months pregnant and he has an injured hand – we’ll see!)

The last annoyance is our stairwell light is burned out. I know, very minor, but involve dragging a chair upstairs and taking down the light fixture. I’m mostly exhausted all the time which makes these types of projects difficult.

I’ll post pictures of our new mailbox once it’s up and my camera is back from the repair place.

05/23/12

front yard daydreams

I spend a lot of time daydreaming what I’d like to do with certain problem areas around our house. It tides me over while we’re in a position that we can’t really do anything, heh.

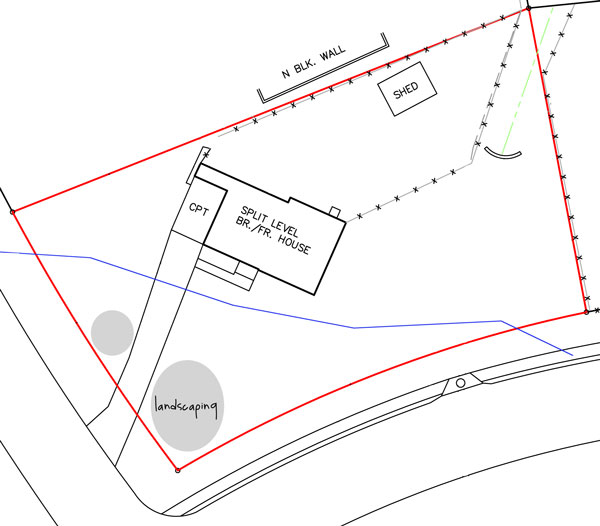
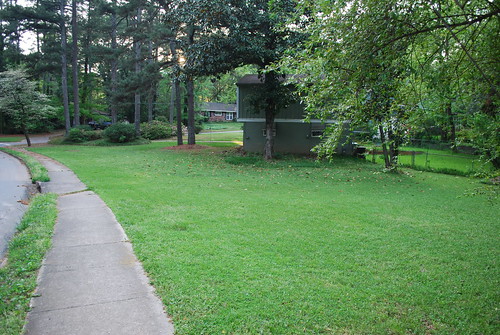
One problem area: We live on a corner lot. Apparently, people seem to think that means that we are totally fine with them cutting off the corner and walking right through our yard. This drives me nuts. I feel like it’s rude and it makes me uncomfortable that they walk so close to our house. (How easy would it be to grab something off the carport?) Also, I worry a little that by letting someone on our property and not doing anything to stop it might invite a potential lawsuit later if they should injure themselves somehow and sue me. Yay, America and our court system. I’m sure that isn’t a very common scenario, but I’ve also been around enough people who have found themselves at the wrong end of a lawsuit to know that fighting something like that is tedious and expensive.

And just to illustrate, I added a blue line to approximate where people are generally cutting across:

Doesn’t it look nice and inviting to cut across?
From the edge of our yard

And by the way, 99% of the people cutting across the property are adults. I actually have only once seen kids cut across. So they are very definitely people who should know better!

I have been brainstorming about putting up a fence to take care of this problem. A fence would also give me some peace of mind about making it more difficult for toddlers to run into the street. I have gone back and forth, and have decided that a fence along the shorter side would be cheaper and still look nice. Here is what I’m talking about:

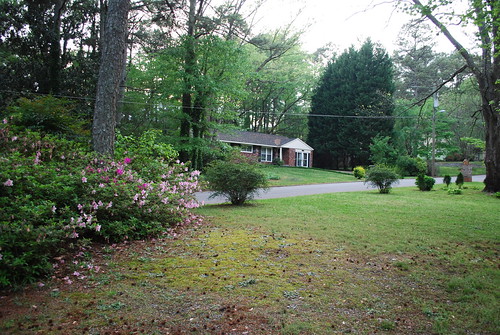
Our yard on the other side

Here are my thoughts about what we should do…

First off, I’d like to remove the two random bushes. I don’t know if they can be moved to elsewhere in our yard, or if we should rehome them. I’ll have to look up what kind of bushes they are. :-) On the left side of the picture, you’ll see some gorgeous azalea bushes. I think they’re beautiful, but they are not in a good spot in our yard. It’s very difficult (read: impossible) to see if anyone is coming when you are backing out of our driveway. Also, if a car parks behind them, I can’t see the car at all from the house or the driveway – which makes me nervous and a safety hazard in my opinion. So transplanting the azaleas is something that needs to happen regardless.

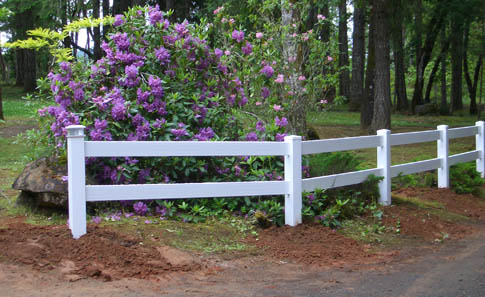
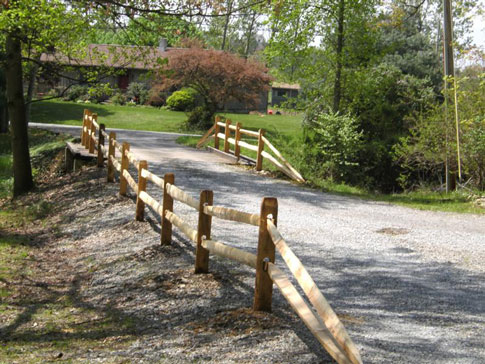
Once the bushes are gone, I’d like to put a fence along the road and up our property a bit to made a corner. (I need to research setback laws for our county.) I am leaning towards a white ranch fence, or perhaps a split-rail. Something like these:

(Images from here and here)

From the very brief pricing I have done, they would be about the same price for the 100ft. length (no gates) we’re talking about. I also have visions of a pretty flowering climbing vine along the fence, or just flowers, to make it appealing to the eye. Of course, I know nothing about plants so I’ll have to talk to someone about that. :-)

So what do you think? Do you prefer ranch rail or split rail? (Picket fence would also work, but it seems a lot more expensive.) What flowering vine would look nice?

02/13/12

Finally! pictures of our backyard

Paul found the charger to the camera battery, and I was finally able to take pictures today!

We got the seed laid around the end of October. In retrospect, that wasn’t the best idea, because then all the leaves fell and we were unsure of how to rake them up without disturbing the new seeds. We were worried if we *didn’t* rake them, then it would hurt the ability of the seeds to grow. I did rake parts of the yard, and I have noticed now that the parts of the yard I didn’t rake look more sparse. If I remember correctly, with this type of grass we will need to reseed every spring – I need to investigate that more thoroughly though.

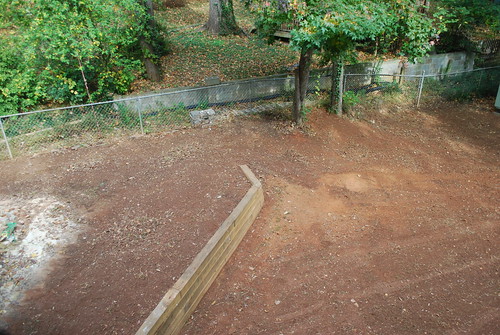
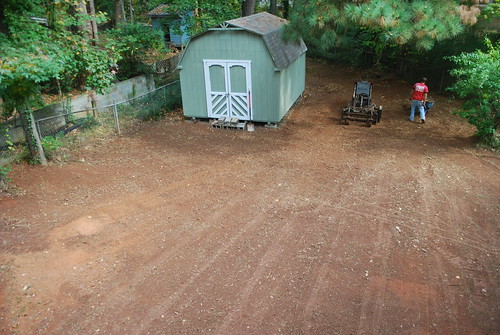
Newly graded and weed-free backyard! (for now)

You can see the areas where they graded the dirt.

Newly graded and weed-free backyard! (for now)

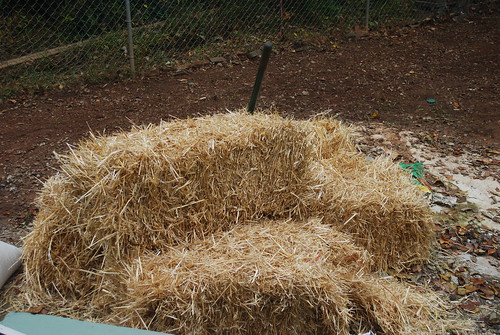
Then they seeded, and put straw down!

Hay for the backyard

Then came the task of watering. We watered the entire yard for 30 minutes a day every day for one week, then every other day for 2 or 3 weeks. Because we only had one spigot and one sprinkler, we had to do it in 4 segments to cover the whole yard. It took about 2 hours each time! I was glad when we were finished with that obligation.
Seeded & covered with straw

I took the following pictures today, about 3.5 months later.

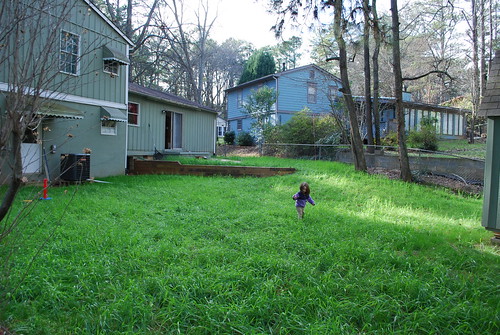
New grass

My daughter LOVES running around in the backyard. Some of the grass is really long, and some is still short and looks like “baby” grass.

New grass

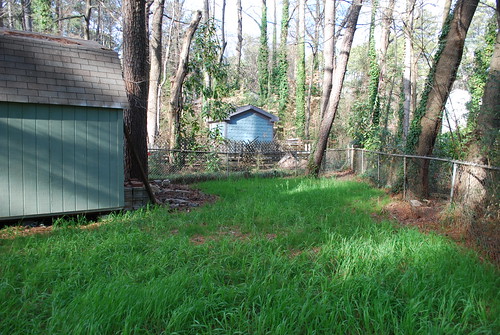
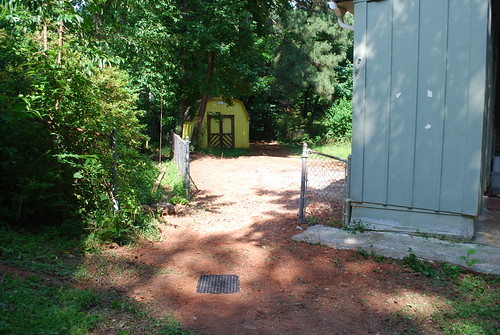
We planted grass behind the shed too, which helped clean up the area a bit. We slowly had to clean up that area the past 2.5 years – there was a LOT of junk and trash back there. You can still see a big pile of cinder blocks (from the old retaining wall) – we tried to stack them as neatly as possible, saving them for future use if we need them.

Behind the shed

I think we’ll mow it within the next month, getting it all the same length. Then we’ll be able to see the holes and if we need to reseed any particular area. I’ll have to do some research on the maintenance of this grass.

It’s really BRIGHT. It’s funny to look at it from the road because the grass in our side yard is faded and yellowish, and this grass is such a brilliant and vivid green color. Hopefully in the summer the colors will even up. I can’t wait to take official “after” pictures. :-)

10/22/11

Backyard – stage 2 this week

We had to do our yard in two stages, due to the grass only being able to be planted certain times of the year.

First stage was putting in a catch basin and underground pipes to divert the water to the back of our property. They also built a new retaining wall, which I love!! Now that it’s been almost 5 months, I can say that it has REALLY helped. It used to be with every rain, our yard would flood, but I haven’t seen it flood once this summer or fall. It’s amazing to be able to walk out back without our feet sinking in mud the day after a hard rain!
Stage 2 is grading the entire yard and planting new grass. Originally we were quoted the price for sod, but it was out of our budget so we’re going to have them put down seed. I am a little nervous about growing grass from seed, so if you have any advice please let me know! We’re planting fescue grass which apparently is the best for the shadiness of our yard. The landscaper told us we’ll have to reseed every year.

On Monday they are coming to put something on the ground to kill all the weeds. (I hope this also kills the poison ivy!) So, this weekend we are going to be cutting the weeds down as short as we can get them and also removing any debris from our yard. (Rusty paint cans, anyone?) Next Friday is when they’ll actually do the grading and plant the grass. So, next weekend look for some pictures. :-)

I just checked the water restrictions in our county, and it looks like the only restrictions non-vegetation things like washing cars, power washing, and kids water things. Ooops we totally didn’t follow that the few times we’ve power washed. It’s not fair that we can’t do any of that kind of stuff on Saturdays. :-( I’m pretty sure it would be incredibly dangerous for me to power wash something with a toddler running around, and my husband doesn’t get home until 8 or 9 most nights, so doing it then is out of the question. Grr. Good thing no one reported us. :-)

09/29/11

A full weekend of painting!

As I mentioned, my parents were visiting last weekend. We spent three days working painting the shed and the back of our house where the add-on sunroom was. It looks so much better! I’ll share the before and after pictures first since I know that’s what you’re really interested in. :-)

First off, the back of our house:
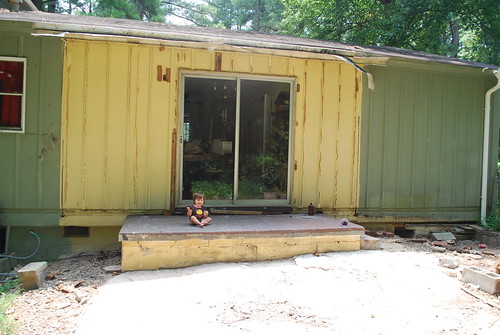
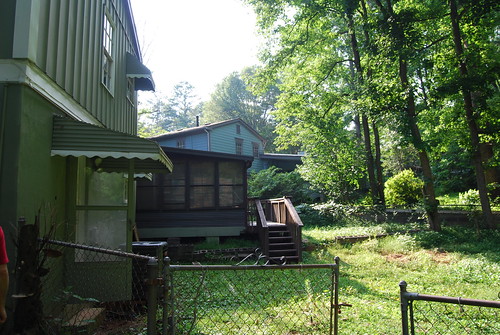
Where the porch was

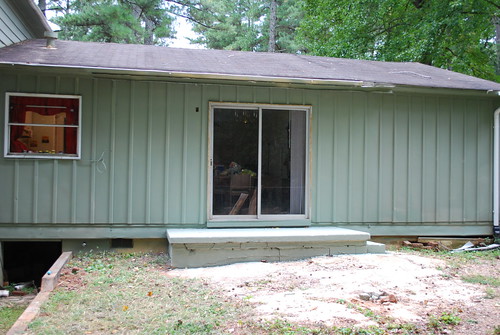
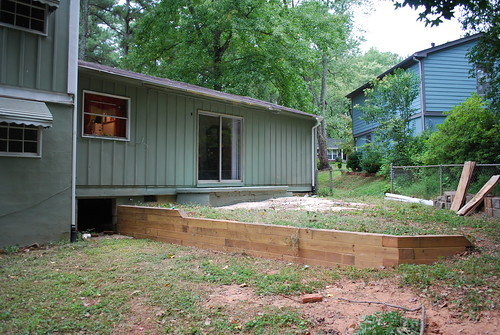
This was what we discovered when we took off the sun porch. Apparently the house used to be yellow. I already touched up the paint around the front door, so this was just a continuation of that. It was a three step process – first, pressure washing the siding. Then we had to sand down all the remnant material from the add-on. My dad guessed it was very old Liquid Nails, or something similar. We used an electric sander to get it all as smooth as possible. Here is the after:

Back sliding glass door

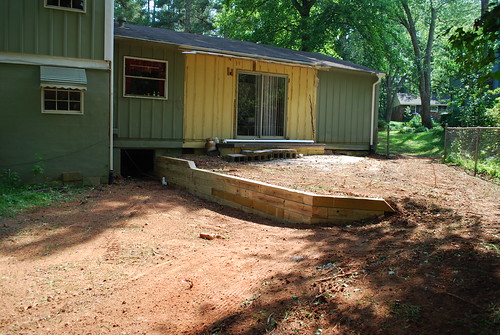
Another angle, before:
New retaining wall

And after:
It looks so much better!

As you can see, the weeds have grown back from the work we had done in June! It looks great right now because my dad and Paul spent a lot of time weed whacking the backyard.

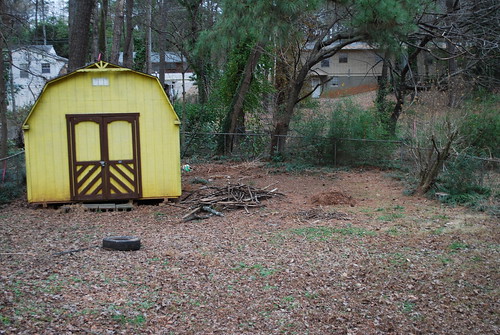
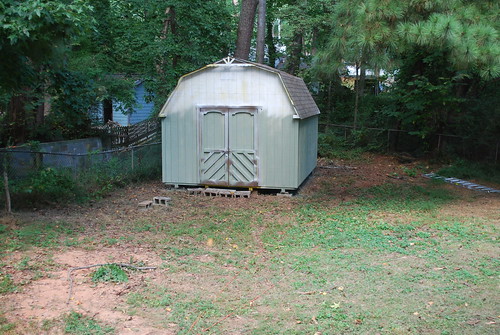
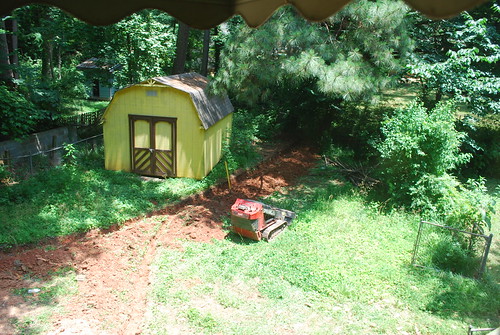
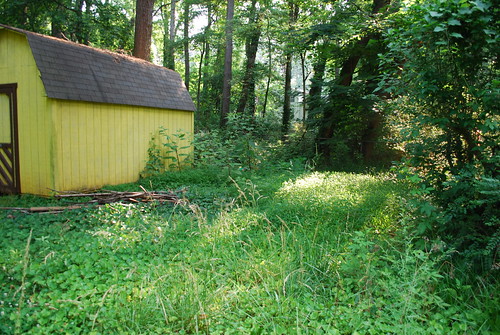
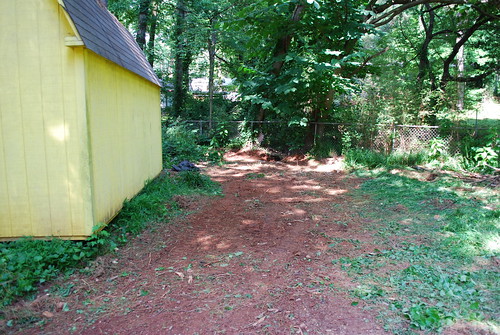
And now for the shed. I’ve been wanting to paint it because the bright yellow is so in-your-face. It also makes the shed look huge and overtaking the yard. Before:
Backyard

And after:
Such a change over the bright yellow!

Newly painted

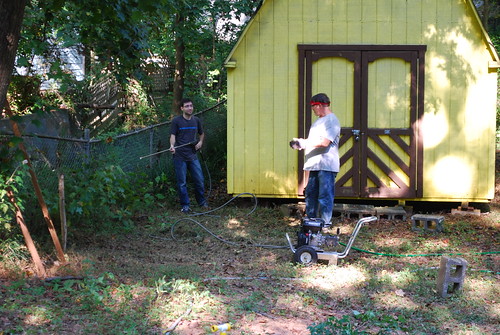
We rented a pressure washer and Paul took care of the siding and the shed a few days before we wanted to paint.
Paul pressure washes the shed

Fortunately, Sherwin-Williams was having a great 40% off sale this weekend, so I took advantage. We started with a white primer, which was the only negative of the whole process. I didn’t notice until I got home that it was oil based, and in retrospect I wish I had immediately returned to the store and asked for an exchange. We ended up having to run out to Home Depot twice to get paint thinner to clean the brushes and the paint sprayer.

The primer is on!
(Sorry the picture isn’t great – at certain times of the day there’s nothing I can do about the direction of the sun!)

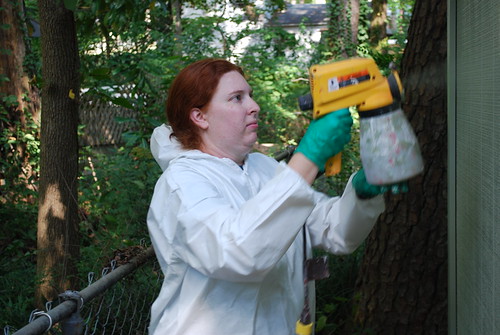
This was my first time using the paint sprayer. It made the job go a whole lot faster, though my arm was sooo sore from holding the heavy, vibrating machine. And yes, I did get a paint suit – I didn’t have any painting clothes that fit me, and I didn’t want to sacrifice another outfit. I loved my suit even if everyone teased me about it looking funny. It kept my arms and legs free of paint!
I did 90% of the painting on the shed

Using the paint sprayer

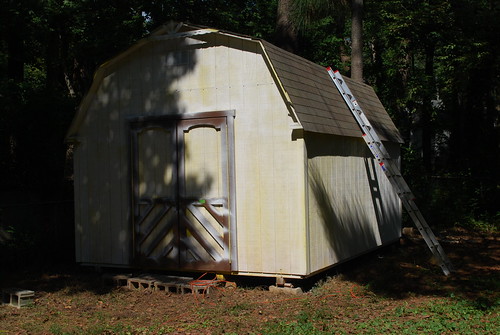
I did as much as I could without getting on the ladder, and then my dad did the rest. I dislike ladders so I was glad he was willing to do that for me.
Halfway done

Looking at it, I honestly think it needs another layer of green, so perhaps I’ll get to that someday. I also have a light to put up next to the sliding glass door as soon as I get the chance. :-) But overall, I think the shed and back of our house look great!

09/24/11

Big project this weekend!

We haven’t done much with our house this summer, aside from a few decorative things that I keep meaning to take a picture of so I can post about it. Mostly, our house is just incredibly messy and I keep saying that I need to just go through and do a major decluttering.

My parents are here this weekend and they love doing house projects. I appreciate the motivation, so I came up with a big project: painting the back of our house and our shed.

Where the porch was

Backyard

We are painting them the same color, the green that is the same as the rest of the house. I hope this will make the shed not feel so big and in-the-way! Today we rented a pressure washer and cleaned the shed and the siding, which has made quite a difference. I think I might keep an eye out for pressure washers on Craigslist because I could see it being quite a useful tool!

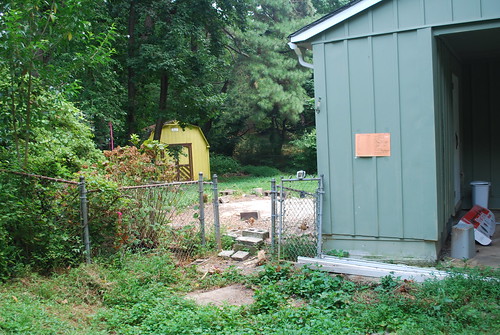
Tomorrow we are going to attempt to get as much of the junk off the siding as possible around our sliding glass door. As you can see from the picture above, there is a lot of stuff leftover from when the porch was put on the house. We guessed the porch was put on at LEAST 20 years ago (based on what the neighbors have told us), and more likely it was more like 30 years ago. They used something similar to Liquid Nails it appears, and even pressure washing didn’t make it budge. We talked to the guys at Home Depot and they recommended an old fashioned scraper and sand paper, at least to get it off enough to make the paint stick to it. That will be the project tomorrow, and Monday will be painting day. As you can see, it’s quite a big painting job so we’re going to rent a professional paint sprayer to make our day easier. I plan to paint the entire shed green, and the trim (the parts around the door that are currently brown) will be painted white to match the house.

I am excited! We need to call the landscaper and schedule their return to grade our yard and plant grass back there. That’s next on the agenda and will have to be done by November 15th I believe (before it gets too cold), but I need to look at our finances first and make sure that we’re still okay to move forward with this project.

Oh, in addition to pressure washing today, we also spent a lot of time in the yard. Paul weed-whacked, my dad raked, and I mowed. Our yard looks great! We still need to bag the leaves and pine straw, but already it is looking so much better. I would like to see the area under the magnolia tree cleaned up a bit, but other than that I’m really pleased with how it all is turning out.

Pictures to come!

06/4/11

before & after: the backyard (phase one)

I know y’all have been waiting anxiously for pictures! This is phase one of the backyard. Phase two will be grading the entire thing and putting down seed, to happen this fall sometime. I also want to paint that shed green to match the house, as well as touching up the paint on the back of the house where that room was. Maybe we’ll do that this summer so we’ll be done with everything by the time we lay seed. :-)

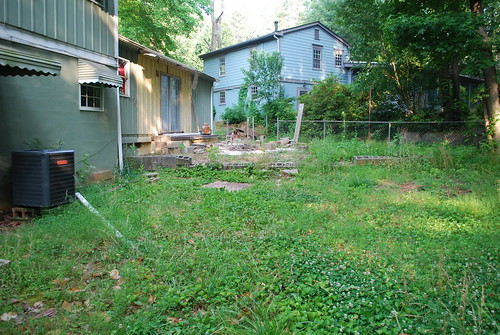
Here is a backyard picture when we moved in:
Backyard

We took the porch down last summer.
Backyard

Another angle; I took this picture yesterday. You probably can’t tell, but we also removed part of the chainlink fence.
Before: our backyard

Our backyard looks kinda trashy, doesn’t it? We didn’t really do any mowing or cleaning, in anticipation of the landscapers working on it.

And…. after!
Back of the house

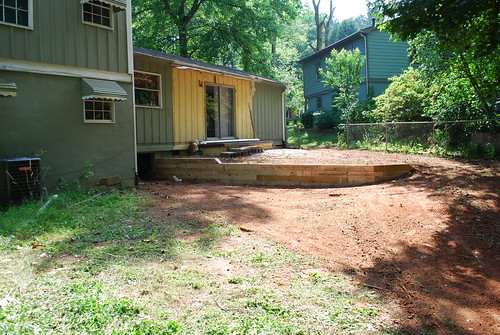
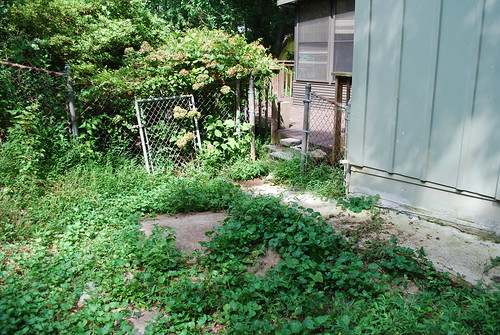
What a change! Here is a picture of the spot where the water always collected, and the previous owners tried to fix it by putting pieces of cement there.
Water collects here

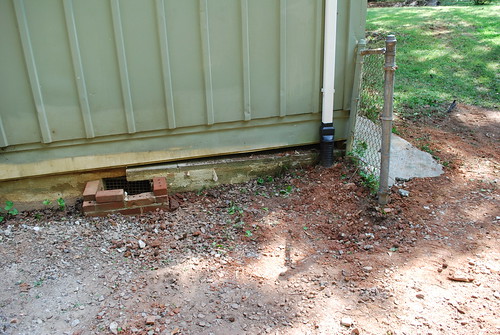
Now we have a catch basin to take the water in a pipe underground and deposited in the dry creekbed at the back of our property. They also removed the fence posts for us.
After: our backyard

I took this picture as they were working, and here you can see the ditches, waiting for pipes. We had underground pipes attached to our two downspouts and to the catch basin, taking water away from our house and hopefully preventing further foundation damage.
Ditches

A closer picture of the retaining wall. They did a nice job, didn’t they?
New retaining wall

Our foundation still needs help – that is the bigger project we’re saving up for – but at least this downspout won’t cause any other damage.
Foundation is still messed up... but the downspouts are taken care of!

Another nice thing is that the random pieces of cement, cinder block, and bricks have been cleared away (and deposited behind our shed), so that really makes the yard look nicer! Also a lot of the weeds were cleared away as they were digging the ditches, which helps too. :-) Here is another set of before/after pictures – taken in the morning and then late afternoon of the same day:
Before: our backyard

By the shed

Can’t wait to see it all with grass! And I’ll have to work on painting that back side, and then we’ll have a lovely little backyard to spend time in. Does anyone know if you have to watch daytime max temperatures for outdoor painting like you do minimum temps?

06/3/11

today’s the day!

The landscapers have been here since around 10 this morning, and they are still working hard on our backyard. I have been taking “in progress” pictures all day, and when they’re done I’ll take some “after” pictures to share here. :-) It’s looking good so far! The retaining wall is up and it’s amazing what a difference it makes. This one is made from landscape timbers, and the one previously was made with cinder block. (See here for a picture.)

Oh, one thing – they aren’t going to grade the yard until the fall, when we can plant grass. (Apparently for fescue grass, you have to wait until it’s cool enough. I think mid-September is the magic date in our area.) I wish we could have gotten it all done at once, but we waited too long to take care of it before summer!