01/18/16

Our kitchen’s major transformation

I was going to wait until the end of my posts to share pictures of my favorite part of the renovation, but I finally took after pictures today and am so excited to post them that I decided not to wait. :-) I have a bunch of in-progress pictures that I’ll share at a later date – I’m still sorting through them and trying to decide how much to post.

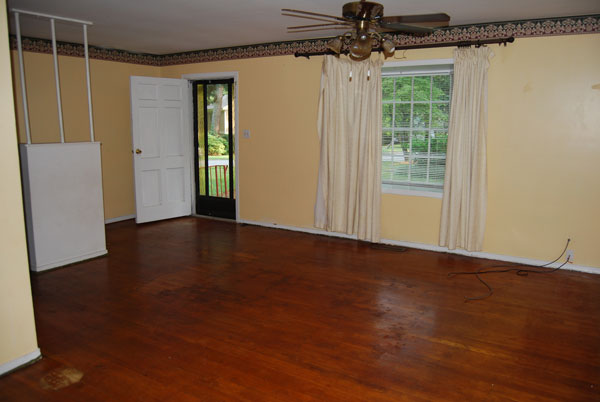
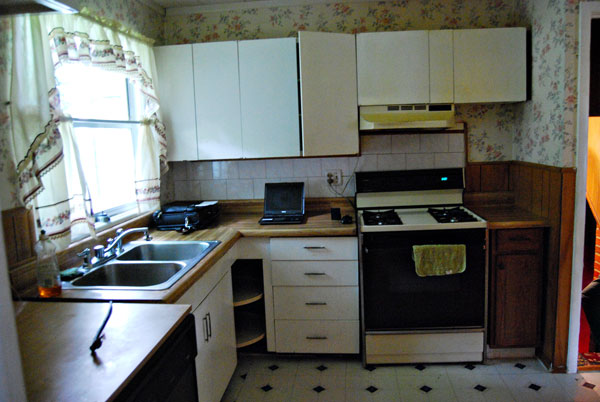
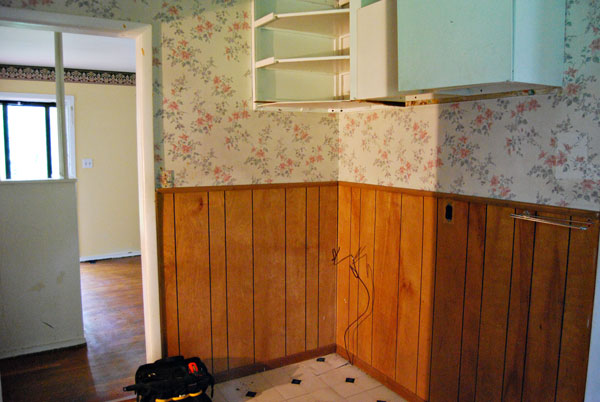
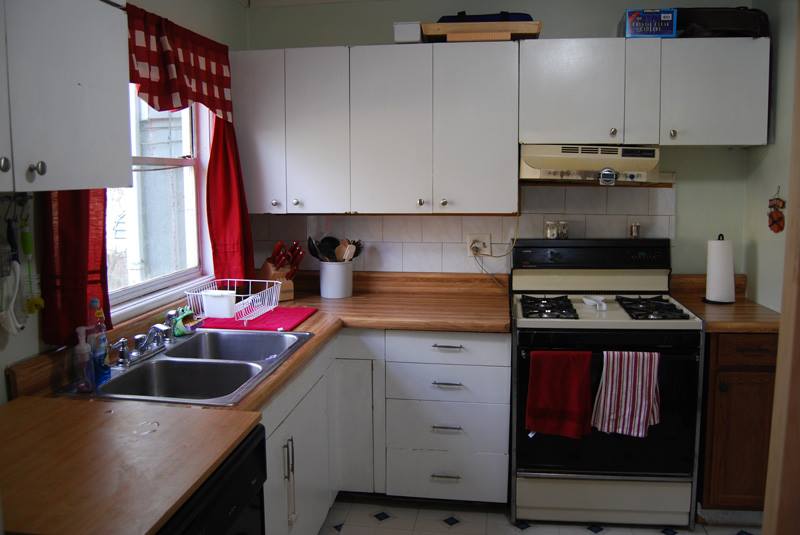
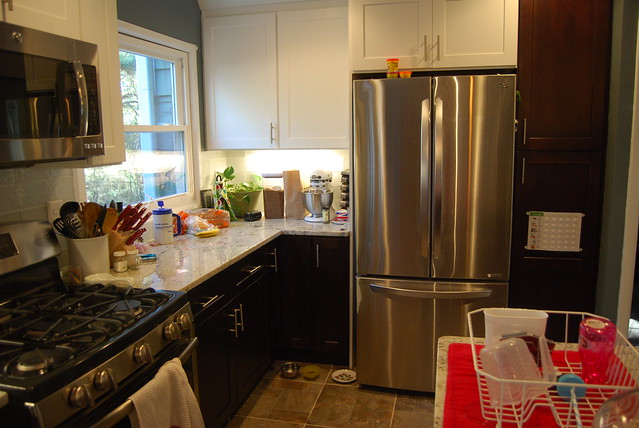
First, I will share pictures of our main level when we bought our house 6.5 years ago.

DSC_1136 DSC_1153 DSC_1157 DSC_1159

As you can see, it needed a bit of work. We did a bunch of painting when we first moved in, and then basically didn’t touch it for the next 6 years. I found it a very frustrating kitchen to work in – there was very little prep space, the cabinets were inefficient, and the portable dishwasher – while better than nothing! – was very annoying after a while. I did love the butcher block look of the laminate counter, but it was starting to come up in places and was not looking so great anymore.

10405340_837502128653_5479027832417978633_n 10990012_837502143623_5830833177615132226_n

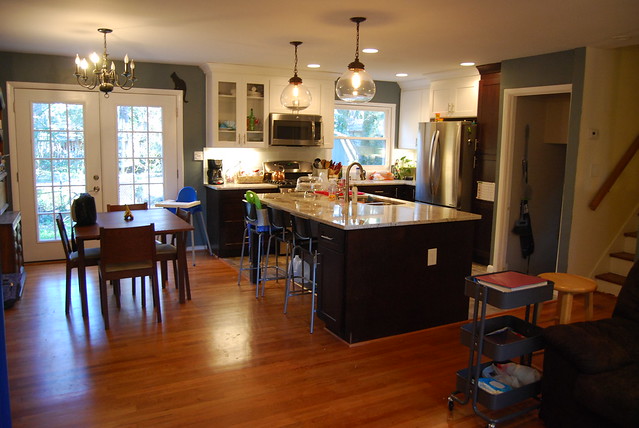
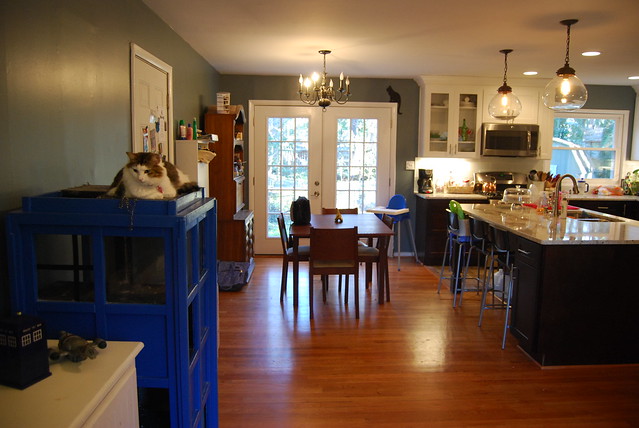
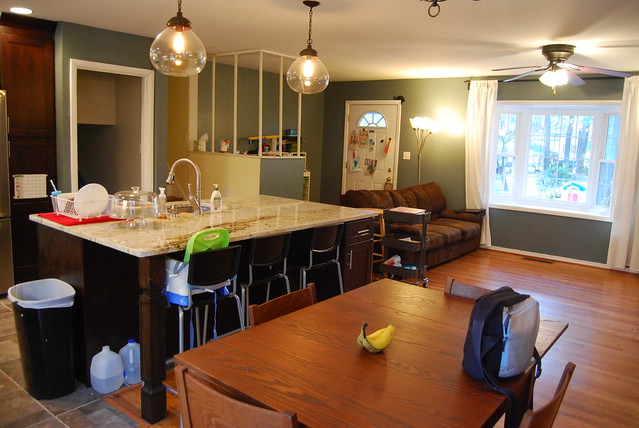
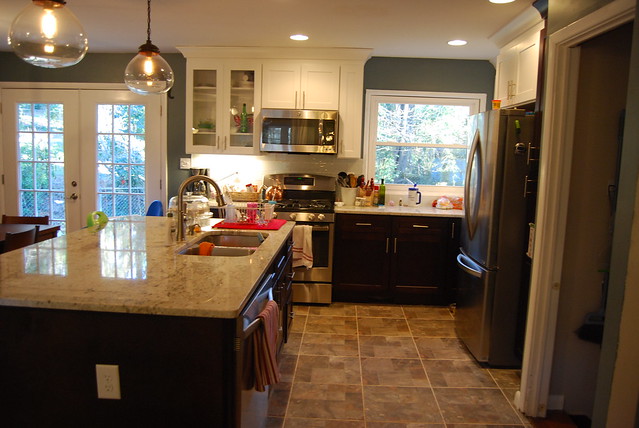
So basically, we gutted the whole kitchen. And the result is fabulous! I’m just going to inundate you with pictures now.

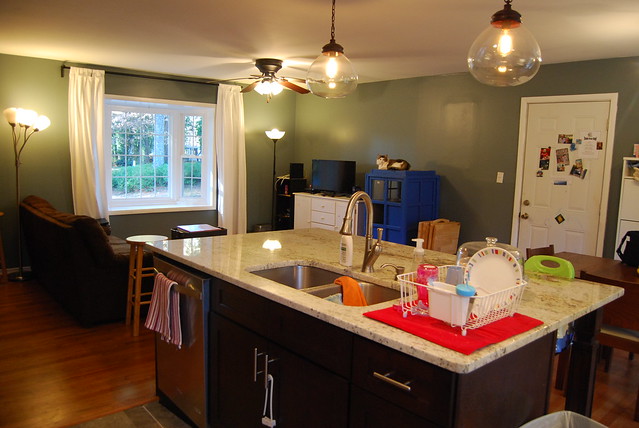
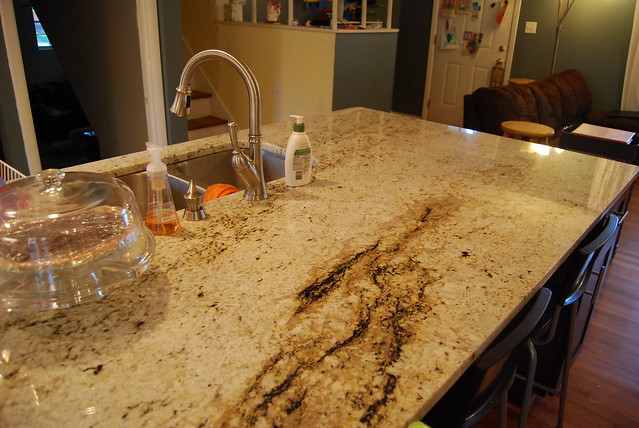
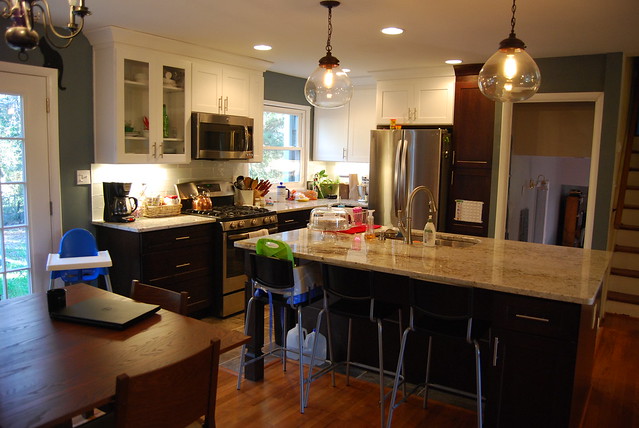
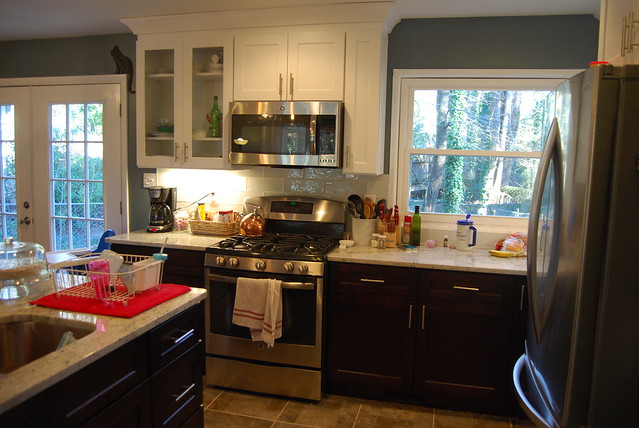
Kitchen Renovation: After!

Kitchen Renovation: After!

Kitchen Renovation: After!

Kitchen Renovation: After!

Kitchen Renovation: After!

Kitchen Renovation: After!

Kitchen Renovation: After!

Kitchen Renovation: After!

Kitchen Renovation: After!

As I said, the kitchen was gutted and basically everything is new. But, here is a list:
– removed 2 walls to open up the kitchen to the rest of the house
– replaced laminate peel & stick tile with porcelain tile on the floor
– window replaced with double-pane window
– sliding glass door replaced with French doors
– single light in the center of the kitchen replaced with 4 canned lights, 2 pendants over the island, and under cabinet lighting
– electrical updated (in the kitchen only) and proper GFI outlets installed
– HVAC vent moved to a toe-kick under the window
– appliances rearranged: fridge went where the stove was, stove moved to where the dishwasher was, and sink moved to the island and built-in dishwasher moved next to sink
– all new cabinets: white upper and espresso lower
– island installed in the area where the walls and fridge had been
– granite counters installed
– kitchen, dining room, living room, and foyer painted
– white glass subway tile installed as a backsplash
– new stainless steel appliances: refrigerator, gas stove, microwave, and dishwasher
– new sink and faucet
– hardwood floors refinished (sanded and sealed)

Whew! And that’s not even an exhaustive list of all the work that was done, period. I would like to go into more detail about the process and what I’ve learned about everything (ha!), but for now I will say I am so, so happy with how it turned out. I have really been enjoying cooking dinner every night, which is good because after eating out for 3.5 months straight I am ready for homecooked meals again! ;-)

10/27/13

unveiling… a new look for the living area!

I will do an official before and after later when I clean up and finish the decor, but I wanted to share initial pictures to show off our new paint color.

When we bought our house, we painted every wall and ceiling. The living/dining room was the last room to be done, and at the same time Atlanta had the “500 year flood” where it poured heavily for 8 days straight. We couldn’t get the paint to dry (if only we’d had a dehumidifier then!), and we ended up moving in without being able to finish painting. We predictably never put on the final coat. For four years the splotchy and unfinished paint job has annoyed me. Finally this weekend with the help of my parents we rectified that!

It took me a while to decide on a color. I am very happy with the blue we chose. On the exterior walls, we did a lighter shade that was Behr Flint Smoke. On the interior walls, we did an accent color of Behr Nature Retreat. (You can see the whole paint family here.)

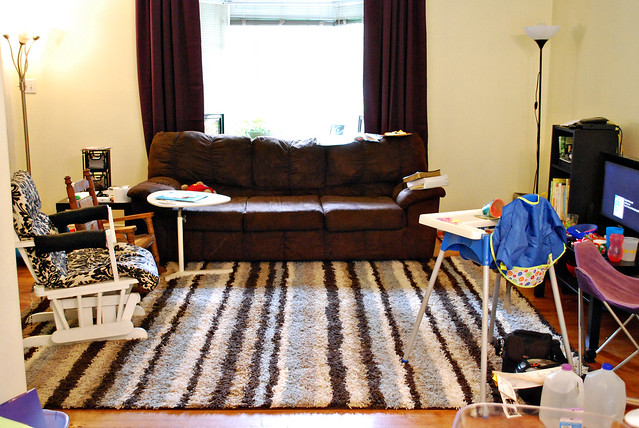
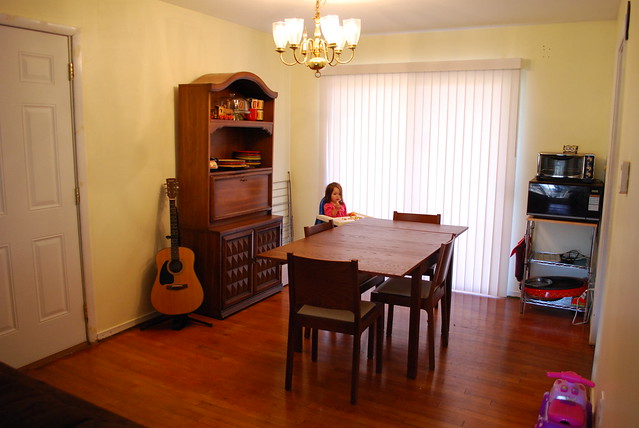
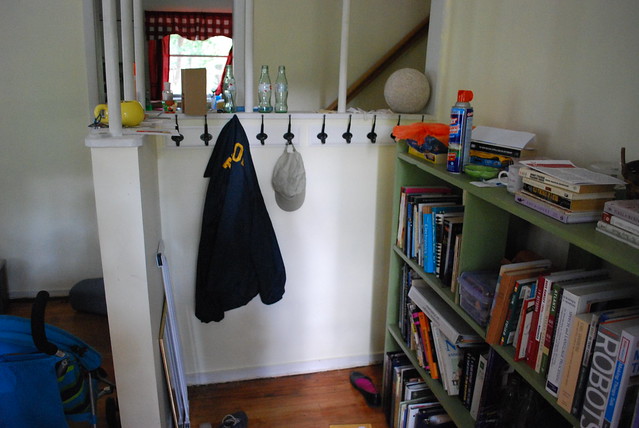
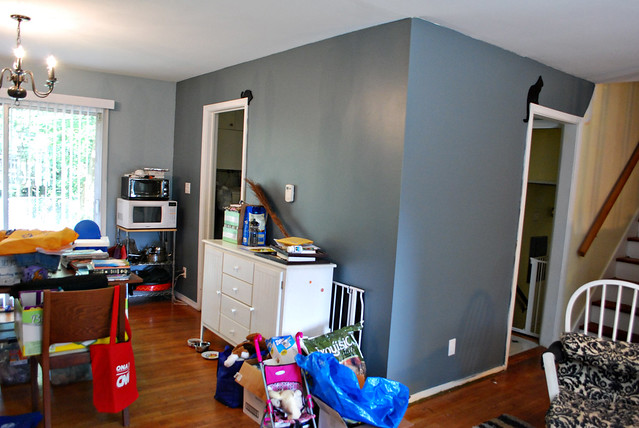
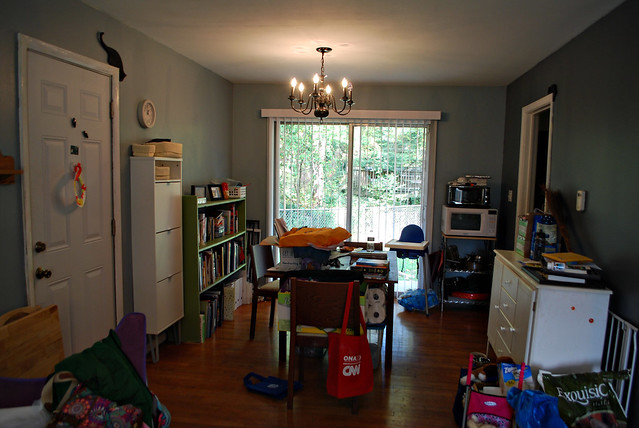
Here are before pictures:
Living Room

Living Room

Dining room

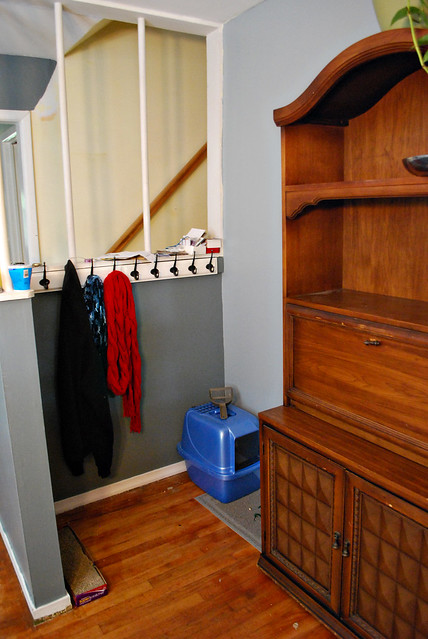
New hooks in the foyer

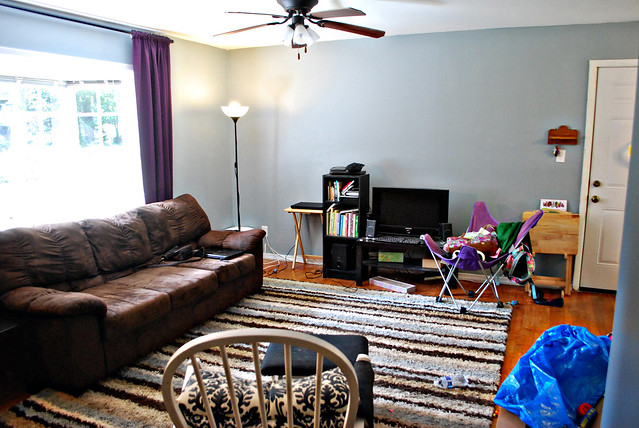
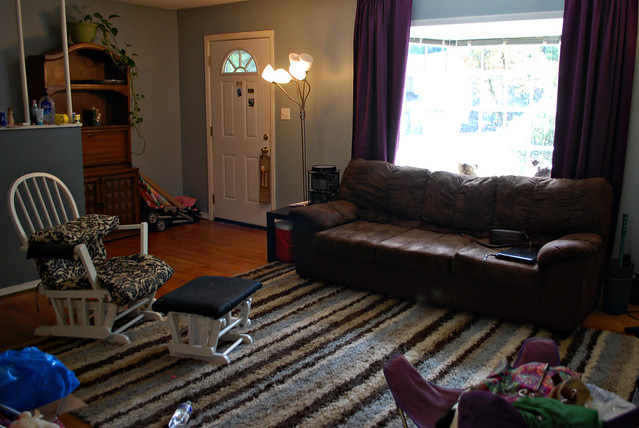
And the after pictures! It’s definitely a lot darker, but I was wanting to go darker than the yellow with more of a contrast between the walls and the white trim. We have more to do – there is some of the trim left to be painted, and I still have a ways to go until all our “stuff” is cleaned up, and I hope to hang pictures.

Living room

Living room

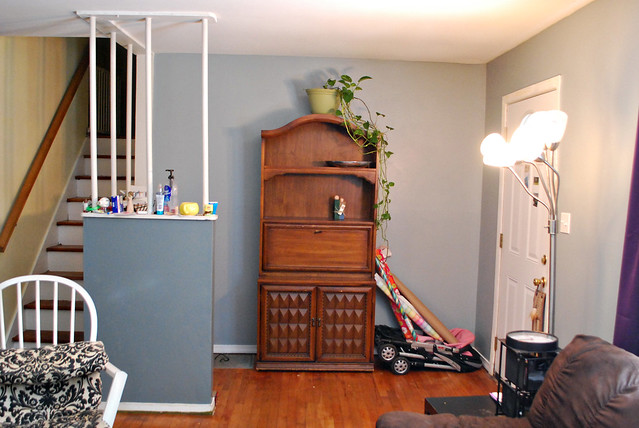
We switched the green bookcase in the foyer with this secretary that was in the dining room.

Foyer

Foyer

Our dining room is a mess right now, so please pardon all the clutter. I am working on cleaning and purging, but we’re still far from being done. The green bookcase is only here temporarily… I haven’t decided yet what I want to do with the space. Also, you’ll see the white shoe rack… I realize I never blogged about that. Will have to do that. ;-)
Dining room

Dining room

One of the really awesome things we did was paint all the baseboards. I will have to find a “before” picture to show how awful they looked, and the fresh coat of paint really did a lot to finish things off. Also, another thing my dad did was to replace all the old off-white outlets with white ones, as well as the old light switches with new white switches. It looks sooo much better!

Painted baseboards

We still have a ways to go before I feel “done”, but having a new coat of paint really does make a difference.

10/19/13

trying to pick a new wall color

When we moved to this house, I chose a light yellow paint for the entire house (except the kitchen and bedrooms). We had to paint – the house reeked of curry – but I wasn’t at a point where I could think about the best color for each individual room. I wanted something mostly neutral that I could live with for a while, and planned to repaint later down the road when I had more of an idea of where I was headed with the room design. I’m pleased with the color we chose, but now I’m ready for a change.

I want to focus on the living room first, since that’s where we spend most of our time. We have done some work to it, but we have yet to add any pictures or other decor. My plan is to start with the wall color and work from there. Here is where our living room stands right now:
Living Room

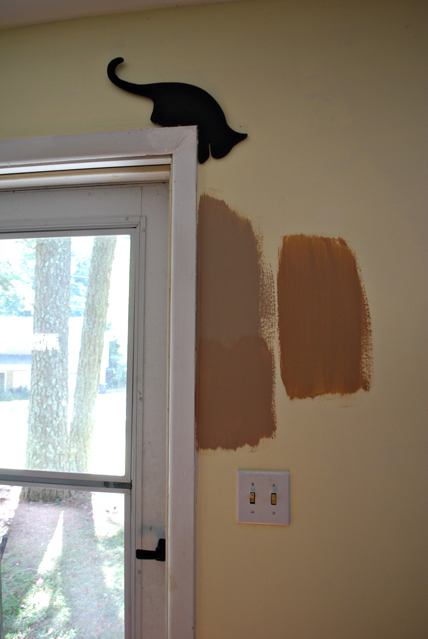
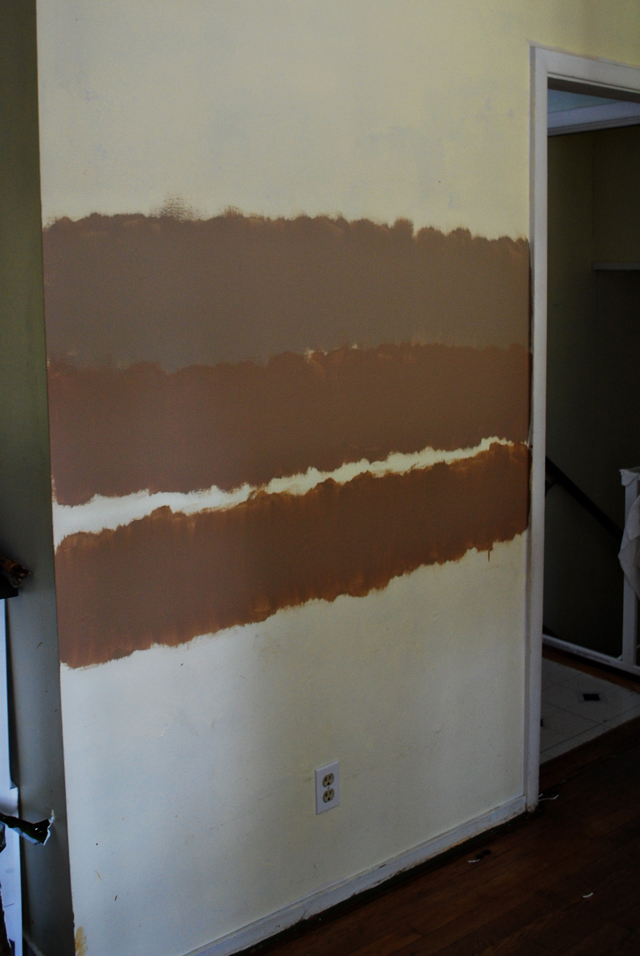
Basically, we have browns going on here. I’m a little tired of the really light walls so I am hoping to go a bit darker, but still neutral. I went to the store and got samples of three browns, trying to match the rug. Here they are:

DSC_1750

It was really difficult to get an accurate picture of the colors, especially trying to compare them to the space and the other items in the room. I also painted larger strips on the wall across from the couch.

DSC_1747

I’ve been staring at them the past week and have decided I don’t like any of them, so I’m back at square one. I actually am not good at picking out paint colors (surprising since I have a degree in graphic design). Painting that wall has helped in that it’s made me realize I have to take into account some other colors, like our wood floors and our dining room table and secretary. Also, I don’t want to be too tied to the rug because while I like it okay, it has gotten damaged in a few areas and I’m not sure if it’s a long term item in our room.

The curtains in the picture above are not staying. I put them up because I had them already, but have since learned that my cats like to climb/sharpen their claws on them. So the curtains will stay until I figure out a solution that will work for everyone.

I am wondering if blue paint would be nice? I know you’re not supposed to do blue for dining rooms, but I could see it working in the living room.

I think I’ll run to Home Depot and see if I can find a new color. I’m hoping to paint this week!

09/25/13

Cutting down the azaleas!

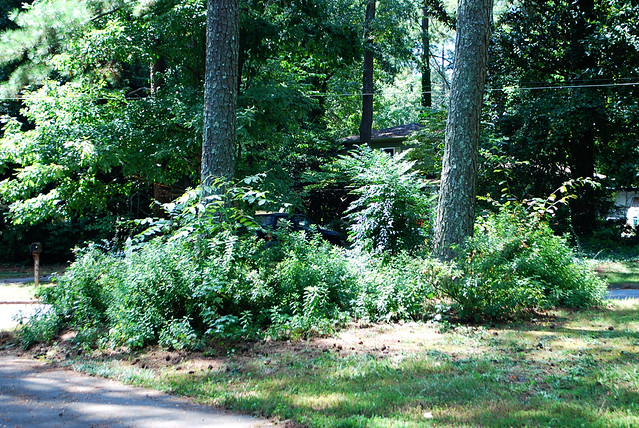
At the end of our driveway, we have several clumps of bushes that were at one point intentionally landscaped by a previous owner. We know nothing about plants, so we have mostly let them go, occasionally pruning them in a completely uneducated way. One of the clumps of bushes are azaleas, which are some of my favorite flowers. Here they are in full bloom:

Azaleas

Azaleas

The pretty flowers were keeping me from cutting them back, but they were really too high and tall. Cars could park on the street on the other side of the bush, and would be completely obstructed from view from the house. It also made backing out the driveway a little dangerous. I couldn’t really find a “before” picture, but hopefully you can get the idea from this picture:

Loves her balloon!

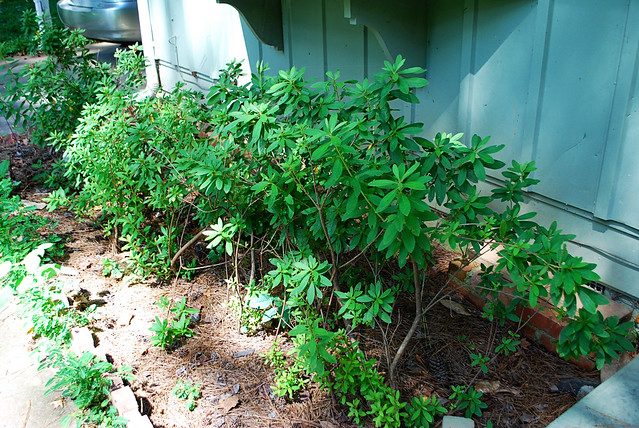
My sister was visiting, and while she was here did a lot of work to cut back the azaleas – she couldn’t find the original bushes. It seemed to her that a layer of mulch/dirt/pine straw was placed over the original bush, or something like that. She didn’t have enough time to finish, but she did get it cut down and thinned out a lot. I took this picture today.

Cut back azalea bushes

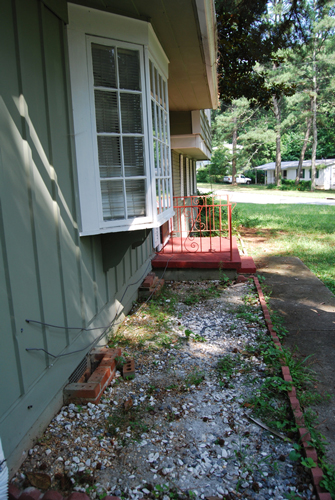
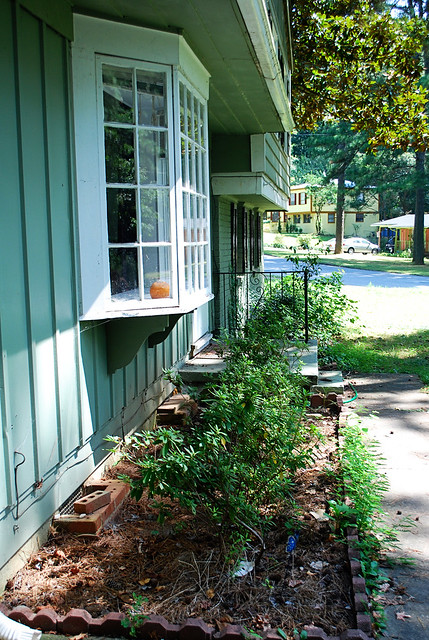
We still need to do more, especially with removing all the non-azalea plants. But for now, this is good. As far as the parts that my sister cut off – she transplanted them to the front flower bed under our bay window. We weren’t sure if they would take, but this past spring they bloomed! And I noticed today that there are new leaves, which should hopefully fill out the whole area. I’m excited for how it looks!

Front flower beds

So as a reminder, here is what it looked like when we moved in:
DSC_1123

And here is what it looks like now:
Front porch

09/23/13

Dehumidifier: why didn’t we get one earlier?!

dehumidifier2

When we moved into our house 4 years ago, the inspector told us that because of the way it was constructed and vented, we should always expect to have high humidity levels in our hours. No worries, we thought. That was something that doesn’t bother us as much. However, this summer it was  getting almost unbearable. It rained sooo much this summer – we’re on track for having one of the wettest years on record. Needless to say, we were feeling the effects of that in the humidity level in our house.

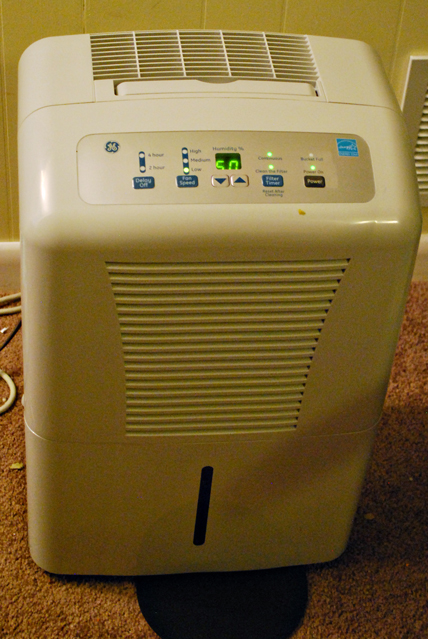
So, I started researching dehumidifiers. I tried to get one off Craigslist but was unsuccessful. There just weren’t many listed, and the ones I did contact never got back to me. I price-shopped online and went to several discount appliance stores only to find they weren’t in stock, and finally just ended up getting it at Home Depot. I went with a 50-pint size, which seemed to be the best size for our room. (I found this article really helpful for figuring out what size was best.) We got it in the evening and set it up in the den. When we woke up the next morning (about 11 hours later), the unit had automatically shut off because the tray was full of water. It ran all day and shut off about 12 hours later. Wow! We have run it continuously for about a month now, and have noticed a huge difference in our house. The average humidity level according to a thermometer/humidity gauge we have in our dining room, used to be around 60-70%, and perhaps higher if it was raining. Now, our levels are closer to 40%! We still empty it every 18 hours or so, but it hasn’t been too bad.

dehumidifier

The den especially feels more comfortable. That room has so much potential but looking back I’ve realized that the humidity in the room was really affecting how much time I wanted to spend there.

We one we purchased was a GE 50 Pint Capacity dehumidifier. They got good reviews from my online research, and it was the capacity we needed. (And I’m glad we didn’t go any smaller in capacity!) So far, we haven’t had any complaints. It does a great job, beeps and automatically shuts off when the tray is full, and is easy to empty. The only downside is it’s a little noisy. I can hear it humming even from upstairs. I’ve mostly gotten used to it, but sometimes when we’re in the den playing, I turn it off just to reduce some of the noise. We also think it does increase the temperature of the room slightly – we’ve noticed that we’ve been turning on a fan more frequently than we did before, but it doesn’t make the room hot or anything.

This has been a real help and I wish we’d gotten one long ago!

05/28/12

Coming home from vacation

We went on a little jog down to Orlando this weekend for my nephew’s 1st birthday! We had a wonderful trip. My brother and sister-in-law just moved into their new (old) house and I look forward to seeing what they do with it! Perhaps it will inspire me to work at decor in our house.

Coming home we were greeted with a slew of issues, which is frustrating.

Shortly before we left, we noticed our bathtub is leaking. We didn’t have time to deal with it before, so we need to figure out the problem and best solution now. The downside of having only one bath/shower! Fortunately our local Y (where we are members) has showers available.

Speaking of plumbing, we also came back to a dripping kitchen sink faucet. It wasn’t dripping before we left, and it isn’t bad, but it’s still something that needs to be dealt with.

We came home to find our mailbox on its side – apparently someone decided to take it out with their car, and drive off. Sigh. So today I went and bought a new mailbox, and now that Paul is home from work for the evening we’ll figure out how easy it will be to put up. (I’m 7 months pregnant and he has an injured hand – we’ll see!)

The last annoyance is our stairwell light is burned out. I know, very minor, but involve dragging a chair upstairs and taking down the light fixture. I’m mostly exhausted all the time which makes these types of projects difficult.

I’ll post pictures of our new mailbox once it’s up and my camera is back from the repair place.

05/23/12

front yard daydreams

I spend a lot of time daydreaming what I’d like to do with certain problem areas around our house. It tides me over while we’re in a position that we can’t really do anything, heh.

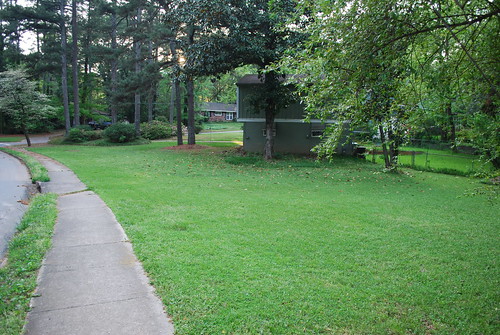
One problem area: We live on a corner lot. Apparently, people seem to think that means that we are totally fine with them cutting off the corner and walking right through our yard. This drives me nuts. I feel like it’s rude and it makes me uncomfortable that they walk so close to our house. (How easy would it be to grab something off the carport?) Also, I worry a little that by letting someone on our property and not doing anything to stop it might invite a potential lawsuit later if they should injure themselves somehow and sue me. Yay, America and our court system. I’m sure that isn’t a very common scenario, but I’ve also been around enough people who have found themselves at the wrong end of a lawsuit to know that fighting something like that is tedious and expensive.

And just to illustrate, I added a blue line to approximate where people are generally cutting across:

Doesn’t it look nice and inviting to cut across?
From the edge of our yard

And by the way, 99% of the people cutting across the property are adults. I actually have only once seen kids cut across. So they are very definitely people who should know better!

I have been brainstorming about putting up a fence to take care of this problem. A fence would also give me some peace of mind about making it more difficult for toddlers to run into the street. I have gone back and forth, and have decided that a fence along the shorter side would be cheaper and still look nice. Here is what I’m talking about:

Our yard on the other side

Here are my thoughts about what we should do…

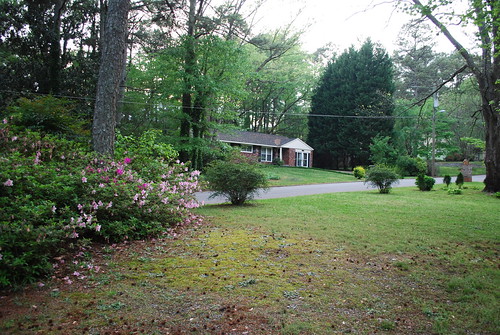
First off, I’d like to remove the two random bushes. I don’t know if they can be moved to elsewhere in our yard, or if we should rehome them. I’ll have to look up what kind of bushes they are. :-) On the left side of the picture, you’ll see some gorgeous azalea bushes. I think they’re beautiful, but they are not in a good spot in our yard. It’s very difficult (read: impossible) to see if anyone is coming when you are backing out of our driveway. Also, if a car parks behind them, I can’t see the car at all from the house or the driveway – which makes me nervous and a safety hazard in my opinion. So transplanting the azaleas is something that needs to happen regardless.
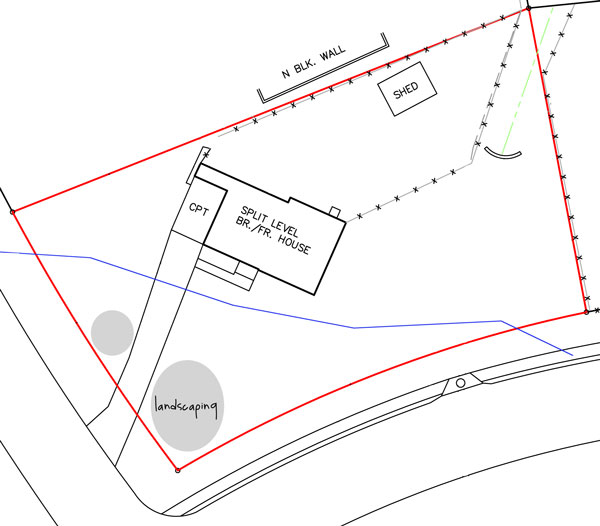
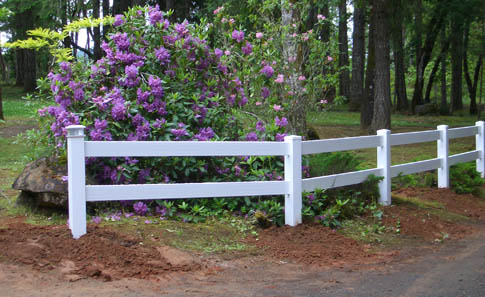
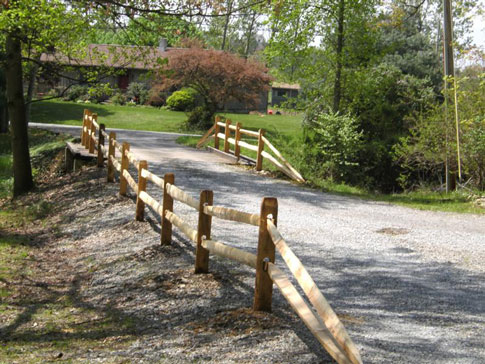
Once the bushes are gone, I’d like to put a fence along the road and up our property a bit to made a corner. (I need to research setback laws for our county.) I am leaning towards a white ranch fence, or perhaps a split-rail. Something like these:

(Images from here and here)

From the very brief pricing I have done, they would be about the same price for the 100ft. length (no gates) we’re talking about. I also have visions of a pretty flowering climbing vine along the fence, or just flowers, to make it appealing to the eye. Of course, I know nothing about plants so I’ll have to talk to someone about that. :-)

So what do you think? Do you prefer ranch rail or split rail? (Picket fence would also work, but it seems a lot more expensive.) What flowering vine would look nice?

05/1/12

And suddenly our priority list changes…

A week or two ago, we had our first house-related emergency. Well, we’ve had the HVAC unit die twice, but both were fairly inexpensive fixes. This time, however, was not so cheap.

I believe I’ve mentioned before that our house has the original galvanized pipes. Galvanized pipes were common when this house was built in the 60s, but they are not the pipes of choice nowadays due to the fact that they break down. We knew fairly early on that we’d need to replumb the whole house someday. It was on our list, but not one of the priorities.

Shortly after a big rainstorm, I noticed there was a puddle in front of our house that hadn’t been there before. Since it had recently rained, I didn’t think much of it. Several days – perhaps even a week went by – before I realized that the puddle never went away. One Sunday, Paul crawled down to the crawlspace to take a look, and noticed it was particularly damp at the edge by the area of the puddle. My uncle (a handyman) came by and he and Paul dug around the area to find this:

A leak!

Yep, we were pretty sure our pipes were leaking! Specifically, the main water supply line that brings the water in from the street. We contacted a plumber who came out the next day and confirmed our diagnosis. He gave us a quote for a new pipe, and instructed us to contact Georgia 811 to mark the utilities before he dug.

Savannah supervises

It was all fairly painless, though we turned off the water for several days. We turned it back on in the evenings, but it was an interesting lesson in appreciating water! I never realized before how dirty my daughter got until I couldn’t wipe her mouth/face/hands/etc.

Our pipes are already deteriorating and we decided a long time ago not to drink the water. Here’s a sample of the water from our kitchen faucet after being gone for the weekend:
Our lovely tap water that we don't drink

Yeah, now you can see why we opt for bottled water!

03/24/12

Why yes, we do have a master bedroom!

You’ve probably noticed a shortage in pictures talking about our master bedroom. The truth is it’s the bedroom that is cleaned the least often and I’ve just not wanted to display that for the whole internet to see. :-) In fact, today when I finally tackled our room, I discovered screws and tools on the dresser from when we put together the furniture after moving in 2.5 years ago. Yeah….

So here is the only “before” picture I took:

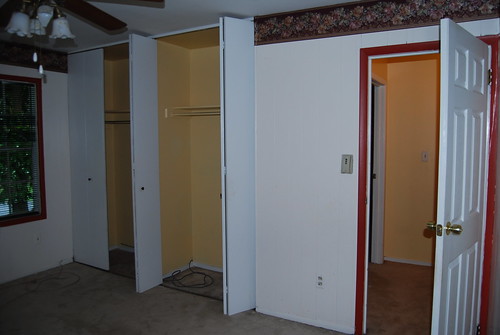
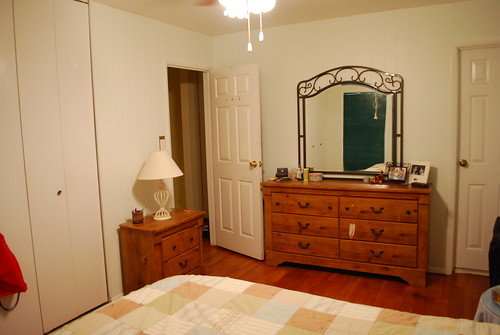
Master bedroom

As you see, the bedroom was paneling painted white with red trim around the windows and doorway. There was also the lovely borderprint that matched the stuff in the living and dining room. The room was carpeted, and the inside of the closets were painted yellow.

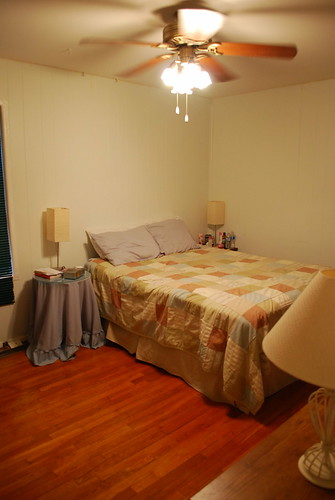
Here’s an after shot, taken today (though 90% of the work we did was done in the first month of owning the house):
Our bedroom

Some of the things we did:
– Removed the borderprint.
– Painted the paneling a very light blueish color. It really doesn’t show up in pictures, but I love it in real life.
– Painted all the trim around windows & doors white, to match the rest of the house.
– Pulled up carpet to reveal gorgeous hardwood floors underneath. They’re in great shape because they’ve been covered by carpet for so long. We did get them refinished when we refinished all the floors before we moved in, but these didn’t need much to make them beautiful.
– Painted the inside of the closets white (as we did in all the other bedrooms). It makes SUCH a difference in my opinion.
– Installed a light switch because there wasn’t one.

From the same angle as the “before” picture.
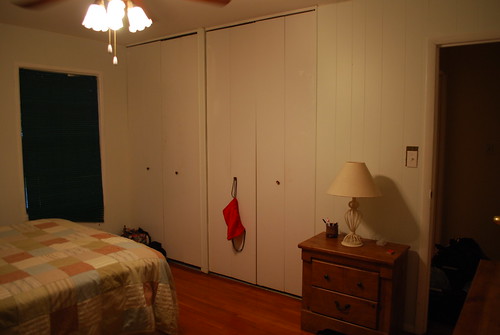
Looking towards the closets - doors closed

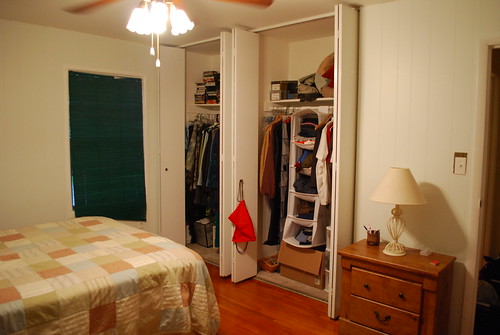
Let’s face it, we never leave our closet doors closed. :-)
Looking towards the closets - doors open

Looking in the other direction…
Nightstand, door, dresser

Closet doors on the left, door to the hallway in the middle, and door to the bathroom on the right. We don’t use the door to the bathroom and keep it locked all the time.

Now that I’ve gotten all these pictures taken… I’m actually going to be selling our furniture pretty soon. It doesn’t fit well in our room, and we had to completely take the headboard & footboard off because it made the bed too long for the space. Here’s a picture of the headboard and footboard from a previous apartment – it matches the dresser and nightstand, which we bought all together. I’m still trying to figure out a good solution to our needs. The room is a bit difficult to arrange furniture because of the doors and HVAC vent on the floor. Also, while I LOVE the medium wood color of the current furniture, I’d like something that contrasts the floor a bit more. I haven’t decided anything yet… but these things are all what’s on my mind.

We also cut our grass in our backyard for the first time, and I’ll post pictures of that later! (It looks like an actual yard now!)

02/13/12

Finally! pictures of our backyard

Paul found the charger to the camera battery, and I was finally able to take pictures today!

We got the seed laid around the end of October. In retrospect, that wasn’t the best idea, because then all the leaves fell and we were unsure of how to rake them up without disturbing the new seeds. We were worried if we *didn’t* rake them, then it would hurt the ability of the seeds to grow. I did rake parts of the yard, and I have noticed now that the parts of the yard I didn’t rake look more sparse. If I remember correctly, with this type of grass we will need to reseed every spring – I need to investigate that more thoroughly though.

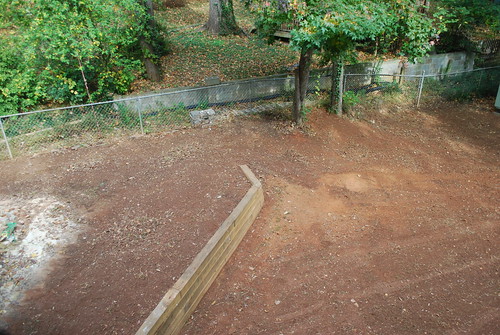
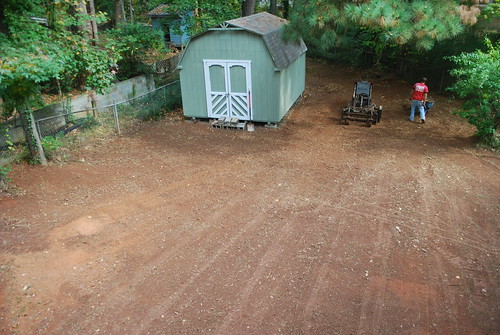
Newly graded and weed-free backyard! (for now)

You can see the areas where they graded the dirt.

Newly graded and weed-free backyard! (for now)

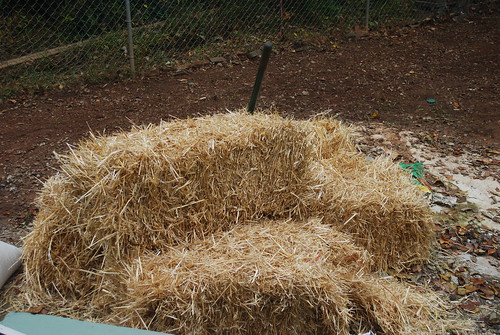
Then they seeded, and put straw down!

Hay for the backyard

Then came the task of watering. We watered the entire yard for 30 minutes a day every day for one week, then every other day for 2 or 3 weeks. Because we only had one spigot and one sprinkler, we had to do it in 4 segments to cover the whole yard. It took about 2 hours each time! I was glad when we were finished with that obligation.

Seeded & covered with straw

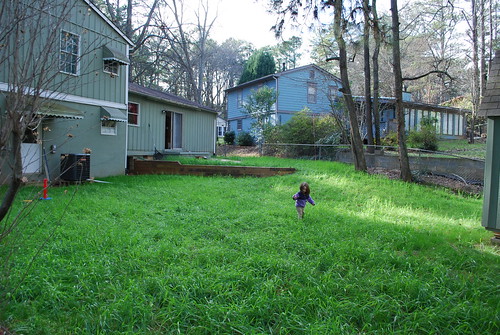
I took the following pictures today, about 3.5 months later.

New grass

My daughter LOVES running around in the backyard. Some of the grass is really long, and some is still short and looks like “baby” grass.

New grass

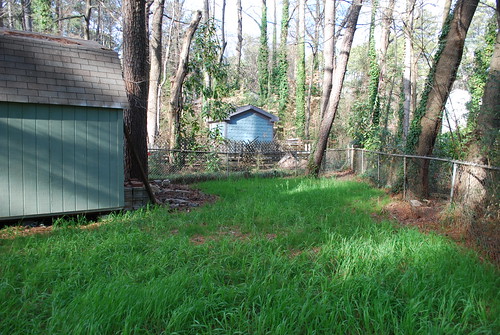
We planted grass behind the shed too, which helped clean up the area a bit. We slowly had to clean up that area the past 2.5 years – there was a LOT of junk and trash back there. You can still see a big pile of cinder blocks (from the old retaining wall) – we tried to stack them as neatly as possible, saving them for future use if we need them.

Behind the shed

I think we’ll mow it within the next month, getting it all the same length. Then we’ll be able to see the holes and if we need to reseed any particular area. I’ll have to do some research on the maintenance of this grass.

It’s really BRIGHT. It’s funny to look at it from the road because the grass in our side yard is faded and yellowish, and this grass is such a brilliant and vivid green color. Hopefully in the summer the colors will even up. I can’t wait to take official “after” pictures. :-)