01/18/16

Our kitchen’s major transformation

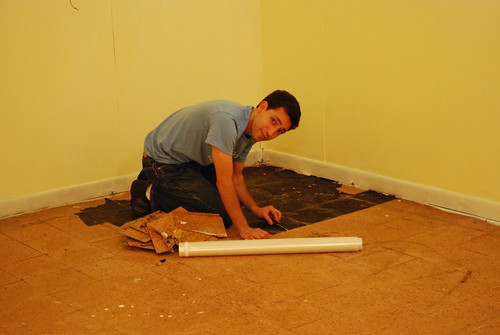
I was going to wait until the end of my posts to share pictures of my favorite part of the renovation, but I finally took after pictures today and am so excited to post them that I decided not to wait. :-) I have a bunch of in-progress pictures that I’ll share at a later date – I’m still sorting through them and trying to decide how much to post.

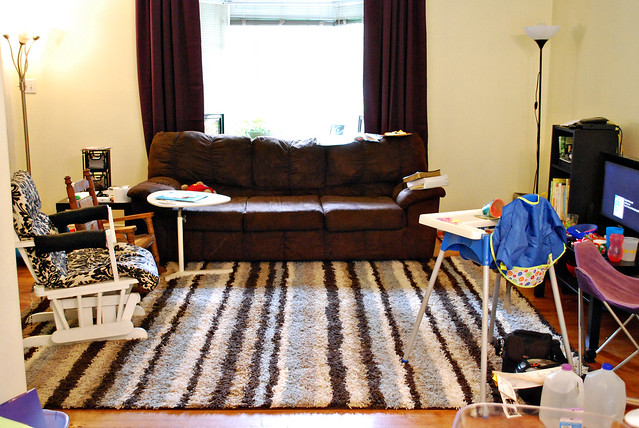
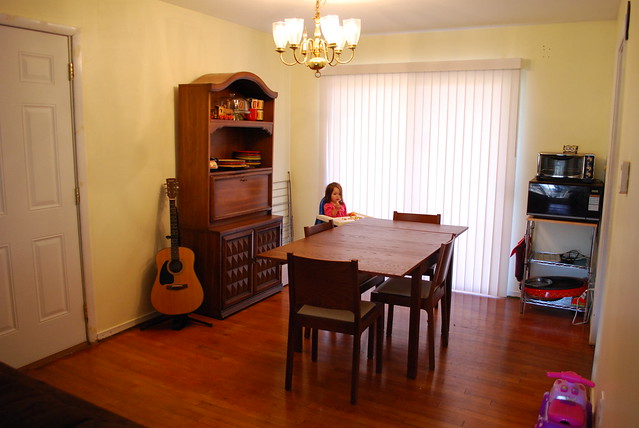
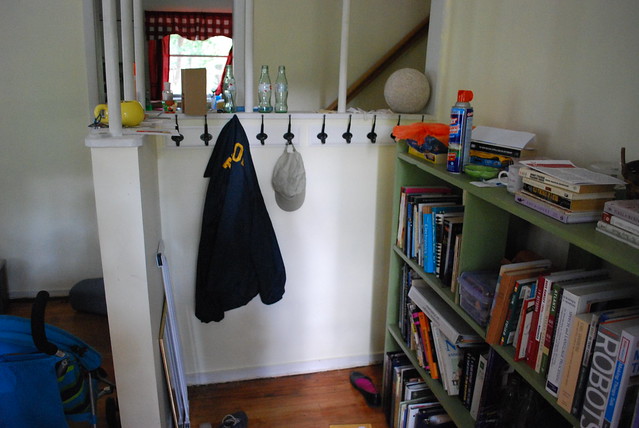
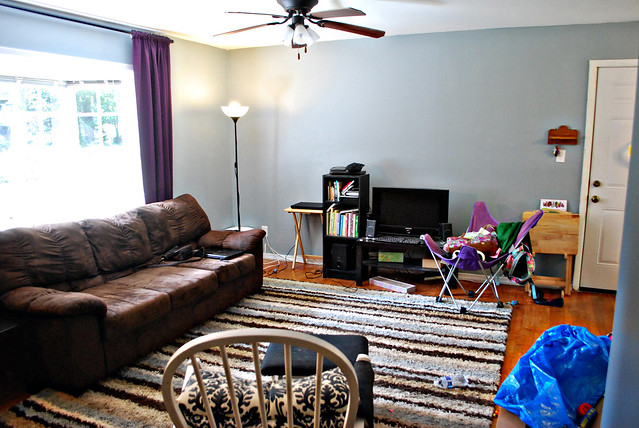
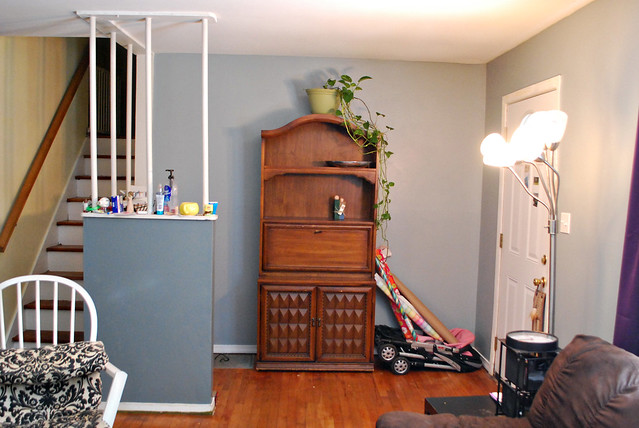
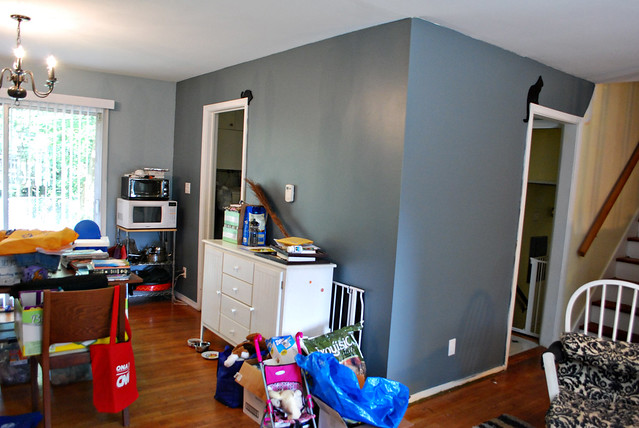
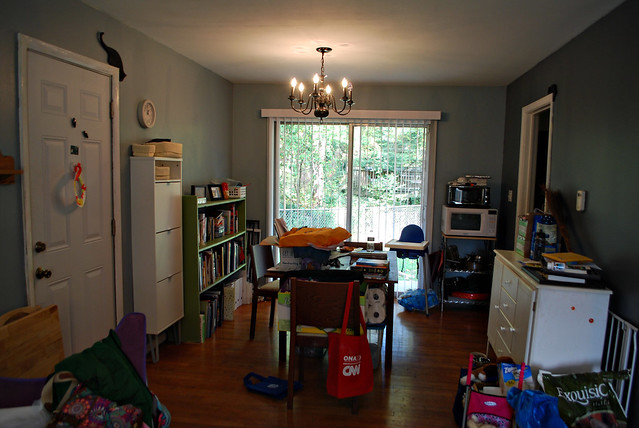
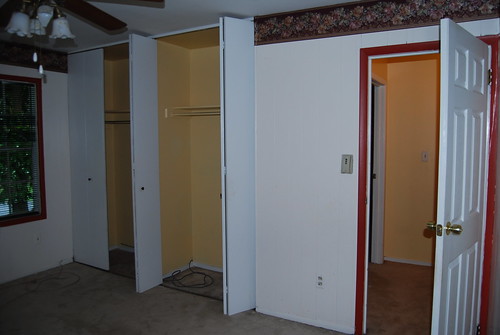
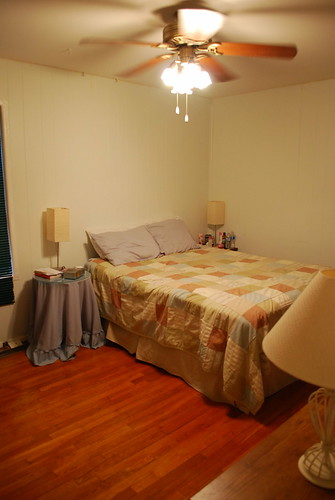
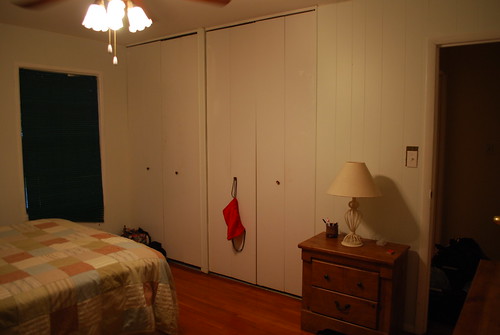
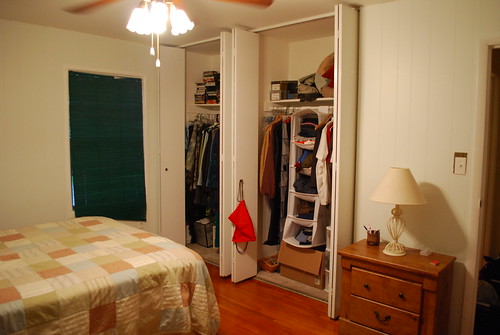
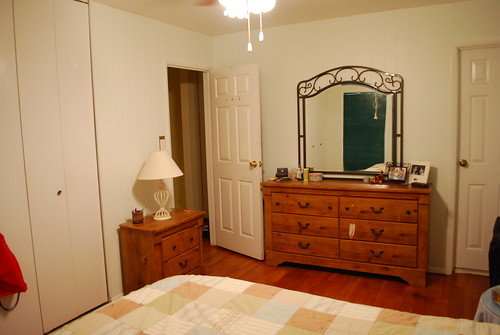
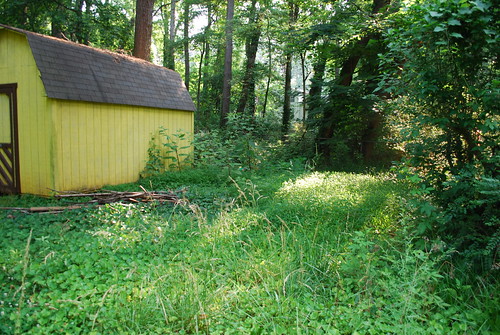
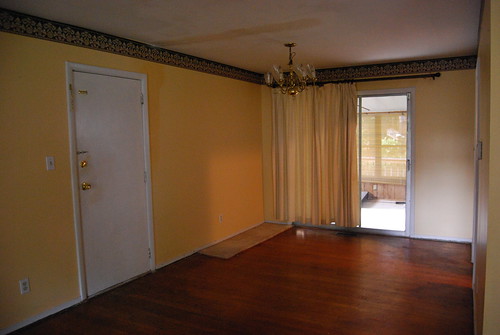
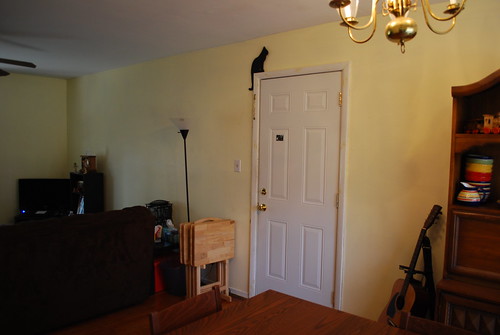
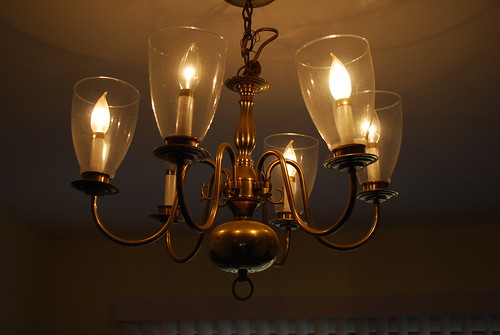
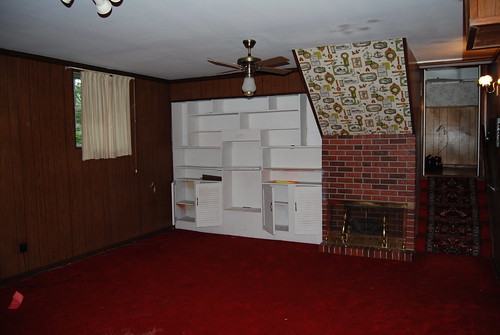
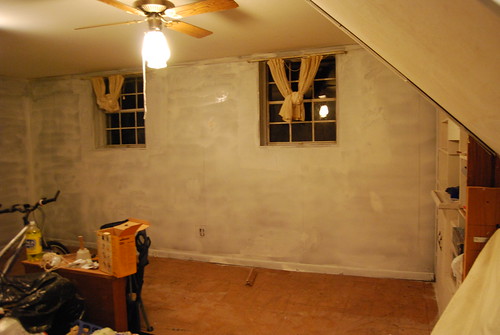
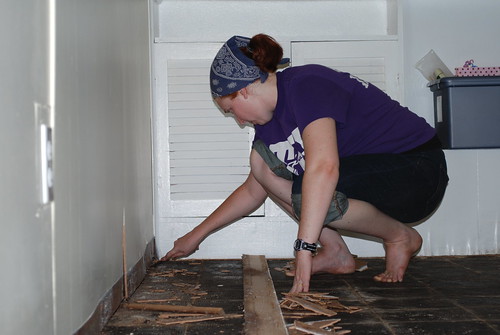
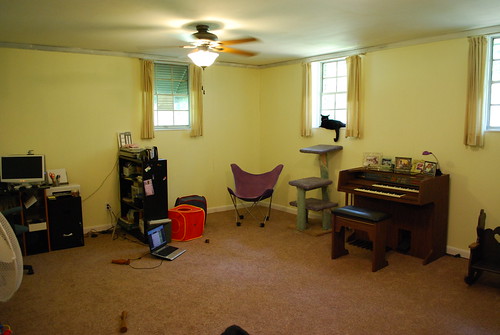
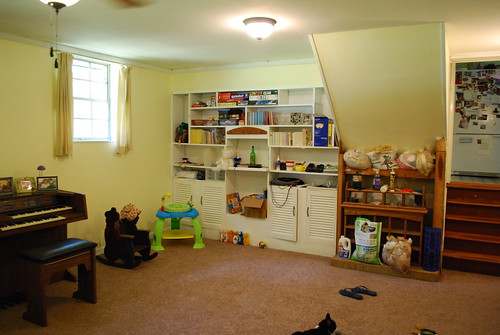
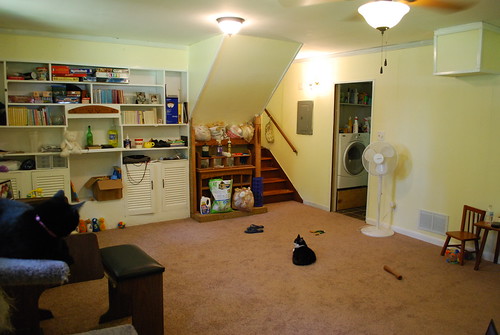
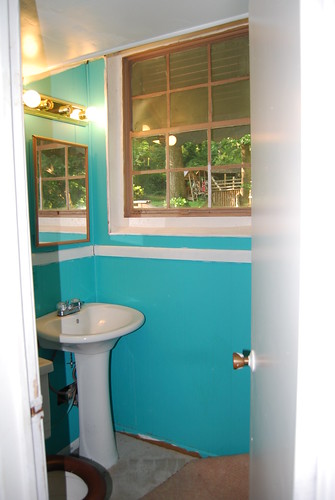
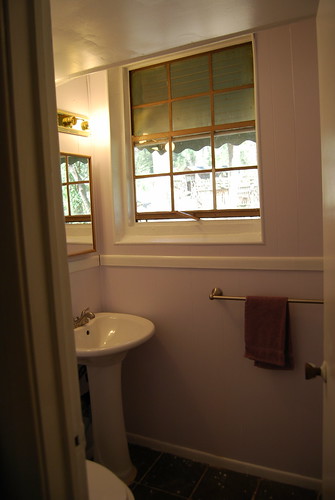
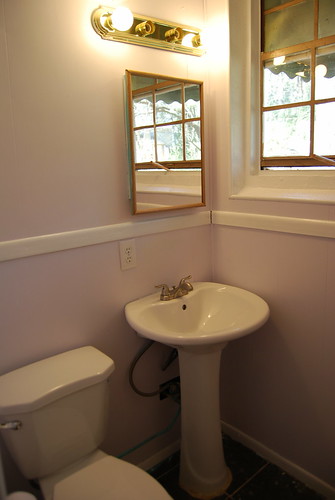
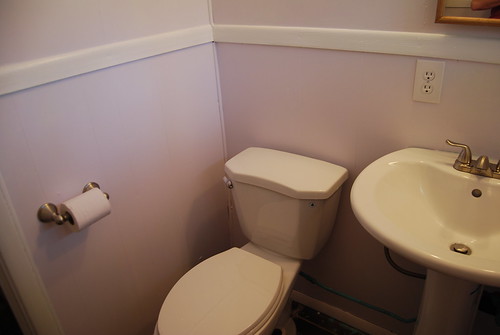
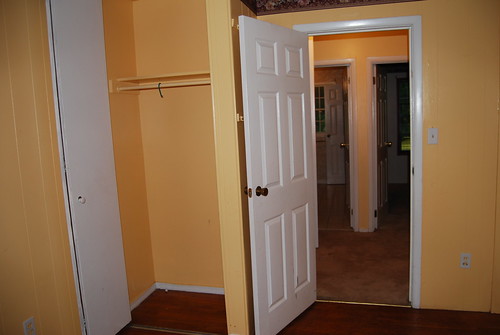
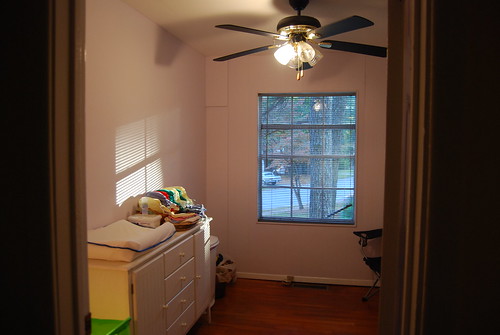
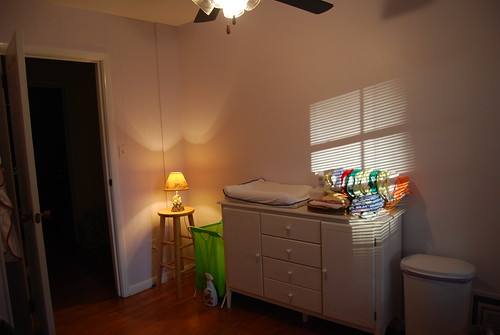
First, I will share pictures of our main level when we bought our house 6.5 years ago.

DSC_1136 DSC_1153 DSC_1157 DSC_1159

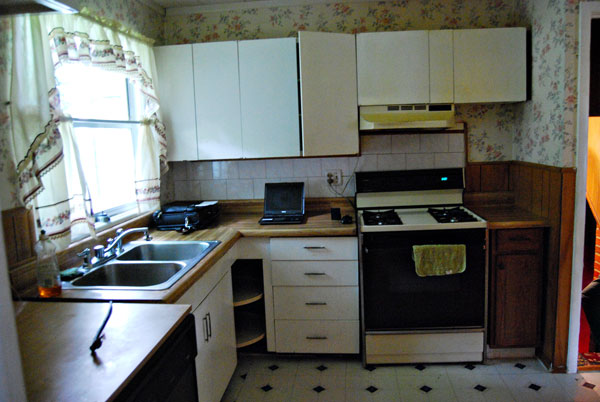
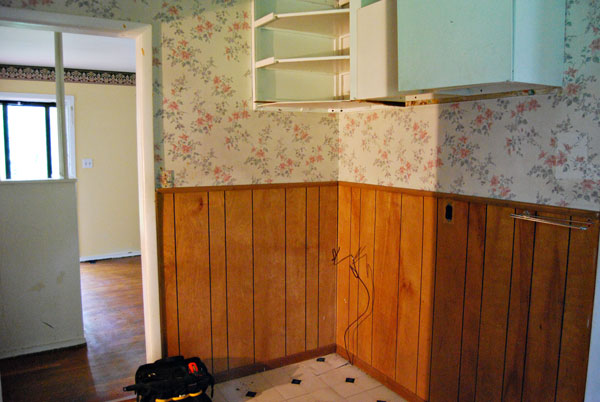
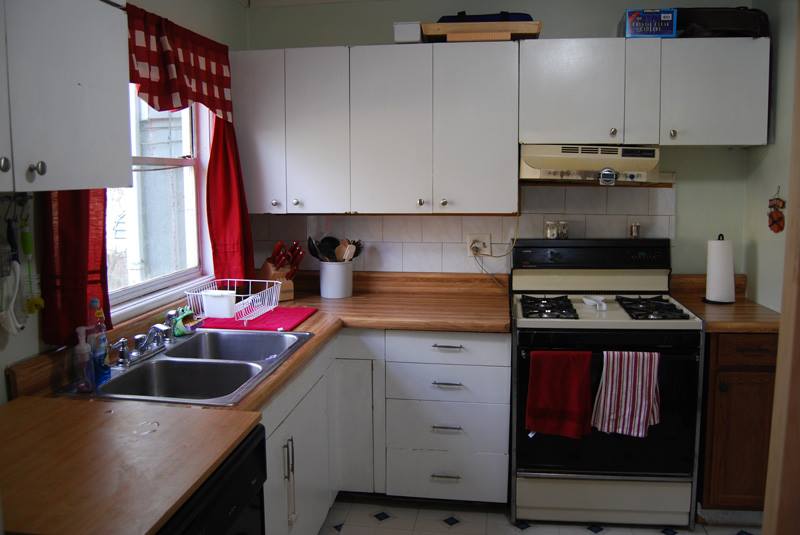
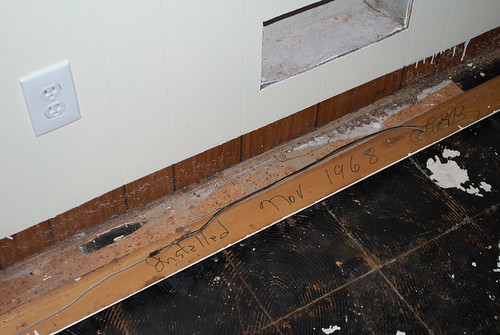
As you can see, it needed a bit of work. We did a bunch of painting when we first moved in, and then basically didn’t touch it for the next 6 years. I found it a very frustrating kitchen to work in – there was very little prep space, the cabinets were inefficient, and the portable dishwasher – while better than nothing! – was very annoying after a while. I did love the butcher block look of the laminate counter, but it was starting to come up in places and was not looking so great anymore.

10405340_837502128653_5479027832417978633_n 10990012_837502143623_5830833177615132226_n

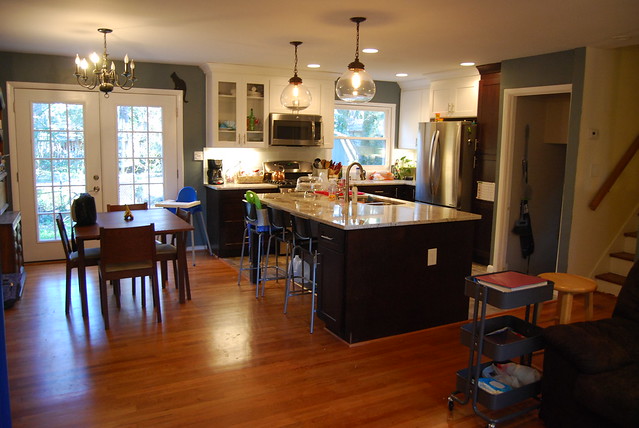
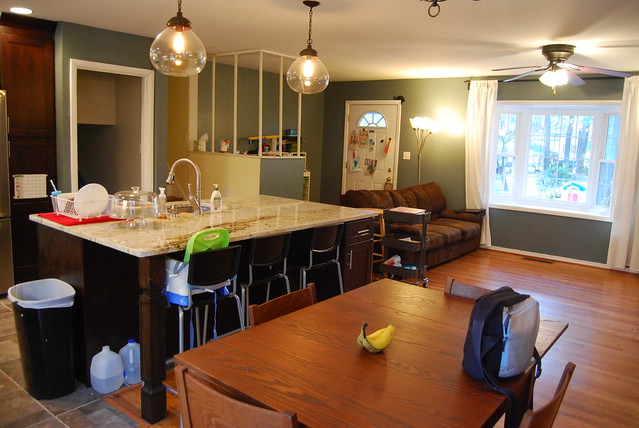
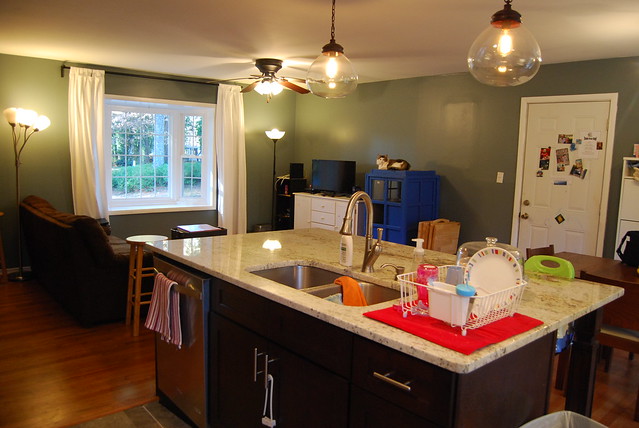
So basically, we gutted the whole kitchen. And the result is fabulous! I’m just going to inundate you with pictures now.

Kitchen Renovation: After!

Kitchen Renovation: After!

Kitchen Renovation: After!

Kitchen Renovation: After!

Kitchen Renovation: After!

Kitchen Renovation: After!

Kitchen Renovation: After!

Kitchen Renovation: After!

Kitchen Renovation: After!

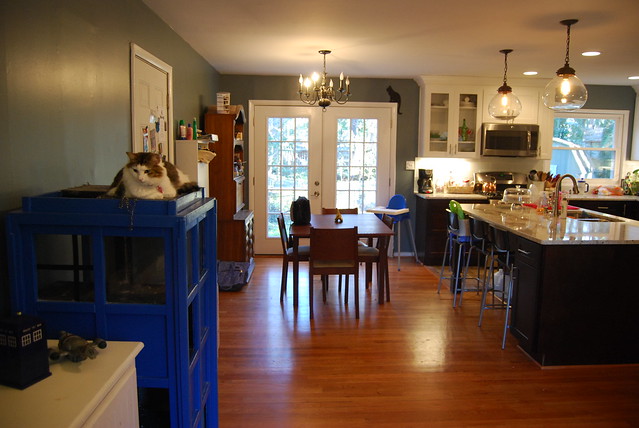
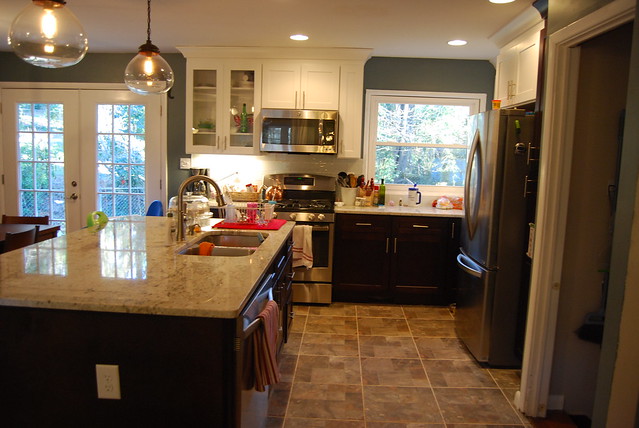
As I said, the kitchen was gutted and basically everything is new. But, here is a list:
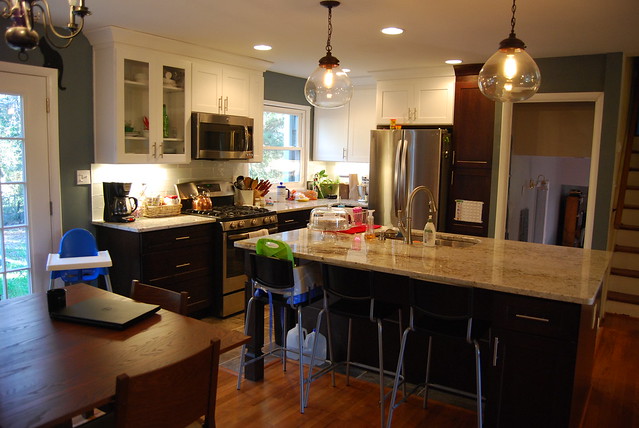
– removed 2 walls to open up the kitchen to the rest of the house
– replaced laminate peel & stick tile with porcelain tile on the floor
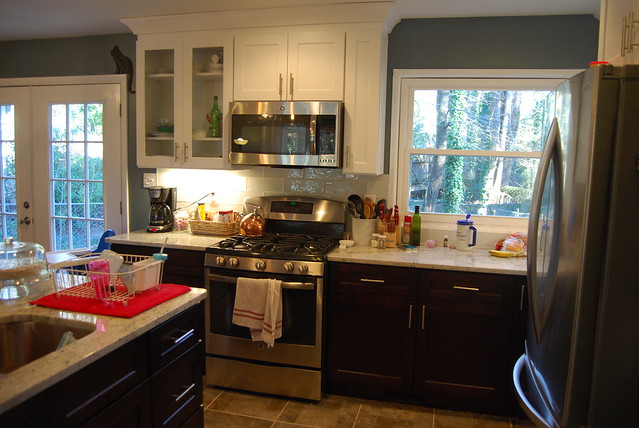
– window replaced with double-pane window
– sliding glass door replaced with French doors
– single light in the center of the kitchen replaced with 4 canned lights, 2 pendants over the island, and under cabinet lighting
– electrical updated (in the kitchen only) and proper GFI outlets installed
– HVAC vent moved to a toe-kick under the window
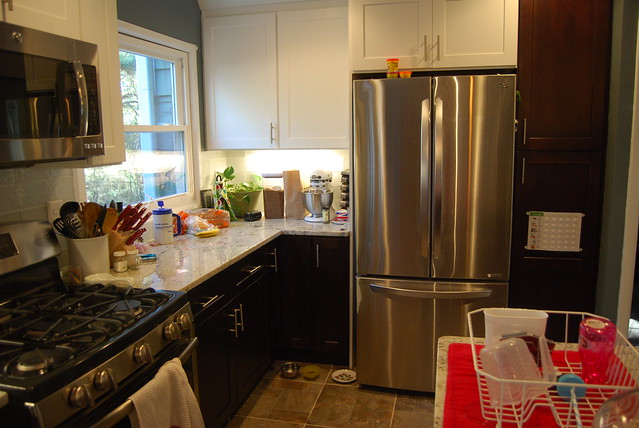
– appliances rearranged: fridge went where the stove was, stove moved to where the dishwasher was, and sink moved to the island and built-in dishwasher moved next to sink
– all new cabinets: white upper and espresso lower
– island installed in the area where the walls and fridge had been
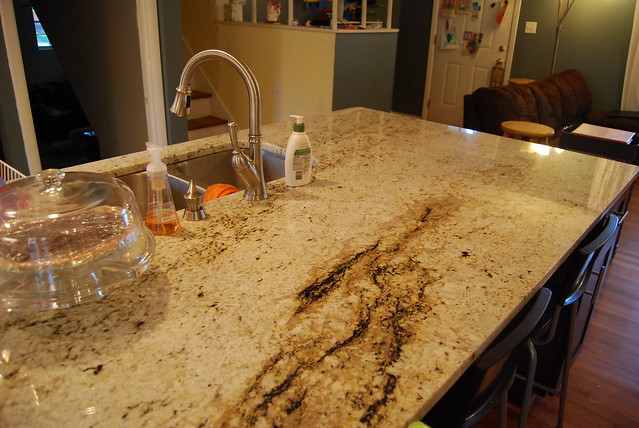
– granite counters installed
– kitchen, dining room, living room, and foyer painted
– white glass subway tile installed as a backsplash
– new stainless steel appliances: refrigerator, gas stove, microwave, and dishwasher
– new sink and faucet
– hardwood floors refinished (sanded and sealed)

Whew! And that’s not even an exhaustive list of all the work that was done, period. I would like to go into more detail about the process and what I’ve learned about everything (ha!), but for now I will say I am so, so happy with how it turned out. I have really been enjoying cooking dinner every night, which is good because after eating out for 3.5 months straight I am ready for homecooked meals again! ;-)

10/27/13

unveiling… a new look for the living area!

I will do an official before and after later when I clean up and finish the decor, but I wanted to share initial pictures to show off our new paint color.

When we bought our house, we painted every wall and ceiling. The living/dining room was the last room to be done, and at the same time Atlanta had the “500 year flood” where it poured heavily for 8 days straight. We couldn’t get the paint to dry (if only we’d had a dehumidifier then!), and we ended up moving in without being able to finish painting. We predictably never put on the final coat. For four years the splotchy and unfinished paint job has annoyed me. Finally this weekend with the help of my parents we rectified that!

It took me a while to decide on a color. I am very happy with the blue we chose. On the exterior walls, we did a lighter shade that was Behr Flint Smoke. On the interior walls, we did an accent color of Behr Nature Retreat. (You can see the whole paint family here.)

Here are before pictures:
Living Room

Living Room

Dining room

New hooks in the foyer

And the after pictures! It’s definitely a lot darker, but I was wanting to go darker than the yellow with more of a contrast between the walls and the white trim. We have more to do – there is some of the trim left to be painted, and I still have a ways to go until all our “stuff” is cleaned up, and I hope to hang pictures.

Living room

Living room

We switched the green bookcase in the foyer with this secretary that was in the dining room.

Foyer

Foyer

Our dining room is a mess right now, so please pardon all the clutter. I am working on cleaning and purging, but we’re still far from being done. The green bookcase is only here temporarily… I haven’t decided yet what I want to do with the space. Also, you’ll see the white shoe rack… I realize I never blogged about that. Will have to do that. ;-)

Dining room

Dining room

One of the really awesome things we did was paint all the baseboards. I will have to find a “before” picture to show how awful they looked, and the fresh coat of paint really did a lot to finish things off. Also, another thing my dad did was to replace all the old off-white outlets with white ones, as well as the old light switches with new white switches. It looks sooo much better!

Painted baseboards

We still have a ways to go before I feel “done”, but having a new coat of paint really does make a difference.

03/24/12

Why yes, we do have a master bedroom!

You’ve probably noticed a shortage in pictures talking about our master bedroom. The truth is it’s the bedroom that is cleaned the least often and I’ve just not wanted to display that for the whole internet to see. :-) In fact, today when I finally tackled our room, I discovered screws and tools on the dresser from when we put together the furniture after moving in 2.5 years ago. Yeah….

So here is the only “before” picture I took:

Master bedroom

As you see, the bedroom was paneling painted white with red trim around the windows and doorway. There was also the lovely borderprint that matched the stuff in the living and dining room. The room was carpeted, and the inside of the closets were painted yellow.

Here’s an after shot, taken today (though 90% of the work we did was done in the first month of owning the house):
Our bedroom

Some of the things we did:
– Removed the borderprint.
– Painted the paneling a very light blueish color. It really doesn’t show up in pictures, but I love it in real life.
– Painted all the trim around windows & doors white, to match the rest of the house.
– Pulled up carpet to reveal gorgeous hardwood floors underneath. They’re in great shape because they’ve been covered by carpet for so long. We did get them refinished when we refinished all the floors before we moved in, but these didn’t need much to make them beautiful.
– Painted the inside of the closets white (as we did in all the other bedrooms). It makes SUCH a difference in my opinion.
– Installed a light switch because there wasn’t one.

From the same angle as the “before” picture.
Looking towards the closets - doors closed

Let’s face it, we never leave our closet doors closed. :-)
Looking towards the closets - doors open

Looking in the other direction…
Nightstand, door, dresser

Closet doors on the left, door to the hallway in the middle, and door to the bathroom on the right. We don’t use the door to the bathroom and keep it locked all the time.

Now that I’ve gotten all these pictures taken… I’m actually going to be selling our furniture pretty soon. It doesn’t fit well in our room, and we had to completely take the headboard & footboard off because it made the bed too long for the space. Here’s a picture of the headboard and footboard from a previous apartment – it matches the dresser and nightstand, which we bought all together. I’m still trying to figure out a good solution to our needs. The room is a bit difficult to arrange furniture because of the doors and HVAC vent on the floor. Also, while I LOVE the medium wood color of the current furniture, I’d like something that contrasts the floor a bit more. I haven’t decided anything yet… but these things are all what’s on my mind.

We also cut our grass in our backyard for the first time, and I’ll post pictures of that later! (It looks like an actual yard now!)

02/13/12

Finally! pictures of our backyard

Paul found the charger to the camera battery, and I was finally able to take pictures today!

We got the seed laid around the end of October. In retrospect, that wasn’t the best idea, because then all the leaves fell and we were unsure of how to rake them up without disturbing the new seeds. We were worried if we *didn’t* rake them, then it would hurt the ability of the seeds to grow. I did rake parts of the yard, and I have noticed now that the parts of the yard I didn’t rake look more sparse. If I remember correctly, with this type of grass we will need to reseed every spring – I need to investigate that more thoroughly though.

Newly graded and weed-free backyard! (for now)

You can see the areas where they graded the dirt.

Newly graded and weed-free backyard! (for now)

Then they seeded, and put straw down!

Hay for the backyard

Then came the task of watering. We watered the entire yard for 30 minutes a day every day for one week, then every other day for 2 or 3 weeks. Because we only had one spigot and one sprinkler, we had to do it in 4 segments to cover the whole yard. It took about 2 hours each time! I was glad when we were finished with that obligation.

Seeded & covered with straw

I took the following pictures today, about 3.5 months later.

New grass

My daughter LOVES running around in the backyard. Some of the grass is really long, and some is still short and looks like “baby” grass.

New grass

We planted grass behind the shed too, which helped clean up the area a bit. We slowly had to clean up that area the past 2.5 years – there was a LOT of junk and trash back there. You can still see a big pile of cinder blocks (from the old retaining wall) – we tried to stack them as neatly as possible, saving them for future use if we need them.

Behind the shed

I think we’ll mow it within the next month, getting it all the same length. Then we’ll be able to see the holes and if we need to reseed any particular area. I’ll have to do some research on the maintenance of this grass.

It’s really BRIGHT. It’s funny to look at it from the road because the grass in our side yard is faded and yellowish, and this grass is such a brilliant and vivid green color. Hopefully in the summer the colors will even up. I can’t wait to take official “after” pictures. :-)

09/29/11

A full weekend of painting!

As I mentioned, my parents were visiting last weekend. We spent three days working painting the shed and the back of our house where the add-on sunroom was. It looks so much better! I’ll share the before and after pictures first since I know that’s what you’re really interested in. :-)

First off, the back of our house:
Where the porch was

This was what we discovered when we took off the sun porch. Apparently the house used to be yellow. I already touched up the paint around the front door, so this was just a continuation of that. It was a three step process – first, pressure washing the siding. Then we had to sand down all the remnant material from the add-on. My dad guessed it was very old Liquid Nails, or something similar. We used an electric sander to get it all as smooth as possible. Here is the after:

Back sliding glass door

Another angle, before:
New retaining wall

And after:
It looks so much better!

As you can see, the weeds have grown back from the work we had done in June! It looks great right now because my dad and Paul spent a lot of time weed whacking the backyard.

And now for the shed. I’ve been wanting to paint it because the bright yellow is so in-your-face. It also makes the shed look huge and overtaking the yard. Before:
Backyard

And after:
Such a change over the bright yellow!

Newly painted

We rented a pressure washer and Paul took care of the siding and the shed a few days before we wanted to paint.
Paul pressure washes the shed

Fortunately, Sherwin-Williams was having a great 40% off sale this weekend, so I took advantage. We started with a white primer, which was the only negative of the whole process. I didn’t notice until I got home that it was oil based, and in retrospect I wish I had immediately returned to the store and asked for an exchange. We ended up having to run out to Home Depot twice to get paint thinner to clean the brushes and the paint sprayer.

The primer is on!
(Sorry the picture isn’t great – at certain times of the day there’s nothing I can do about the direction of the sun!)

This was my first time using the paint sprayer. It made the job go a whole lot faster, though my arm was sooo sore from holding the heavy, vibrating machine. And yes, I did get a paint suit – I didn’t have any painting clothes that fit me, and I didn’t want to sacrifice another outfit. I loved my suit even if everyone teased me about it looking funny. It kept my arms and legs free of paint!
I did 90% of the painting on the shed

Using the paint sprayer

I did as much as I could without getting on the ladder, and then my dad did the rest. I dislike ladders so I was glad he was willing to do that for me.
Halfway done

Looking at it, I honestly think it needs another layer of green, so perhaps I’ll get to that someday. I also have a light to put up next to the sliding glass door as soon as I get the chance. :-) But overall, I think the shed and back of our house look great!

06/4/11

before & after: the backyard (phase one)

I know y’all have been waiting anxiously for pictures! This is phase one of the backyard. Phase two will be grading the entire thing and putting down seed, to happen this fall sometime. I also want to paint that shed green to match the house, as well as touching up the paint on the back of the house where that room was. Maybe we’ll do that this summer so we’ll be done with everything by the time we lay seed. :-)

Here is a backyard picture when we moved in:
Backyard

We took the porch down last summer.
Backyard

Another angle; I took this picture yesterday. You probably can’t tell, but we also removed part of the chainlink fence.
Before: our backyard

Our backyard looks kinda trashy, doesn’t it? We didn’t really do any mowing or cleaning, in anticipation of the landscapers working on it.

And…. after!
Back of the house

What a change! Here is a picture of the spot where the water always collected, and the previous owners tried to fix it by putting pieces of cement there.
Water collects here

Now we have a catch basin to take the water in a pipe underground and deposited in the dry creekbed at the back of our property. They also removed the fence posts for us.
After: our backyard

I took this picture as they were working, and here you can see the ditches, waiting for pipes. We had underground pipes attached to our two downspouts and to the catch basin, taking water away from our house and hopefully preventing further foundation damage.
Ditches

A closer picture of the retaining wall. They did a nice job, didn’t they?
New retaining wall

Our foundation still needs help – that is the bigger project we’re saving up for – but at least this downspout won’t cause any other damage.
Foundation is still messed up... but the downspouts are taken care of!

Another nice thing is that the random pieces of cement, cinder block, and bricks have been cleared away (and deposited behind our shed), so that really makes the yard look nicer! Also a lot of the weeds were cleared away as they were digging the ditches, which helps too. :-) Here is another set of before/after pictures – taken in the morning and then late afternoon of the same day:
Before: our backyard

By the shed

Can’t wait to see it all with grass! And I’ll have to work on painting that back side, and then we’ll have a lovely little backyard to spend time in. Does anyone know if you have to watch daytime max temperatures for outdoor painting like you do minimum temps?

03/3/11

dining room

I never did take “after” pictures of our dining room. Since we had guests for dinner last night, I cleaned it up and this morning I decided to snap some pictures before it got messy again. :-) It hasn’t changed that much, which is another reason I never bothered with “after” pictures.

First, the “before”:
Dining room

And now for the “after” pictures, taken yesterday while Savannah was eating breakfast:

Dining room

It didn’t change all that much, so here is a list of the things we did:
* We removed the curtains (we still need to patch up the holes from there!). The curtains were dirty, but were actually really thick, so we used them as drop cloths for painting. They were excellent drop cloths!
* Removed the borderprint, and then painted all the walls a light yellow. We also painted the ceiling white.
* Refinished the hardwood floor.
* Last summer we removed the add-on sunporch from the back. That made a tremendous difference in the light! The room (and the whole main level of the house) is SO much brighter.
* Put up vertical blinds for privacy once the sunporch was gone.
* Replaced the side door that headed to the carport. This was a hollow wooden interior door that locked with a variety of little locks that any determined person could pop open. Actually, those locks were a little crooked so in order to lock them we couldn’t shut the door completely. We put in a steel door with a deadbolt.

Here’s a better picture of the side door:
Side door to carport

Other side of the dining room

Vertical blinds

This picture isn’t great, but here’s a closeup of the ugly chandelier, which we hope to replace someday:
Ugly chandelier

As I said, this room hasn’t changed that much since we bought the house.

06/16/10

our den – finished!

Originally posted at twentysixcats.com

The den was a HUGE project in our house. It was on our list to finish when we moved into the house last fall, but it seemed silly to spend the money on that when there were lots more immediate things. My plan for the room was to make an area that was 100% kid safe and child proofed. I hope to see it become the playroom (with the toys contained downstairs!). We don’t really have furniture for it right now, but in the future I envision getting something like a sectional with a hide-a-bed for slumber parties and overnight guests (after we have more kids and the guest room becomes just a bedroom). One thing I love is that it is only a few steps down from the kitchen, so I can keep an eye on the kids while cooking dinner. We still need to get baby gates; hopefully soon.

After trying to make an office area work upstairs, I gave up and decided to move it down to one corner of the den. It’s not exactly kid-proof, so I hope to get some of those playyard baby gates or something to section off the area. I’ve been scouring Craigslist for them, so whenever I find some at a good price I’ll snatch them up. :-)

Here is a picture of one side of the den from when we bought the house:
Family room

The carpet was the first to go – it was damp and smelled horrible. It became a sort of junk room for about 6 months when, in March, my sister came down for a week and helped us paint. It took 4 coats of paint to cover the dark paneling! We put 2 coats of Kilz on it to help with the mustiness and possible mildew in the room. The room definitely had a basement feel to it. We then put on a few coats of the same yellow we used throughout the house.

Painting our den - first coat

We also ripped out the fake fireplace, and hope to put a pantry in there. That’s Paul’s project, and will be nice for storing stuff since we don’t have a pantry in the kitchen. I had originally thought I wouldn’t worry too much about the built-in shelves, but when I pulled out the white paint I thought I’d just go ahead and give them a nice coat. I’m glad I did! I didn’t realize how disgusting those shelves were! I washed them, too (before painting), and they look so much better. I wish I’d gotten a picture of a shelf half painted so you could see how gross they were!

After painting, we waited another few months until we had the money to put in carpet. That became an adventure in of itself! We finally got the carpet in, and so far we have been loving it! We also replaced all the baseboards (in an attempt to remove everything with cat pee).

Pulling up asbestos tiles

Hard at work

We also did a few other smaller things: we replaced all the plugs in the room, because the old ones were brown (to match the paneling). There was an A/C vent and an air return that we got covers for – the return was a different size than I guess they make now, because getting a cover for it was really hard! I ended up having to buy one a few inches too big but it works. Little things like that really help finish a room!

Installed Nov. 1968

I took out the accordion door that went from the den to the laundry room. Once the room was painted, the brown door looked a little weird. Also it made it impossible to put a baby gate in the door way, and the door itself wouldn’t latch. I looked into other types of doors and decided our best bet was to just leave it open, even though now you can see the laundry area.

We replaced the ceiling light and ceiling fan. The old lights were mismatched and outdated, and the fan was too small for the room. So, I picked up something that looked nicer and have been pretty happy. However, I will say, I think it might be worth paying more for a nicer ceiling fan. We bought the cheapest we could find and I definitely notice a difference between this fan and the ones upstairs in our bedrooms (that came with the house). Fans are just so expensive, though!

As you can see we have learned a lot about houses from this room alone! A year ago, we did not know anything about carpet, tiles, sealing cement floors, tree roots, replacing electrical outlets, replacing lights and fans, and baseboards.

And now for some pictures!
Our den/playroom

Our den/playroom

Our den/playroom

As you can see, we’re still figuring out the arrangement but I like all the space to play on the floor. The only other thing I want to do is do something with the curtains. These are kind of ugly, but I’m not really sure what to replace them with. The windows are very close to the top of the room because of this part of the house being partially underground, so I think the normal panel curtains look a little silly. I don’t want curtains that go to the floor because of it being a playroom. Perhaps blinds? I’m still thinking about it. In the meantime, I’m really happy with how this room has turned out! And the living room looks much better now that we moved some of the furniture downstairs.

Next up: finalize room layouts and hang pictures throughout the house!

03/19/10

…and the bathroom is done!

Originally posted at twentysixcats.com

There is a half-bathroom downstairs off the den in our house. When we moved in, it looked like this:

Half bathroom

The picture doesn’t really show the whole extent. That teal color was so BRIGHT. It was way too bold and dark for that room. It took 3 coats of white to cover it up, plus one coat of color! Also, when they painted it teal, they kinda went crazy. They painted over all the hardware (the outlet cover, the towel rod, pipes running to the toilet) and they got it on everything (the faucet, the sink, the medicine cabinet, the floor). (To see what I mean, check out the baseboard in the picture above!)

So, after working hard, we finally finished repainting it and getting it set up to use again! Here are the pictures:

Bathroom

Bathroom

Bathroom

Some of the things we did:
* Paint the walls a light shade of purple (leftover paint from Savannah’s room)
* Paint the ceiling and all the trim white
* Replace the toilet in order to comply with our county’s low-flow laws
* Replace the faucet as the old one was cheap and cracking, and had teal paint all over it
* Put up a new toilet paper holder and towel rod, to match the brushed nickel faucet
* Clean and scrape teal paint off the sink

So the bathroom is finished for now! There are a few things left that need to be done, when we get the money.
* Get a small shelf to hide the cleaning supplies and extra toilet paper.
* Replace the medicine cabinet/mirror. It is ugly and has teal all over it, but it’s still functional so I couldn’t justify getting a new one.
* Get a new light for over the mirror. One that is brushed nickel will match the rest of the hardware the best.
* Put up a curtain – I actually have an old shower curtain which would match this perfectly, but I’ll need to figure out if it’s possible to turn it into a curtain for the window.
* Someday we hope to get all new windows for this house. When we do that, we’ll go with frosted glass.

My sister and I have been working hard all week on this and the den. The den looks fabulous! It’s not completely done, though. We still need to put another coat of white on the baseboards and the trim along the top of the wall. We also need to clean up the room (paint cans, drop cloths, etc.). I am excited to see it come together, though! When we get our tax return, we’ll be able to put the carpet in, and then that room will be done, too! Pictures of the den to come later.

11/12/09

Savannah’s bedroom

Originally posted at twentysixcats.com

We picked the smallest of the three bedrooms to be Savannah’s room. Right now, all we do is change diapers and keep her clothes there. When she’s sleeping through the night, I’ll probably have her sleep there too. My parents have a crib for her at their house in Orlando; as soon as we figure out how to get it up here we’ll put that in the room too. I would love to get a rocking chair or glider, but it works as it is right now.

This is the only “before” picture I have of Savannah’s room. It basically shows you the old paint color. Painting the room is pretty much the only thing we did.
Smallest bedroom

What her bedroom looks like now:
Savannah's room

I picked out a pale purple color. I love the result! You can’t really see the color all the well in the picture, because I took it as the light outside was fading.

The changing area and dresser

We got the dresser at a local secondhand store and I’m really happy with it. It holds her blankets, clothes, shoes, socks, bibs, etc. You can see all her cloth diapers on top of the dresser – aren’t they so pretty? :-) To the left is her hamper, and to the right is where we put the dirty diapers. Oh, and we needed a surface to put the lamp so we stuck it on one of our stools. We don’t have a breakfast bar anymore, so we really don’t need stools. However, they work great as small tables for lamps!

I hung all her clothes that weren’t onesies. Aren’t they cute?
All the pink clothes in Savannah's closet!

On the other side of the room from the dresser is a pack & play and a camping chair. They are leftover from when we were working on the house. This room was the first one that we finished, so I used to sit here and nurse her, and put her to sleep in the pack & play. I don’t really spend any time here anymore, but perhaps when I get a rocking chair or glider I’ll find myself in here more!

Beth gave me an awesome baby gift:
Gift for Savannah

Didn’t she do such a great job? I love it! I can’t wait to hang it. The paneling is SO hard to nail into. (All the bedrooms have paneling – the guest room was the only one that wasn’t already painted when we moved in.) So, once I decide where to put it, I better be VERY sure. :-) I haven’t gotten around to hanging pictures yet. Someday, someday…

Those are all the pictures I’ve taken so far. Our bedroom needs a bit more organizing, and I’ll hopefully get to that sometime soon. Then there’s the bathroom, the dining room, and the den… The den will probably not be done until next spring or summer, so you’ll have to be patient for that. It doesn’t look any different than when we moved in except that it doesn’t have carpet and it’s filled with boxes. :-)