08/20/16

One year ago today…

The renovations started on our house! Some pictures of Demo Day from last year, which is always the most exciting part of the process. :-)

The dumpster arrives!

The dumpster arrives! We had this dumpster in our driveway for 3 months last fall. It was completely full by the time they were done!

Upper cabinets down

Starting to take down the cabinets.

Multiple layers of wallpaper and ceiling tiles

Showing the multiple layers of wallpaper and ceiling tiles our kitchen had.

Walls coming down!

Caroline shows off the kitchen at midday – the walls are down and the cabinets are gone, but the studs are still there. They called in an electrician at this point to take care of all the wires.

Everything gone but the stove

The wall of the kitchen with the stove, after the cabinets and backsplash are gone. It looks so ugly once everything is gone!

Where the sink used to be

The floor where the sink was. When I saw this, I was really worried about water damage on the floor underneath, bit thankfully once they removed that layer the subfloor underneath was fine. Phew!

Where the fridge used to be!

Where the fridge used to be! It was crazy to me to be able to see all the way to the bay window from the kitchen window. I remember how much brighter the downstairs felt once the walls were down.

Walls coming down...

They thought one of the walls was load bearing and would need a beam and a column, so they put up temporary walls on either side before they took down the studs. We had these temp walls here for a few weeks before a structural engineer inspected and said the wall was not actually load bearing, and we were fine. That was very happy news!

Getting ready to fix the foundation

After demolition, the first task was to fix the foundation. They had to remove the stoop outside the back door to get access to our crawlspace.

The kitchen is opened up!

The walls in the kitchen are completely down! (You can see the temporary walls on the right) Hooray for an exciting day!

I am hoping to chronicle the whole renovation process, but not sure how fast those posts will come. :-) Just as a heads up! You can jump ahead to the official before and after pictures here.

01/18/16

Our kitchen’s major transformation

I was going to wait until the end of my posts to share pictures of my favorite part of the renovation, but I finally took after pictures today and am so excited to post them that I decided not to wait. :-) I have a bunch of in-progress pictures that I’ll share at a later date – I’m still sorting through them and trying to decide how much to post.

First, I will share pictures of our main level when we bought our house 6.5 years ago.

DSC_1136 DSC_1153 DSC_1157 DSC_1159

As you can see, it needed a bit of work. We did a bunch of painting when we first moved in, and then basically didn’t touch it for the next 6 years. I found it a very frustrating kitchen to work in – there was very little prep space, the cabinets were inefficient, and the portable dishwasher – while better than nothing! – was very annoying after a while. I did love the butcher block look of the laminate counter, but it was starting to come up in places and was not looking so great anymore.

10405340_837502128653_5479027832417978633_n 10990012_837502143623_5830833177615132226_n

So basically, we gutted the whole kitchen. And the result is fabulous! I’m just going to inundate you with pictures now.

Kitchen Renovation: After!

Kitchen Renovation: After!

Kitchen Renovation: After!

Kitchen Renovation: After!

Kitchen Renovation: After!

Kitchen Renovation: After!

Kitchen Renovation: After!

Kitchen Renovation: After!

Kitchen Renovation: After!

As I said, the kitchen was gutted and basically everything is new. But, here is a list:
– removed 2 walls to open up the kitchen to the rest of the house
– replaced laminate peel & stick tile with porcelain tile on the floor
– window replaced with double-pane window
– sliding glass door replaced with French doors
– single light in the center of the kitchen replaced with 4 canned lights, 2 pendants over the island, and under cabinet lighting
– electrical updated (in the kitchen only) and proper GFI outlets installed
– HVAC vent moved to a toe-kick under the window
– appliances rearranged: fridge went where the stove was, stove moved to where the dishwasher was, and sink moved to the island and built-in dishwasher moved next to sink
– all new cabinets: white upper and espresso lower
– island installed in the area where the walls and fridge had been
– granite counters installed
– kitchen, dining room, living room, and foyer painted
– white glass subway tile installed as a backsplash
– new stainless steel appliances: refrigerator, gas stove, microwave, and dishwasher
– new sink and faucet
– hardwood floors refinished (sanded and sealed)

Whew! And that’s not even an exhaustive list of all the work that was done, period. I would like to go into more detail about the process and what I’ve learned about everything (ha!), but for now I will say I am so, so happy with how it turned out. I have really been enjoying cooking dinner every night, which is good because after eating out for 3.5 months straight I am ready for homecooked meals again! ;-)

01/6/16

A House Story

About 6.5 years ago, we bought our first home – a fixer-upper at a great price. We approached the challenge with stars in our eyes and an adventurous spirit. We quickly learned two things: 1) even when you DIY, repairs can be expensive, and 2) we aren’t DIY people. The latter was an unfortunate lesson, and we now know for any future house purchases not to bite off more than we can chew.

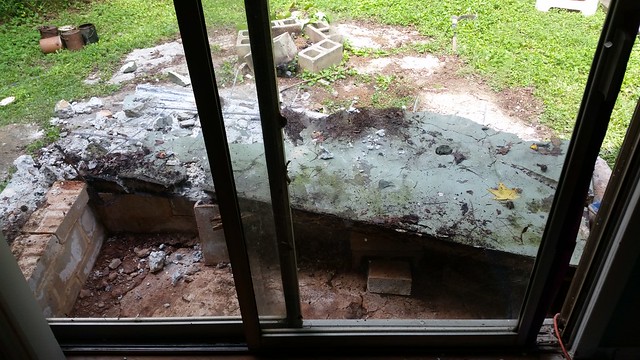
Our optimism started wavering when we got the quotes for our foundation a year after purchase, and realized just how expensive fixer-uppers can be. Three years ago, we poured out a bunch of money we didn’t have to get rid of a rat infestation, and at the same time were notified that they had redrawn the lines and our house was now in a flood plain. We were now required to purchase flood insurance, raising our mortgage about $100 a month. And to just rub salt in the wound, we came home one day to find our house broken into and trashed.

I hated this house. We bought low, but prices had sunk even lower, and because of the foundation problem we couldn’t even sell it. We tried to walk away – just foreclose, take the loss on our credit, and rent for a while. The mortgage company (Bank of America) refused to give us the time of day – we spent hours on the phone over a period of several days, trying to figure out our options. (We were attempting a deed-in-lieu or a short sale.) We were so discouraged and unsure about what to do.

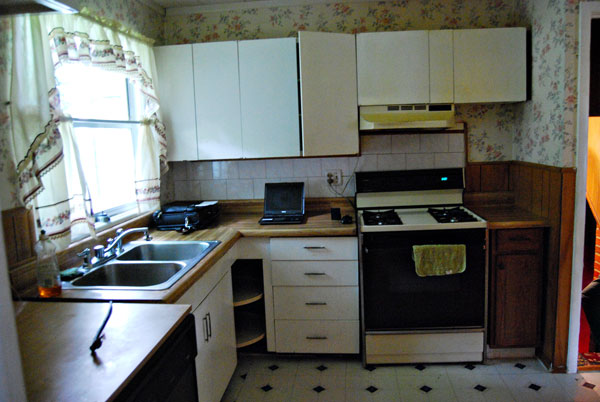
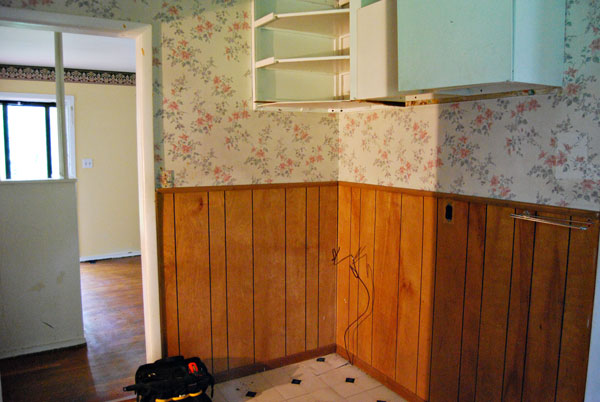
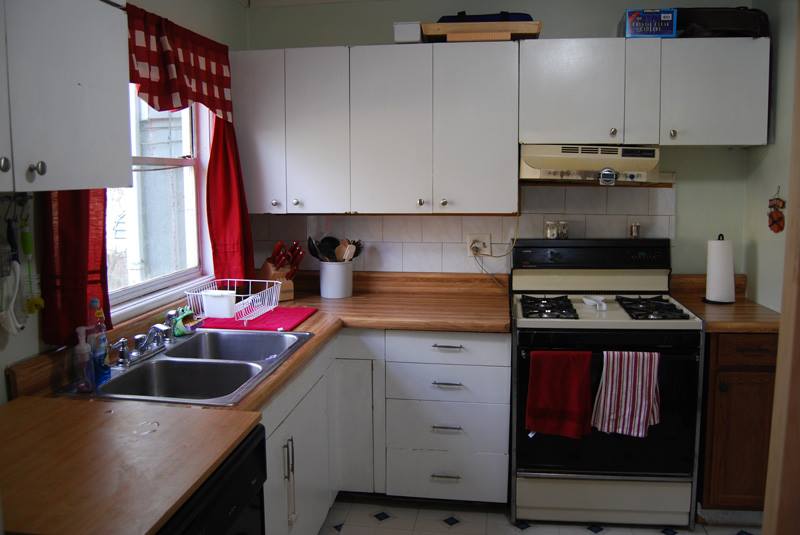
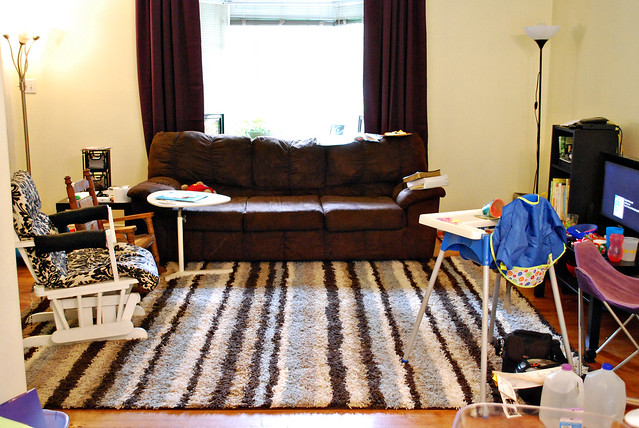
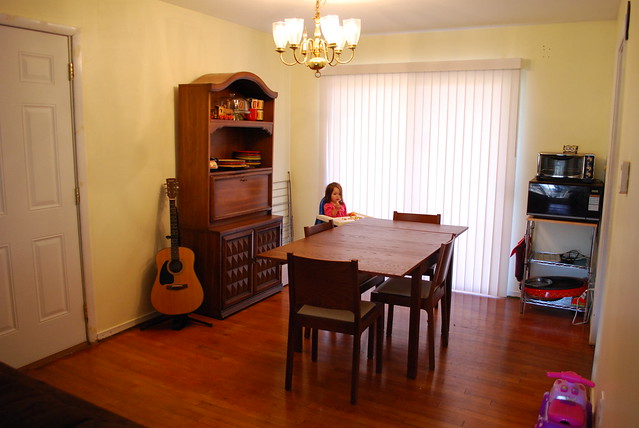
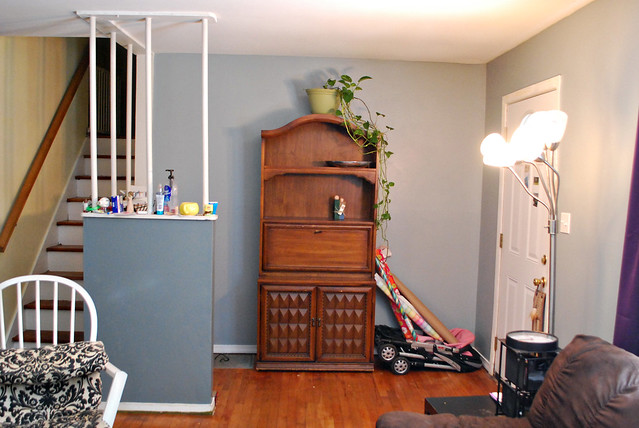
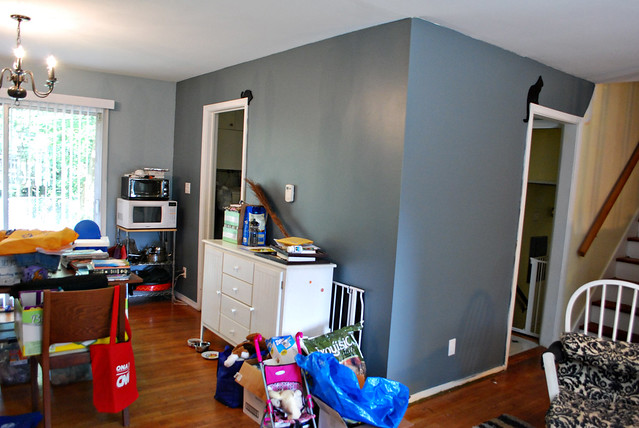
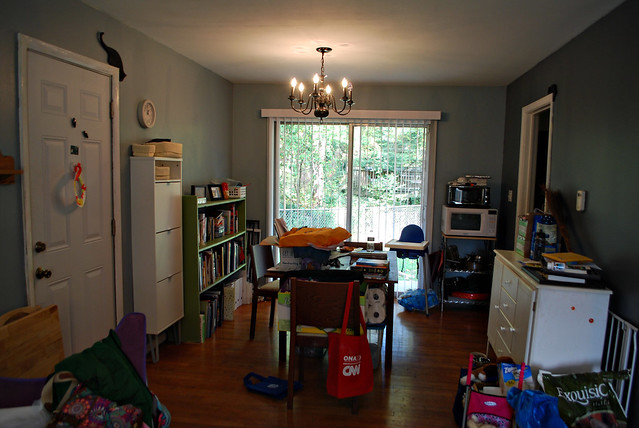
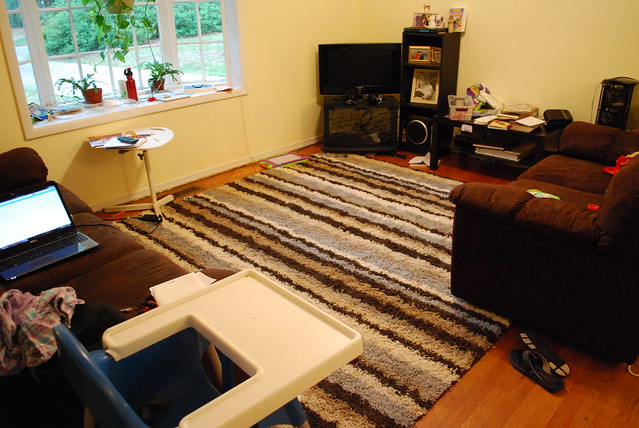
We ended up staying. Honestly, those were dark days and I don’t care to revisit them long enough to figure out what our reasons were at the time. We stayed in this house with all its problems, and honestly I felt miserable here. I stopped inviting anyone over. I struggled to find the motivation to clean it, and I dreaded cooking in our small kitchen that was so closed off.

I stopped writing in the blog because we stopped making improvements. We no longer put money into anything except repairing broken things. We treated it like a rental house.

But, time was on our side. We bought right after the housing bubble burst, so we just needed to ride it out until the market improved. And, finally, it improved. I kept a close eye on home sales in our neighborhood and when prices were high enough that we could break even, we decided to sell. We contacted a few real estate agents, namely trying to figure out what our options were as far as selling without fixing the foundation. We actually had an investor make an offer, but the sale ended up falling through.

Around this time, we started looking at rental houses since we were frankly over home ownership and we were unlikely to make enough profit on the sale to afford a down payment. After visiting a few, I quickly realized that we were looking at renting a house that was smaller than the one we owned, with a rent significantly higher than our mortgage. And with 3 kids and homeschooling, space was a big consideration. We began to wonder if selling was the best idea after all.

Several years ago, a friend of mine (Kacie) had told me about an FHA renovation loan called a 203(k) loan. I’m going to go into more detail about it in a future blog post, but it was our best chance at getting the funds to fix the foundation. We began to talk – what would it take to make this house worth staying in for the forseeable future? I gave Paul my list:
– foundation repaired
– new double-paned windows
– roof replaced
– new HVAC unit
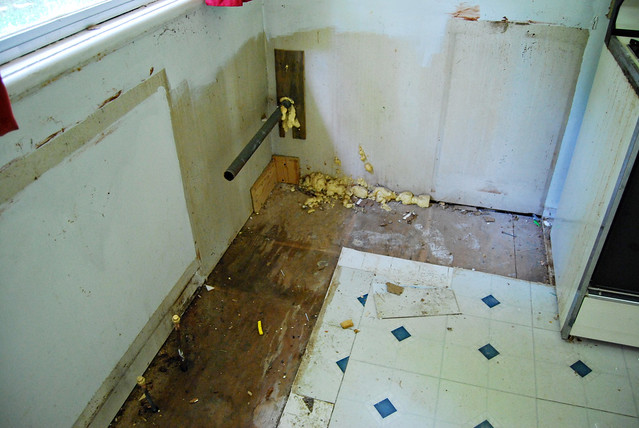
– replace all the pipes
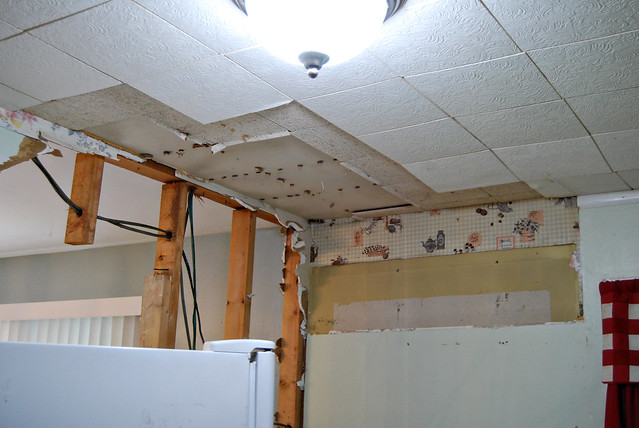
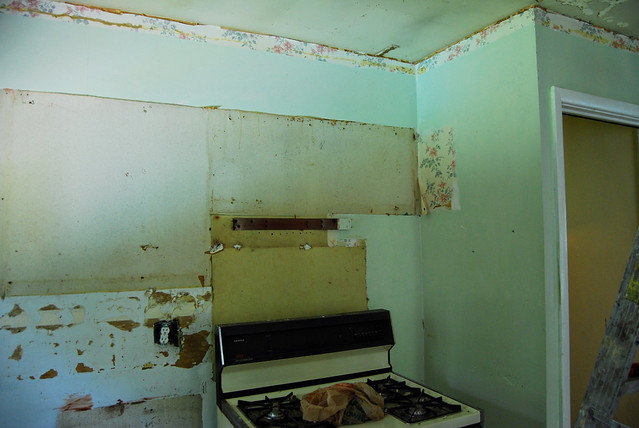
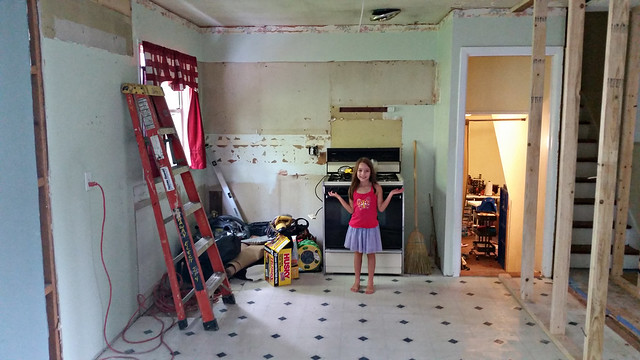
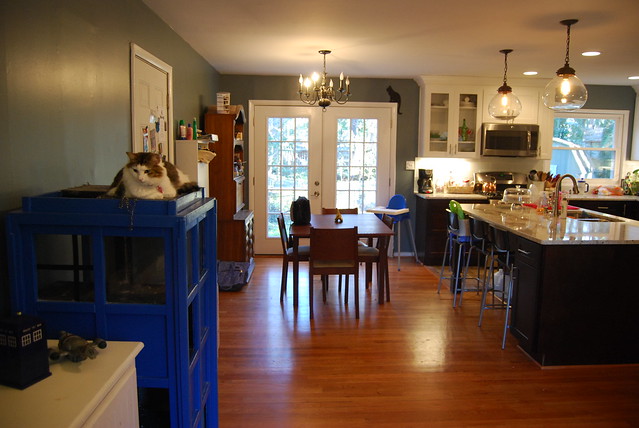
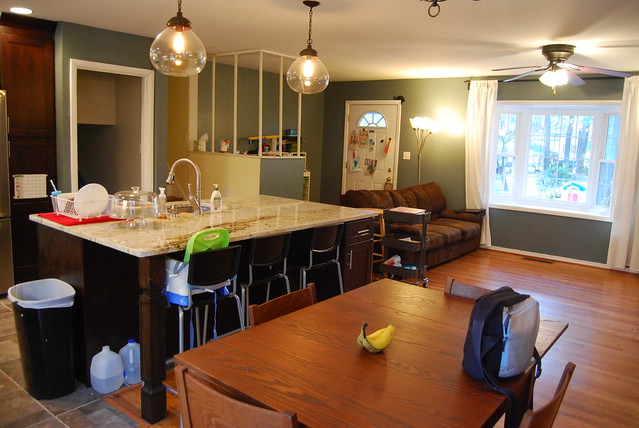
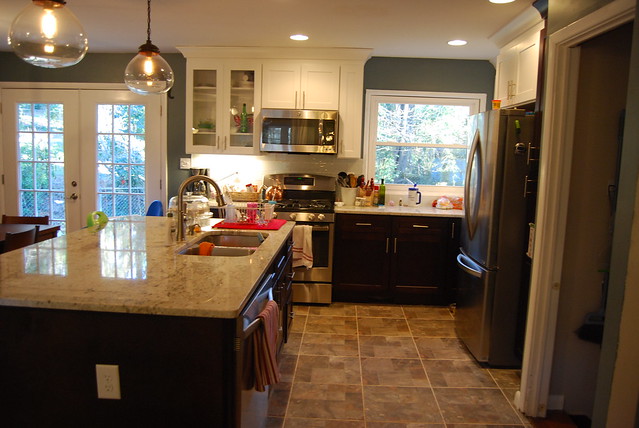
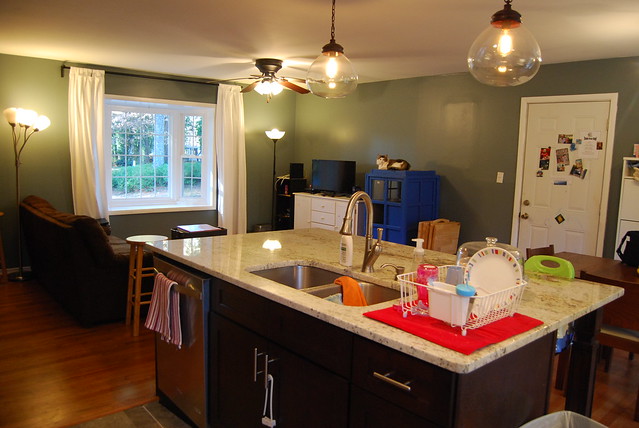
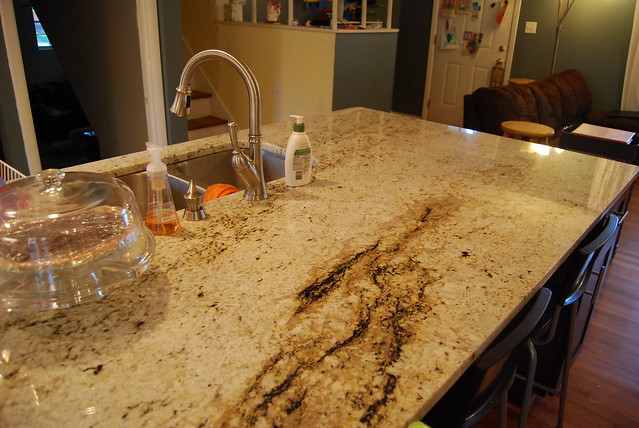
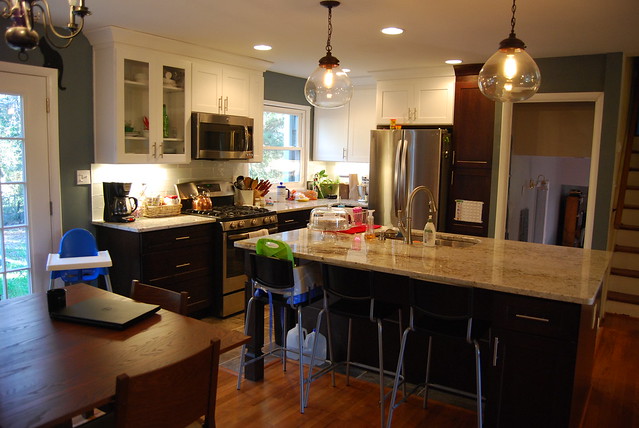
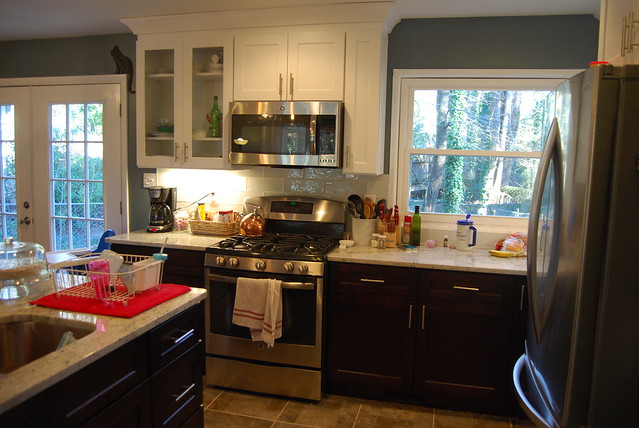
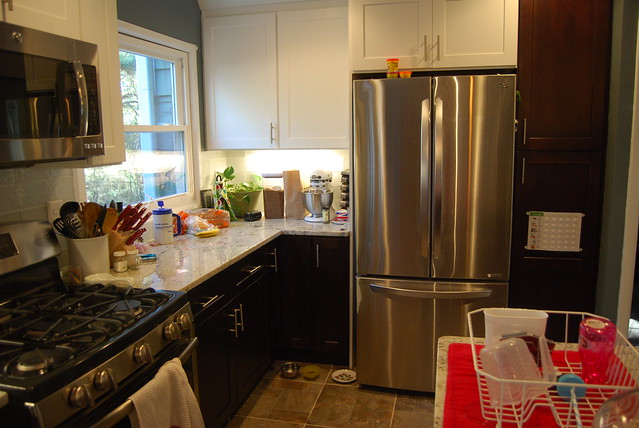
– major kitchen overhaul

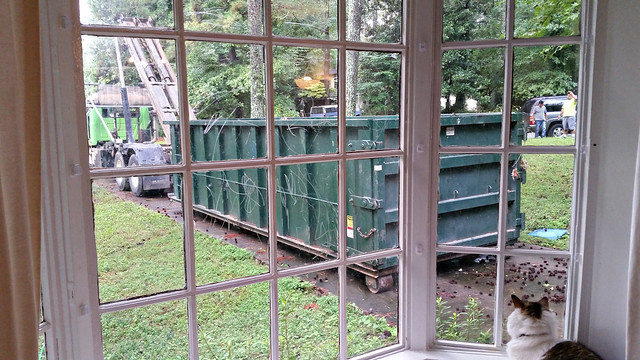
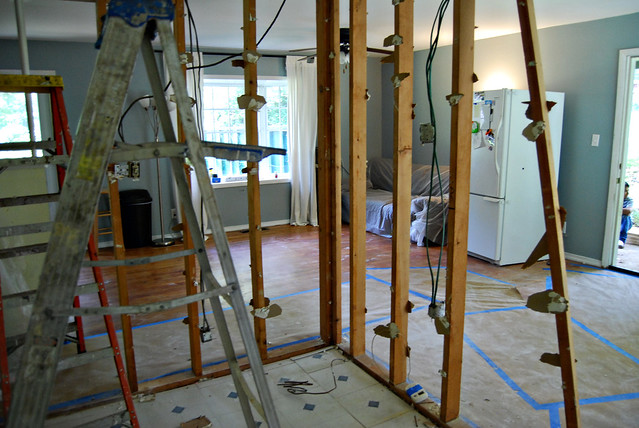
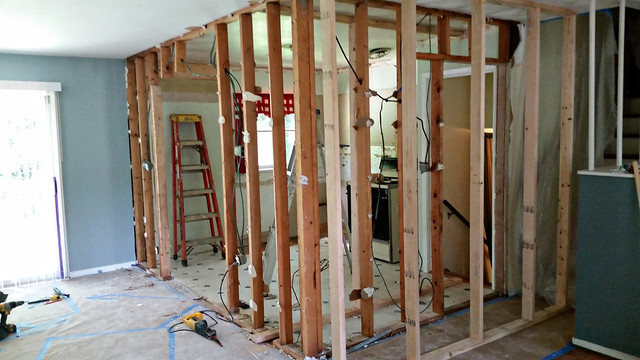
The next part of the story involves a lot of paperwork, phone calls, bids, and appraisals, but in the end we were able to secure the funds to do all of those things.

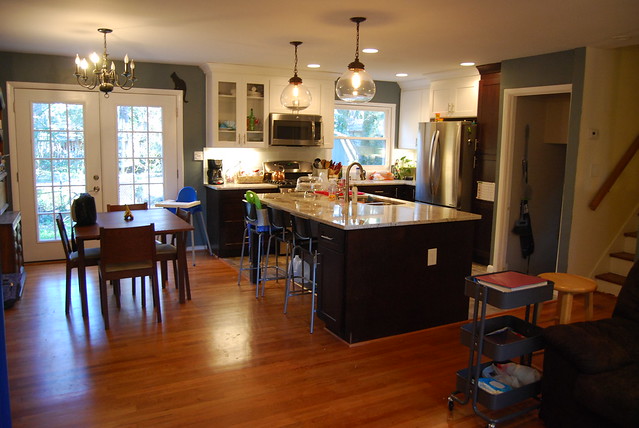
We started renovations in August 2015 and they finally finished in early December. The conditions of the loan required us to hire a general contractor, so no chance of DIY, but we cannot be more happy with the finished product. It feels like a different house.

It’s been a long time coming. I’m so grateful that we were able to do this. There’s been a major improvement in our quality of life living here, and I’m finally inspired and excited to really put those small touches that make a house a home.

I chronicled the renovation process with many pictures, so I’ll be collecting those and getting descriptions typed up in the next few weeks. I still need to take official “after” pictures (I was waiting for the Christmas decorations to come down), but I’m really excited for the big reveal! So, stay tuned!

10/27/13

unveiling… a new look for the living area!

I will do an official before and after later when I clean up and finish the decor, but I wanted to share initial pictures to show off our new paint color.

When we bought our house, we painted every wall and ceiling. The living/dining room was the last room to be done, and at the same time Atlanta had the “500 year flood” where it poured heavily for 8 days straight. We couldn’t get the paint to dry (if only we’d had a dehumidifier then!), and we ended up moving in without being able to finish painting. We predictably never put on the final coat. For four years the splotchy and unfinished paint job has annoyed me. Finally this weekend with the help of my parents we rectified that!

It took me a while to decide on a color. I am very happy with the blue we chose. On the exterior walls, we did a lighter shade that was Behr Flint Smoke. On the interior walls, we did an accent color of Behr Nature Retreat. (You can see the whole paint family here.)

Here are before pictures:
Living Room

Living Room

Dining room

New hooks in the foyer

And the after pictures! It’s definitely a lot darker, but I was wanting to go darker than the yellow with more of a contrast between the walls and the white trim. We have more to do – there is some of the trim left to be painted, and I still have a ways to go until all our “stuff” is cleaned up, and I hope to hang pictures.

Living room

Living room

We switched the green bookcase in the foyer with this secretary that was in the dining room.

Foyer

Foyer

Our dining room is a mess right now, so please pardon all the clutter. I am working on cleaning and purging, but we’re still far from being done. The green bookcase is only here temporarily… I haven’t decided yet what I want to do with the space. Also, you’ll see the white shoe rack… I realize I never blogged about that. Will have to do that. ;-)

Dining room

Dining room

One of the really awesome things we did was paint all the baseboards. I will have to find a “before” picture to show how awful they looked, and the fresh coat of paint really did a lot to finish things off. Also, another thing my dad did was to replace all the old off-white outlets with white ones, as well as the old light switches with new white switches. It looks sooo much better!

Painted baseboards

We still have a ways to go before I feel “done”, but having a new coat of paint really does make a difference.

10/21/13

outside updates

The weather has been beautiful the past two months or so, and we have been taking advantage by being outside more. I don’t really enjoy being outside when it’s not pleasant, and that probably shows in the overall cleanup of our house during the summer and winter months. So, it’s good for me to spend the time and energy to make up for it.

One of the things I spent a long time on was in cleaning up the bushes by the road. I talked a little bit about the azaleas here, and left with this picture:

Cut back azalea bushes

It’s not very obvious in the picture, but there are a lot of non-azalea bushes in that island that have somewhat taken over now that the azaleas have been cut back. So I spent a few hours outside one afternoon/evening with our pruning shears and lopped off as much as I could. I had to be really careful because there are vines with thorns starting to grow. I cut them back whenever I encountered them, but then I had to be careful because I wasn’t wearing gloves. Here is the after:
Azaleas, after trimming back
(Apologies for not taking these pictures in the best of light – I just know I need to take them when I think of it and not wait.)

I cut a lot back from the other pine island, but you can’t really tell. The thorny vines were worse on that side, so it was tedious, but I think it’s a good start.

Another thing I started doing was quickly pulling out the hose and spraying down the front of our house where the spider webs are going crazy (around our front door). It has really helped and doesn’t take too long. However, our house was at an awkward place just sprawling around the front stoop, so I decided to get one of those hose hiders from Home Depot. Because of the azaleas, I couldn’t put it on the ground, but I think it actually looks nice to have something on the front stoop.

Fall flavor

Fall flavor

We didn’t paint the front door – it was just open. I try to leave the door open whenever the weather is nice, to help air out the house. I just wish we had screens elsewhere in the house so I could get some cross-ventilation going! (One of our cats makes a beeline for open doors and windows.)

I stuck the little pumpkin there for now, but we hope to get a big pumpkin soon. I think it looks very nice!

10/19/13

trying to pick a new wall color

When we moved to this house, I chose a light yellow paint for the entire house (except the kitchen and bedrooms). We had to paint – the house reeked of curry – but I wasn’t at a point where I could think about the best color for each individual room. I wanted something mostly neutral that I could live with for a while, and planned to repaint later down the road when I had more of an idea of where I was headed with the room design. I’m pleased with the color we chose, but now I’m ready for a change.

I want to focus on the living room first, since that’s where we spend most of our time. We have done some work to it, but we have yet to add any pictures or other decor. My plan is to start with the wall color and work from there. Here is where our living room stands right now:
Living Room

Basically, we have browns going on here. I’m a little tired of the really light walls so I am hoping to go a bit darker, but still neutral. I went to the store and got samples of three browns, trying to match the rug. Here they are:

DSC_1750

It was really difficult to get an accurate picture of the colors, especially trying to compare them to the space and the other items in the room. I also painted larger strips on the wall across from the couch.

DSC_1747

I’ve been staring at them the past week and have decided I don’t like any of them, so I’m back at square one. I actually am not good at picking out paint colors (surprising since I have a degree in graphic design). Painting that wall has helped in that it’s made me realize I have to take into account some other colors, like our wood floors and our dining room table and secretary. Also, I don’t want to be too tied to the rug because while I like it okay, it has gotten damaged in a few areas and I’m not sure if it’s a long term item in our room.

The curtains in the picture above are not staying. I put them up because I had them already, but have since learned that my cats like to climb/sharpen their claws on them. So the curtains will stay until I figure out a solution that will work for everyone.

I am wondering if blue paint would be nice? I know you’re not supposed to do blue for dining rooms, but I could see it working in the living room.

I think I’ll run to Home Depot and see if I can find a new color. I’m hoping to paint this week!

09/25/13

Cutting down the azaleas!

At the end of our driveway, we have several clumps of bushes that were at one point intentionally landscaped by a previous owner. We know nothing about plants, so we have mostly let them go, occasionally pruning them in a completely uneducated way. One of the clumps of bushes are azaleas, which are some of my favorite flowers. Here they are in full bloom:

Azaleas

Azaleas

The pretty flowers were keeping me from cutting them back, but they were really too high and tall. Cars could park on the street on the other side of the bush, and would be completely obstructed from view from the house. It also made backing out the driveway a little dangerous. I couldn’t really find a “before” picture, but hopefully you can get the idea from this picture:

Loves her balloon!

My sister was visiting, and while she was here did a lot of work to cut back the azaleas – she couldn’t find the original bushes. It seemed to her that a layer of mulch/dirt/pine straw was placed over the original bush, or something like that. She didn’t have enough time to finish, but she did get it cut down and thinned out a lot. I took this picture today.

Cut back azalea bushes

We still need to do more, especially with removing all the non-azalea plants. But for now, this is good. As far as the parts that my sister cut off – she transplanted them to the front flower bed under our bay window. We weren’t sure if they would take, but this past spring they bloomed! And I noticed today that there are new leaves, which should hopefully fill out the whole area. I’m excited for how it looks!

Front flower beds

So as a reminder, here is what it looked like when we moved in:
DSC_1123

And here is what it looks like now:
Front porch

09/23/13

Dehumidifier: why didn’t we get one earlier?!

dehumidifier2

When we moved into our house 4 years ago, the inspector told us that because of the way it was constructed and vented, we should always expect to have high humidity levels in our hours. No worries, we thought. That was something that doesn’t bother us as much. However, this summer it was  getting almost unbearable. It rained sooo much this summer – we’re on track for having one of the wettest years on record. Needless to say, we were feeling the effects of that in the humidity level in our house.

So, I started researching dehumidifiers. I tried to get one off Craigslist but was unsuccessful. There just weren’t many listed, and the ones I did contact never got back to me. I price-shopped online and went to several discount appliance stores only to find they weren’t in stock, and finally just ended up getting it at Home Depot. I went with a 50-pint size, which seemed to be the best size for our room. (I found this article really helpful for figuring out what size was best.) We got it in the evening and set it up in the den. When we woke up the next morning (about 11 hours later), the unit had automatically shut off because the tray was full of water. It ran all day and shut off about 12 hours later. Wow! We have run it continuously for about a month now, and have noticed a huge difference in our house. The average humidity level according to a thermometer/humidity gauge we have in our dining room, used to be around 60-70%, and perhaps higher if it was raining. Now, our levels are closer to 40%! We still empty it every 18 hours or so, but it hasn’t been too bad.

dehumidifier

The den especially feels more comfortable. That room has so much potential but looking back I’ve realized that the humidity in the room was really affecting how much time I wanted to spend there.

We one we purchased was a GE 50 Pint Capacity dehumidifier. They got good reviews from my online research, and it was the capacity we needed. (And I’m glad we didn’t go any smaller in capacity!) So far, we haven’t had any complaints. It does a great job, beeps and automatically shuts off when the tray is full, and is easy to empty. The only downside is it’s a little noisy. I can hear it humming even from upstairs. I’ve mostly gotten used to it, but sometimes when we’re in the den playing, I turn it off just to reduce some of the noise. We also think it does increase the temperature of the room slightly – we’ve noticed that we’ve been turning on a fan more frequently than we did before, but it doesn’t make the room hot or anything.

This has been a real help and I wish we’d gotten one long ago!

09/20/13

Changes in the living room

I haven’t taken updated pictures of our house in a while, so I hope to do that in the near future! In the meantime, I wanted to talk about some changes to our living room. Last time I talked about it here was when we got our new rug, and the living room looked like this:

New rug

It’s a little hard to see since the picture is focusing on the rug, but we had a couch on the left perpendicular to the window, and a loveseat on the right parallel to the window. It closed in the living room into a nice little room, but I also felt it made the whole main level feel a bit tight, especially when the couches would get pushed back.

My parents were visiting at the time, and we brainstormed lots of room setups to make it more open. We were tied to keeping the tv along that wall because of the outlets. We finally decided to move our loveseat down to the den/family room, bring up the glider, and move the couch in front of the window. Here are the finished results:

Living Room

Living Room

I didn’t think to put the couch in front of the window until I saw my neighbor’s living room setup (they have the same floorplan as us). There is an HVAC vent there, but it’s actually been okay with keeping the couch pulled out from the wall a little. It also allowed us to use the bay window for decor where little hands could not reach. (Then we got two cats, and they kept knocking over the picture frames so we had to clear it again!)

We also put our TV on top of the coffee table, which has worked out pretty well. I am glad to have the glider back in a spot where I’m able to use it more, but I do need to recover it. We had the small child rocking chair there for a while, until the cats started to use it as a scratching post, so we rehomed it to our storage area until we figure out how to solve that problem. We keep a basket of toys in the corner which has made cleaning up really fast.

You probably also notice the window treatments… We hung a rod above the bay window, and some room darkening curtains that I had bought for the baby’s room but didn’t end up using (and waited too long to return them). They are much too dark, but I wanted to see how I liked the layout before shelling out money for curtains. I do like it, though I think this would be a good place for a rod where you can open/close the drapes with rope (not sure what it’s called). I don’t plan to replace them just yet – my cats, again, seem to think they are a great thing to climb so I don’t want to worry about them ruining ones I care about.

Overall, I like the changes and I think it accomplishes what I set out to achieve. The room’s not perfect by any means, but it’s getting a little closer!

09/18/13

Master Bathroom – before

I was looking for some files on my computer, and I stumbled on all the pictures I took of the house during the inspection. Apparently I had placed them in a separate folder than the rest of my pictures, so I only had the few I’d uploaded to Flickr. I found several “before” shots of the bathroom before we took down the doors. This more than anything gives a clear picture of how disgusting this house was when we bought it.

DSC_1173

The bathroom at first glance – the doors were one of the very first things we did when we started our renovations.

DSC_1176

Our beautiful wall of mirrors. Also notice the very rusty vent cover on the floor – we replaced that fairly quickly as well.

DSC_1175

The tub was absolutely disgusting. We had three different people wear their arms out scrubbing it, once the doors were removed. (Here’s what it looked like after.)

Most of the changes we made to the bathroom have been very minor, but we have grand plans for the future. You can see the current pictures of the bathroom here and I am working on updating all the before and after pages for each room.